
Category Archives: VR
Importing 3D models into Oculus Home from Sketchfab
A couple of weeks ago, I posted a video about importing items from Sketchfab, a site that hosts 3D models people have created, into Oculus Home. I meant to put up a companion post to that video, but as sometimes happens I was busy, and so the post didn’t go up as quickly as I’d hoped. Luckily, I recently had a five-hour flight from the east coast with many delays due to weather, and was able to start writing it up, and now that I’m back home there’s some time (but not much) to power through and finish. If you just want to see the video, it’s at the end of this post and linked earlier in this paragraph.
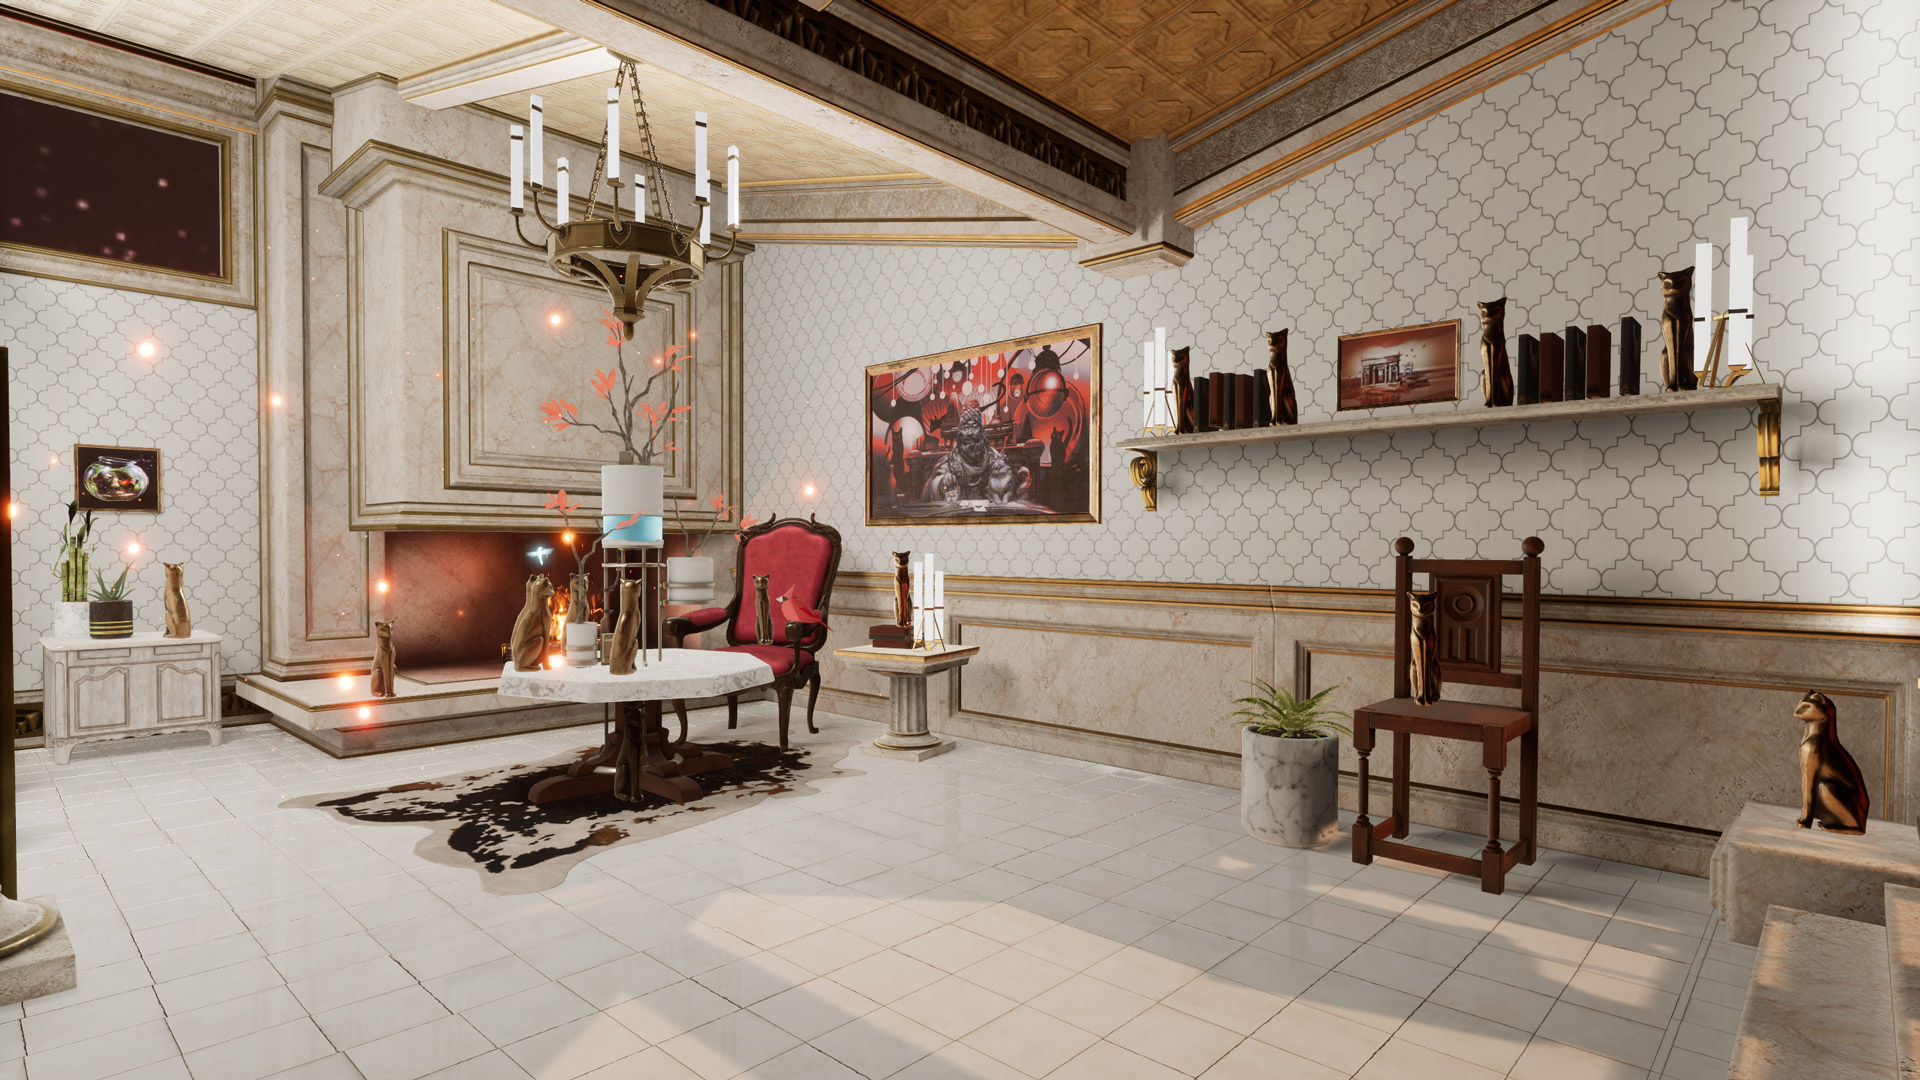
For those not familiar, Oculus Home is a personal space, sort of like an apartment, that appears when you first boot up the Oculus Rift headset. For a long while, Oculus has provided a wide range of additional items you could use to decorate your space, everything from furniture to suits of armor to completely new environments such as a gothamesque city or outer space. Even with all of that, one of the main requests users had over at the Rift Suggestion Portal was to be able to create their own objects and import them into their virtual living space. Here’s a crappy picture of an earlier version of my Home, taken off YouTube from this article’s companion video.
Oculus Home
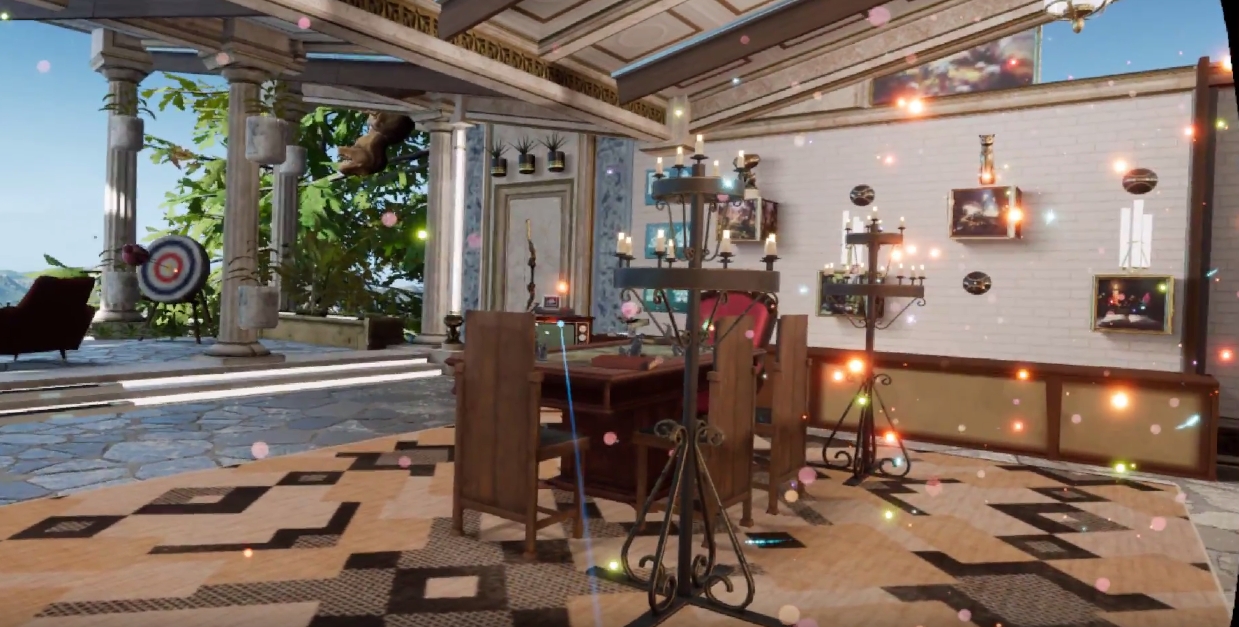
(Side note: In the video I discuss the texture loading issues and choppy performance, however a Dash update released a week later fixed it all. No more issues!)
About a month ago, Oculus delivered. You can now import items created in some of the virtual modeling programs available on the platform such as Medium, as well as from website Sketchfab, and it is the latter that really opens up the possibilities. Because people can upload models created using any tool, there is a wide variety available, although be warned that as is the case with anything else, when the public can upload their own creations there are some that are of the NSFW variety. Also, some models must be bought, but there are many free ones as well.
Another nice thing about Sketchfab is that you can manipulate the objects in your browser before downloading, so you can get a very good idea how they will look in your 3D environments. It also holds developers to a standard to not cut corners on, say, the backs of things (which modelers will sometimes do if they know the object will be placed against a wall, for example – in fact, games simply don’t render what can’t be seen at both the object and world level!) and develop the whole thing completely. As with anything, quality varies, although I was, for the most part, very pleased with what the site offered. Also be aware that not all models are available for download, such as the notable ‘Old Truck and Gas Pumps‘ and ‘The Pumpkin House‘ seen in the screenshot below, but most smaller, decoration-style models are.

Some Sketchfab models
Importing models is not an overly complicated process, however there is an issue with scaling. Many objects you will import will be far too big to fit in the space, and will need to be scaled down. Because Oculus does not allow for scaling within Home itself, a third party tool is needed to do the scaling and there’s no way to determine whether the object is properly scaled other than to import it and test it in the space. If it’s too big or too small, you’ll have to go through the process again. My hope is that Oculus will soon allow for scaling within the Home environment itself. Until then, we have to do it the hard way.
So, we will first find the object we wish to import, scale it, then import it.
In the video, I imported what looks like a file cabinet that would be found in post-apocalyptia (remember Three-Dog?) or a building from the zombie apocalypse. It adds a nice yet subtle, creepy flair.
I found the model by doing a search for free downloads, but you can find the specific one in the video by searching for “Rusty Metal Cabinet” or simply click here. I should mention that if you decide to do the search and see what else is available, ‘Cabinet’ is misspelled for this particular model on Sketchfab, but you’ll find it anyway.
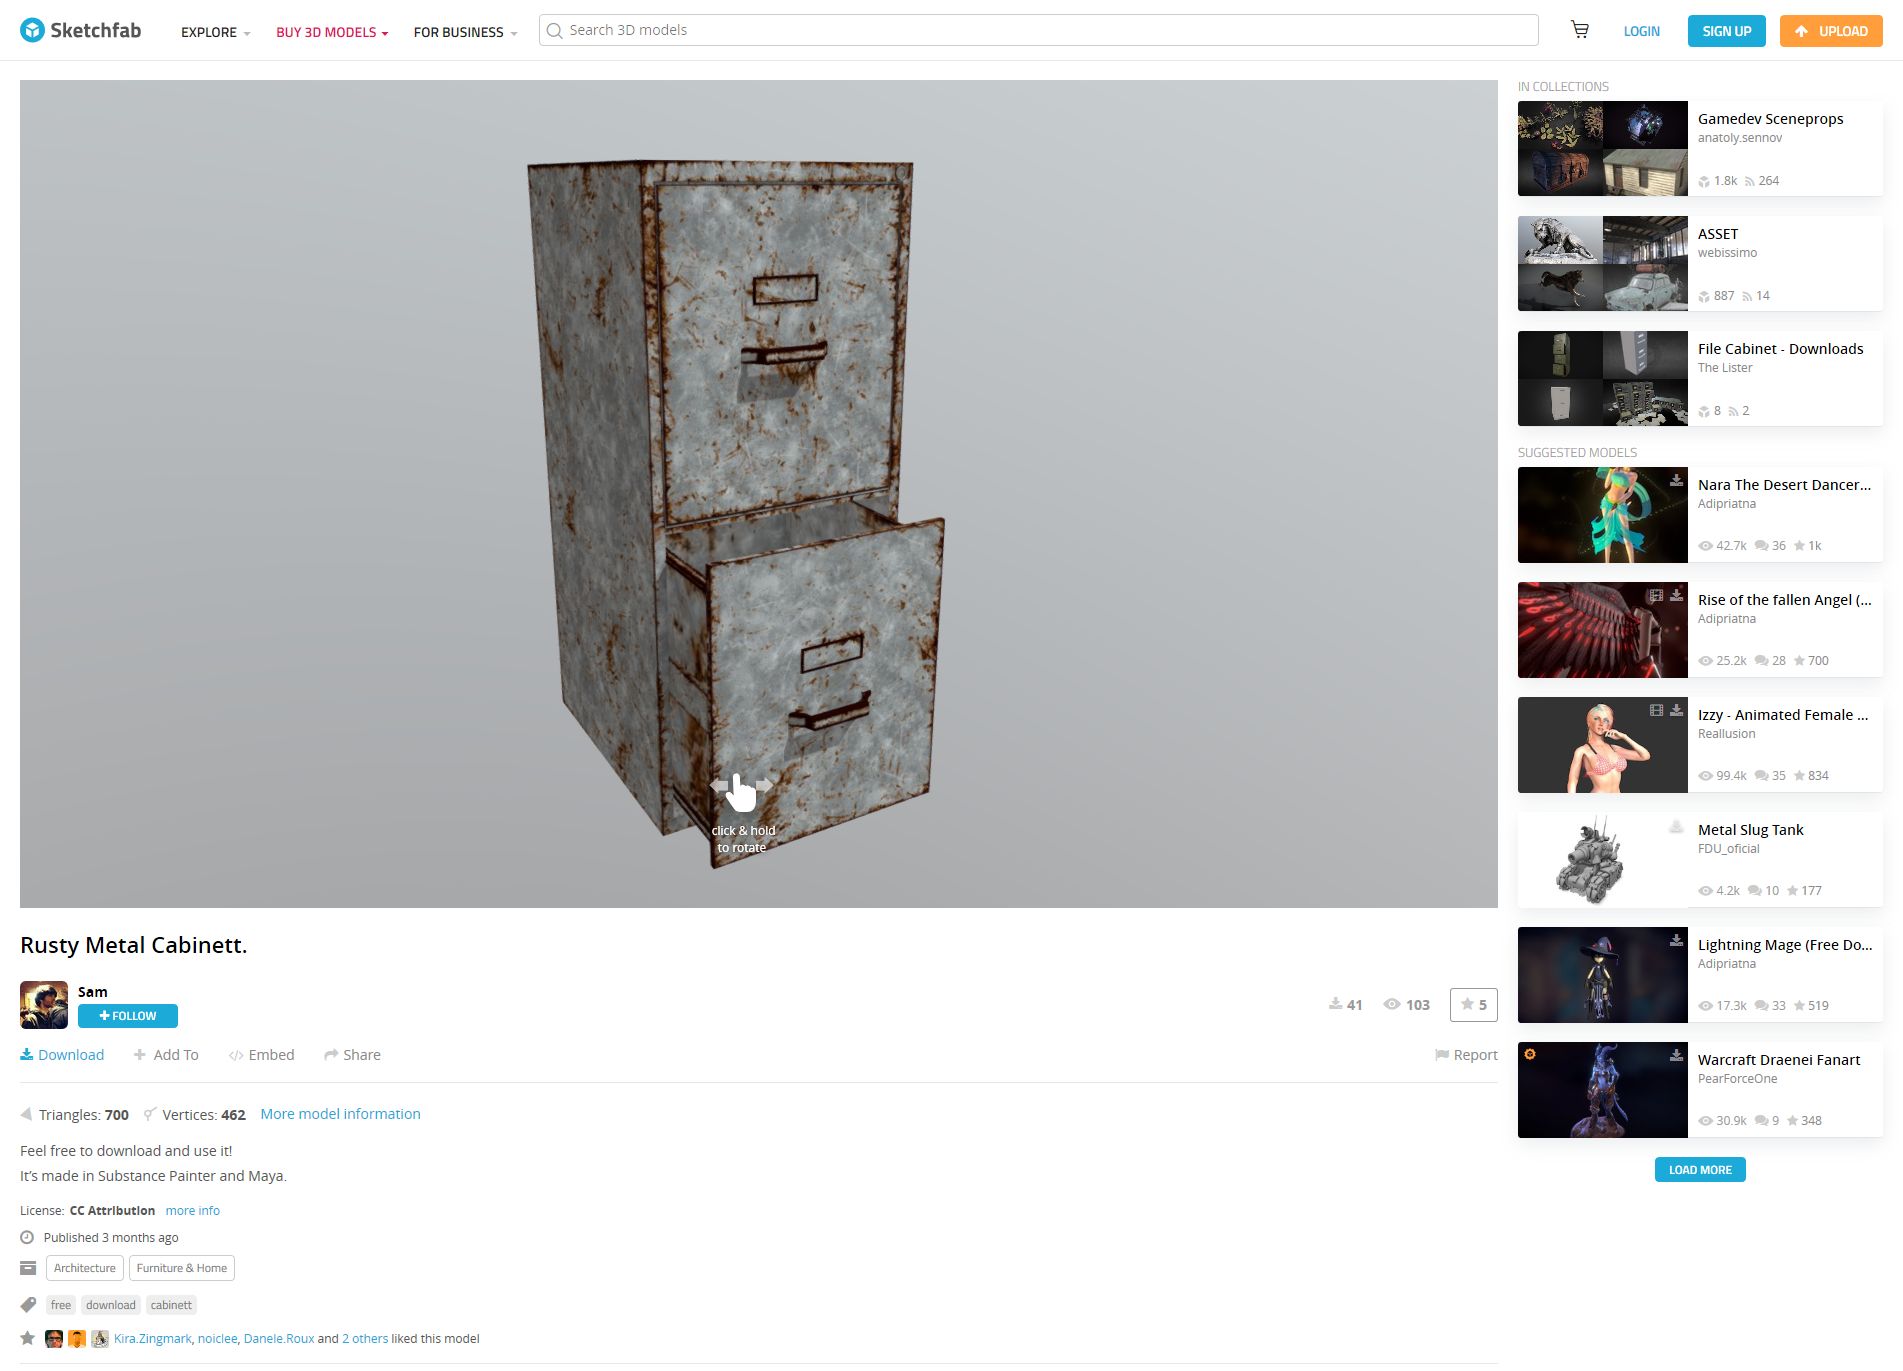
Rusty Metal Cabinet on Sketchfab
Once you have found it, you can rotate it and view it from all angles right in your browser, and when you are ready to make it yours just click on the blue ‘Download’ link under the author’s name, right under the model itself.
Downloading is the big catch here: When the download dialog appears, you want to be sure to download the ‘Autoconverted format.’ That glTF format is an open-source method for the interchange of 3D models for use in applications other than those in which they were initially created. What that means is, the format can be exported to the format we need for importing into Oculus Home, while the ‘Original Format’ will be for the tool used to create the model itself, whether Blender or 3DSMax, or whatever, and that’s not what we want.
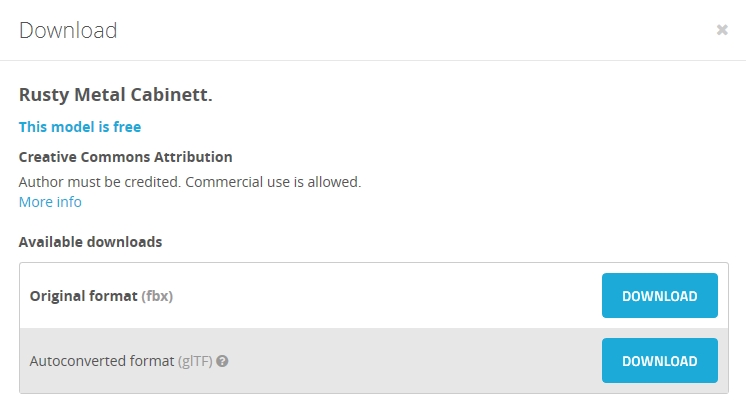
Be sure to download the ‘Autoconverted format” option
Once downloaded, export the zipped file so you have the folder with associated files inside it. I use 7-zip, which for me is the easiest, provides the most control and options, and integrates nicely into the context menu. Their website, however, leaves much to be desired. However you extract it, once you have the resulting folder, open it up so you can see the ‘Textures’ folder, along with ‘Scene.bin’ and ‘Scene.gltf.’ Then, bring up https://glb-packer.glitch.me/ and drag all three of those onto the page: The folder, and the two Scene files. You don’t have to do anything else, it will automatically convert then download a file called ‘glb.out’ that has all you need. Because it generates an .out file, we know it’s a binary compaction of the original files and folders into a single file.
It couldn’t be easier. Seriously, this is the whole page, and if converting to GLB there’s nothing to do!

GLB packer. This is it.
Of course, that easy step shouldn’t lull you into a false sense of complacency, because now it gets cumbersome. You should have, in your Documents folder, an Oculus Home folder, then an ‘_Import’ folder, and you can make the _Import folder if it’s not there, but don’t forget the underscore! Rename your ‘glb.out’ folder to something that makes sense, for example in the video I renamed it to ‘RustyMetalCabinet,’ and drag it into the ‘_Import’ folder.
For now, that’s it! Go into home, check in the ‘My Imports’ tab of your inventory, and you will see it there just as you named it. Bring it into home, and…it will likely be way, WAY too big. And that means it’s scaling time, which is easily the most tedious part of the process; all you can do is scale it, hope it’s right, then re-import it back into Home. If it still isn’t the right size, you’ll need to do it again. Come on Oculus, let us scale in Home!
Anyway, to scale the object, you’ll need to bring up the threejs.org/editor site, drag your .out file onto it, then scale by clicking and sliding your mouse over the ‘Scale; numbers on the right-hand side, as you can see in the video and image below, then selecting ‘Export .GLB’ from the file menu. The problem is, there’s no real way to know how the thing scales regarding your particular Home: It could be too big, too small, all you can do is re-import it and check it, then do the scaling over again if it doesn’t fit. For example, I ended making a teensy file cabinet before I got the size right. I kept it anyway, though; it was neat, in it’s way.
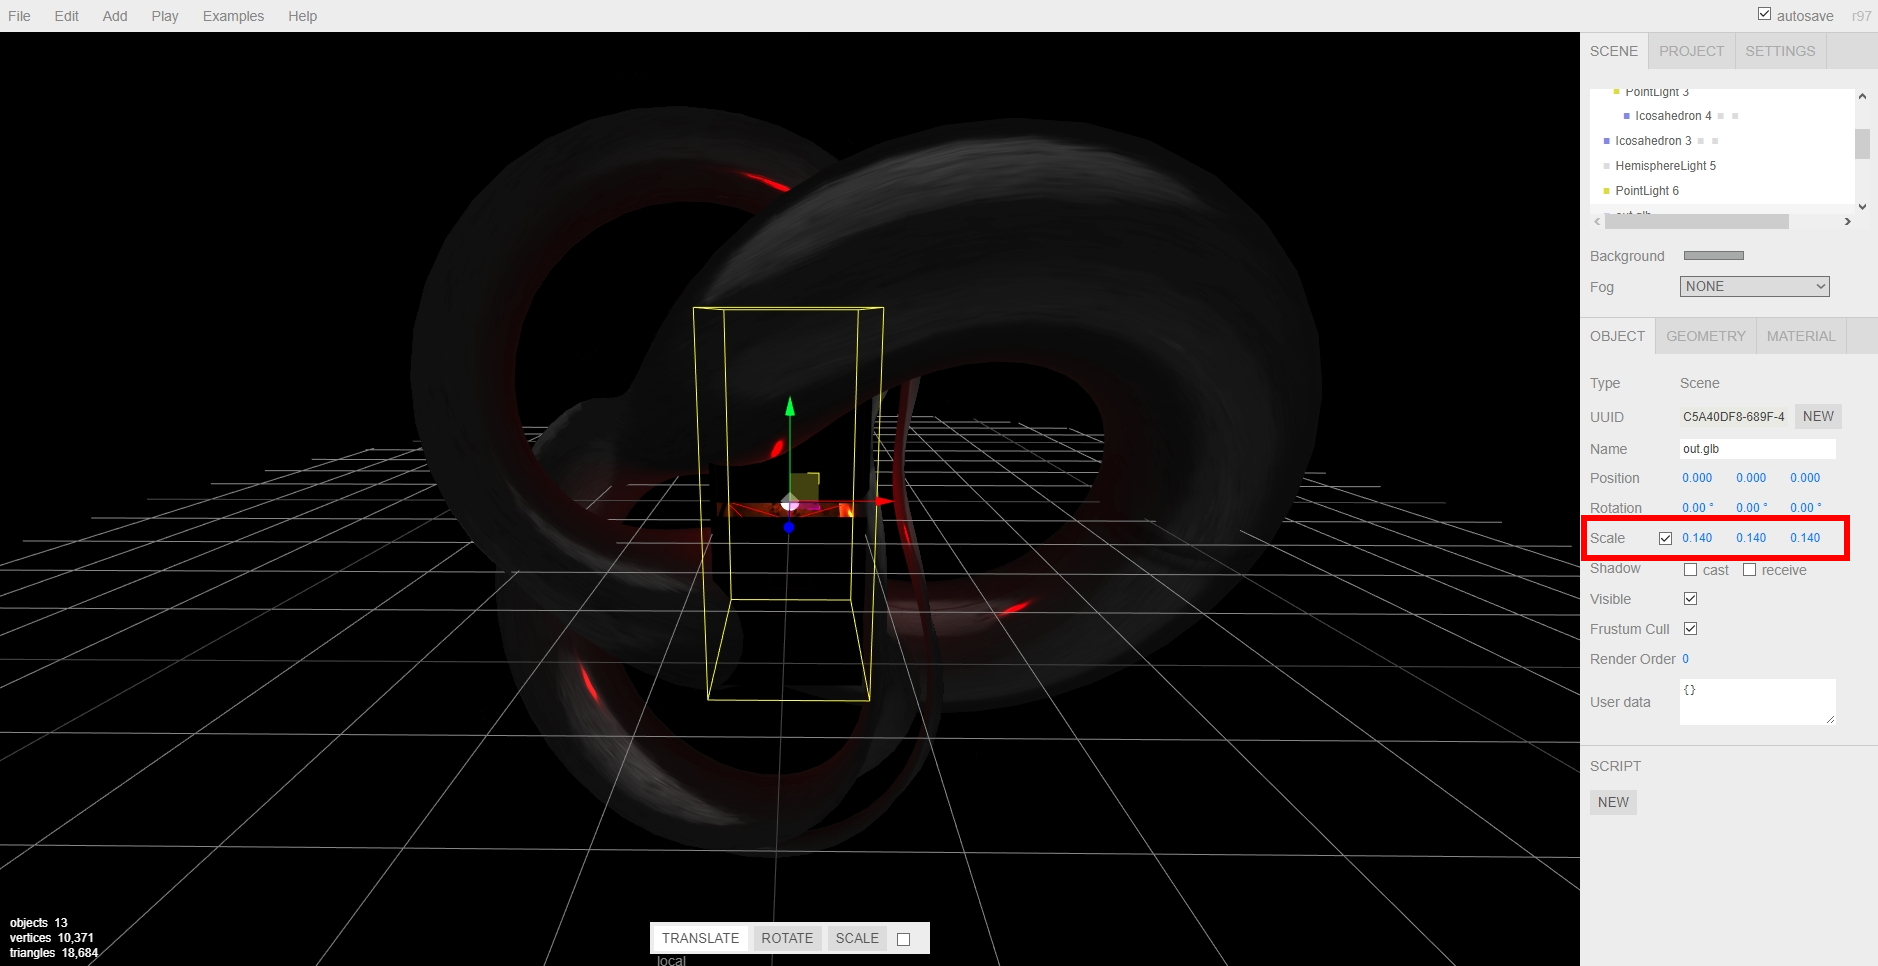
Adjusting scale in the threejs editor
Then, once you have found your scale, you’re all set! Another neat thing about doing this is that when imported models load into your home on startup, the do this futuristic materialization, like they’re being 3D-printed by light, into existence. It’s a really nifty effect.
So there you go! Have fun, there is a huge number of models to choose from, the recent Oculus update has fixed most of the performance issues, so the possibilities are almost endless! If we can just get scaling, perhaps even direct import, the icing will be on the cake, but until then, it’s still pretty fun.
Here’s the video:
Just like old times: Running console emulators and PLEX on the virtual flat screen TV in Oculus Home
A couple of months ago, Oculus introduced a few flat-panel TVs (and a desktop monitor) into Oculus Home. That would have been fine in and of itself, however these TVs can have ‘panels’ embedded into them. Panels are essentially windows from your desktop, so if you had Word or Plex or chat or even a game session open, you could have it appear in a TV or monitor in your virtual home.
Naturally, my first instinct was to fire up one of my retro-console emulators and see if I could have it run by projecting it through one of the TVs in the virtual space. It’s almost a meta thing: Playing a classic console on a flat-screen TV in a virtual environment via VR. If it worked, since Oculus allows you to place as many of these as you wish, I could set up the custom gaming room of my dreams. I am happy to report it worked perfectly, and I am in the process of designing that gameroom right now! I’m thinking futuristic city as the backdrop, but we’ll see.
PLEX, which is movie-playing and streaming software for your personal media collection, also ran beautifully with no lag, and I’ll talk a little about that towards the end.
Before I get to the results, let’s talk about emulators. Emulators trick your system into thinking they’re the console they’re emulating, and I mean that they really trick it. Whatever shortcomings the console itself had, so will the emulator (and possibly a few more, but we’ll get to that). If a bug appeared in a game, or the console just quite wasn’t fast enough to push a game, that will be replicated during emulation. Atari 2600 emulators will even show racing the beam errors, in which the next line of video won’t be drawn if the emulator is still carrying out logic operations. In the following image, which shows The Empire Strikes Back for the Atari 2600 running in the Stella emulator (Stella was the code name for the console during development), if you look closely you’ll see black lines down the left hand side of the image: Those are racing the beam errors, even though it’s not a CRT and not even a console! The point is, when you’re emulating, the systems is the console.
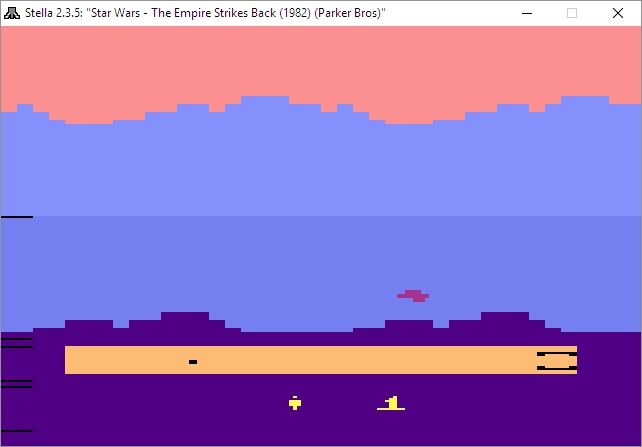
Racing the Beam errors in the Stella emulator
Not only that, the games are actually the games, not some reprogrammed nonsense. An ISO, for example, is an exact bit-level copy of digital media, so someone will put the original game disc into their PC’s optical drive, or sometimes they’ll use the console itself with special connections, and use special software to turn that disc or cart into a file. Other times, the ROM chip itself will have to be ripped using a ROM (EEPROM) burner.
The point is, with an emulator, you’re getting the actual console experience with the actual games and all their flaws or lack thereof, not some hokey recreation. It also means some games may not work all that well, or at all, but that’s rare.
Generally, emulators are not terribly difficult to set up and get running. Each has its own quirks, but once you start experimenting you’ll be hooked, not to mention surprised at (generally) how well they run.
I use many emulators, and I’ll give you a crash course on setting them up. All you really need to know is that you need to specify a folder that contains your games, and you can call the folder anything you want: Whenever I set up a folder I’ll call it either ‘Games’ ‘ROMs’ or ‘ISOs,’ but you can use anything. Speaking of the games, those files can come in several forms: Some emulators allow for zip files in the games folder, others will require an .iso, .bin, or possibly other, specific file such as .gcn which is for the Nintendo GameCube. Some can use whatever you throw at them. Additionally, for the later consoles, you’ll need a BIOS file in your games folder as well, and they can generally be found with a low-effort web search, as can the games themselves.
Here’s an example of how the directories work, and these are almost always assigned during setup, although you can certainly set it through the options as well. For clarification, I run mine from a network drive, which is nice because I can save a game and then pick it up again from any PC in the house, or on the planet. Speaking of game saves, the emulators take care of setting up memory cards for saving games as well, however you can also create ‘Save States’ at any point in a game regardless of how its save structure is set up. So if you have to leave or otherwise shut down the emulator but haven’t reached a checkpoint, you create a save state, then load that instead of the save from within the game itself. You’re essentially saving the state of the emulator, not the game.
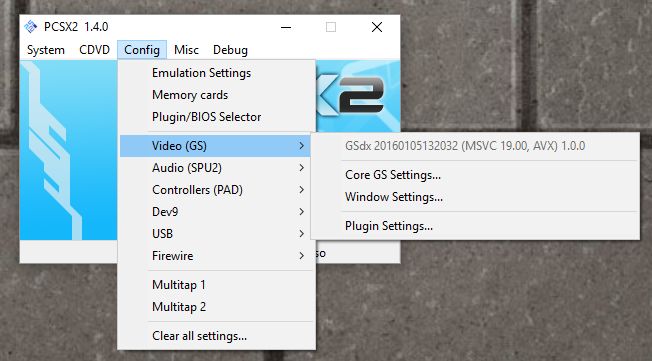
Here’s an example of setting up the games directory: In the image below, in image ‘1’ in the upper left, you can see I have an ‘Emulators’ folder, and after opening that, in image ‘2,’ top right, I am selecting the PCSX2 folder, which is a PlayStation2 emulator. Then, in image ‘3,’ lower left, I have created a folder called ‘Games’ where I keep all game files, and finally the last image shows the .iso and .bin files that represent that games I have for that emulator. On the other hand, my Gamecube / Wii emulator, Dolphin, has a folder called ISOs where I keep all my games, even though not all of them are actually .isos.
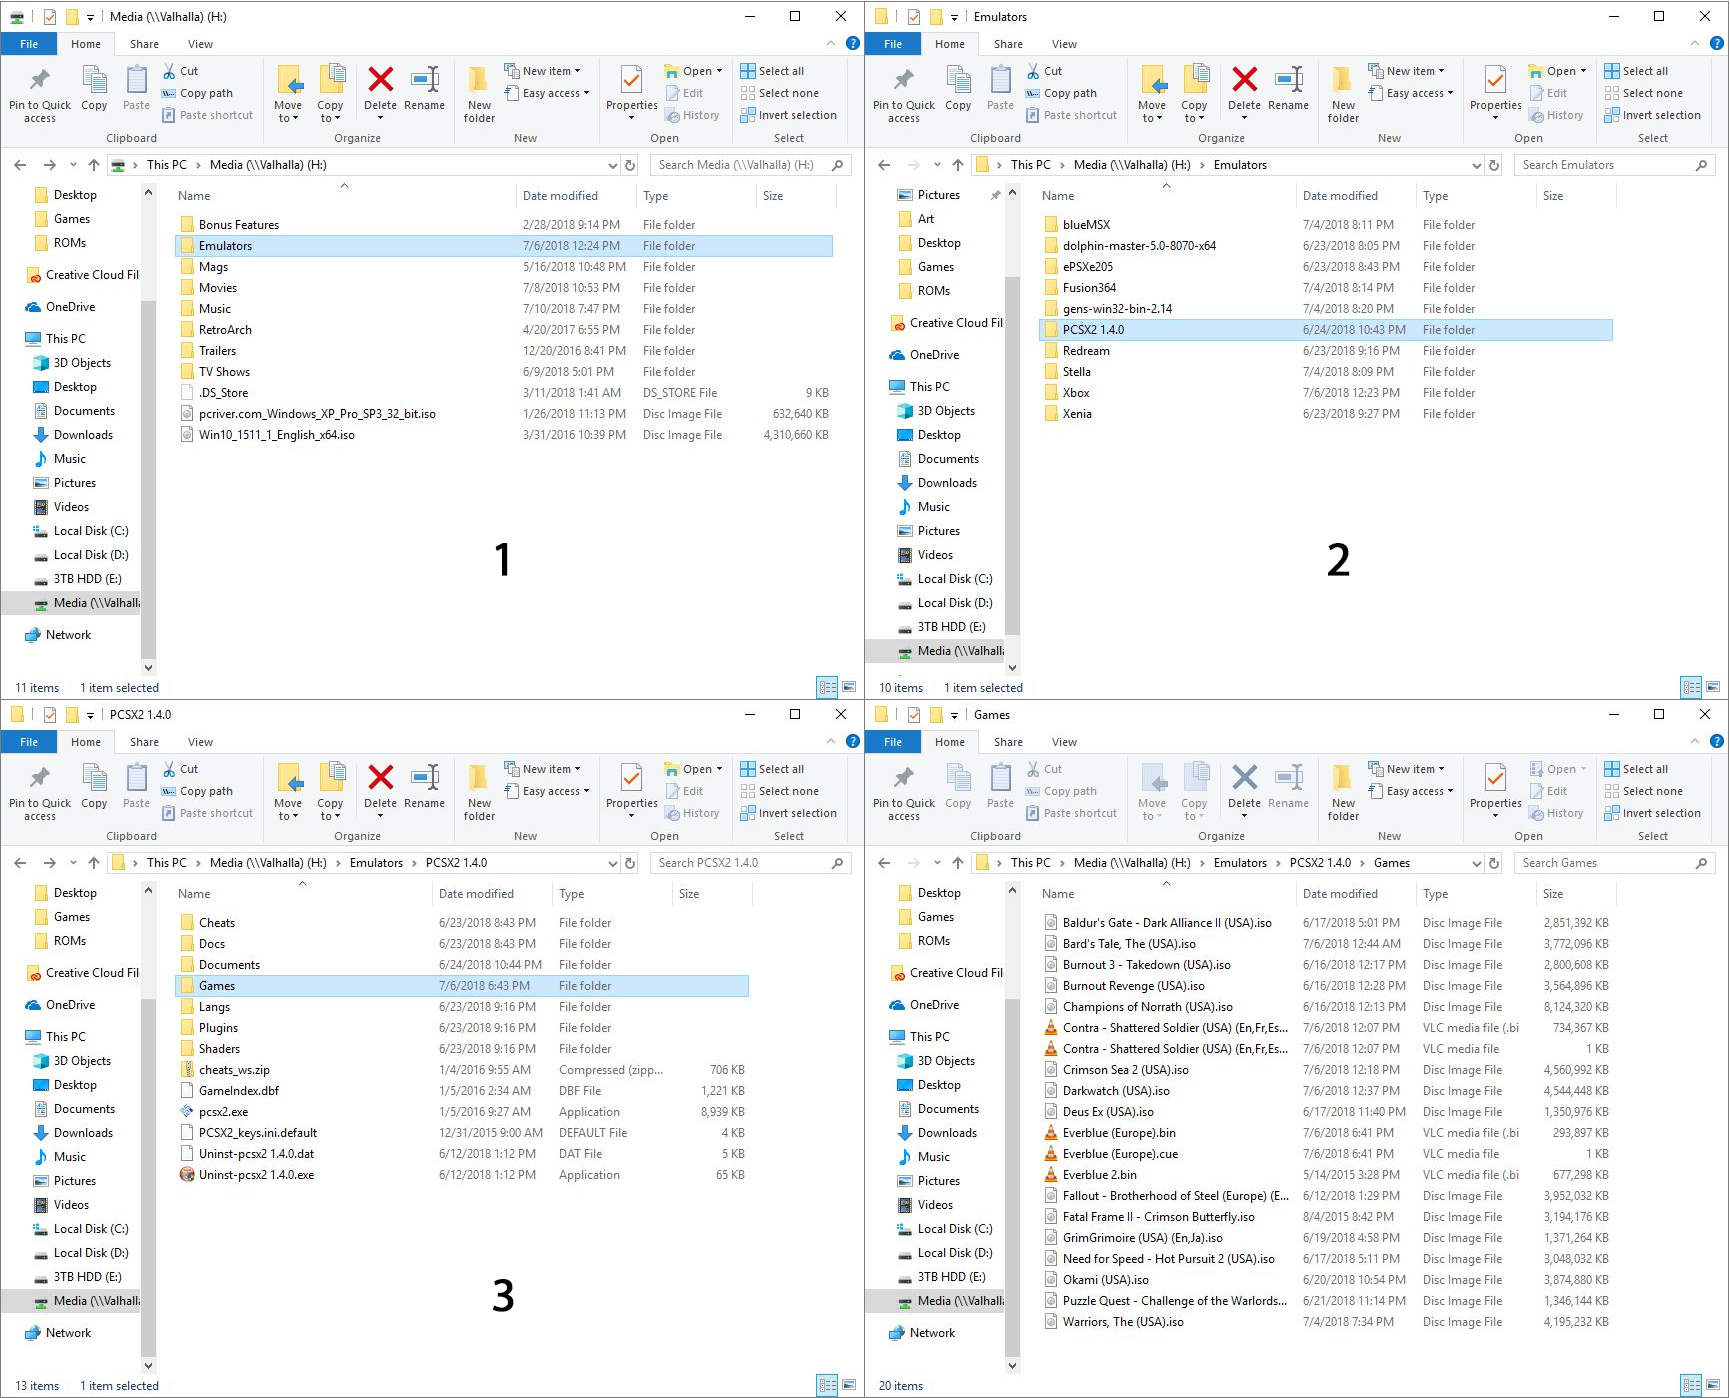
Directory structure for the PCSX2 emulator
The next big thing is that I have an XBox One controller connected to my PC, and any controller you use has to be configured. The initial controller setup, although straightforward, can be moderately time-consuming, but you should only have to do it once. For most emulators, you’ll need to go through and indicate which button on the controller does what, and you do that by clicking on each function in the emulator, then pressing the button / pulling the trigger that you’d like to assign. Below are images of the PCSX2 controller configuration screen, and underneath that the Dolphin controller configuration screen, and you have to click on each function then press / pull the corresponding control on the controller itself. Once that’s done, controls should be all set. Ultimately, it’s a really nice way of doing it because you can set the controllers any weird, wacky way you’d like.

PCSX2 Controller Configuration dialog

Dolphin Controller Setup
The only other major issue you are likely to run into is the graphical settings. Older consoles weren’t designed with 4K TVs in mind, many never even considered widescreen! Although most games will work fine, each emulator will have its own peculiarities when it comes to this, and they all offer EXTENSIVE graphics customization. PCSX2, for example, allows you to use OpenGL, Direct3D9 or Direct3D11, and it’s fascinating how a game won’t run under DX9, but will run perfectly under DX11, or vice versa, and I have seen many variations on that. I also, for that particular emulator, set resolution to at least 2x native; then it will run surprisingly well even on a widescreen 4K TV. And of course, it allows you to customize graphics for the emulator in general, as well as specific tweaks for the renderer you choose.
PCSX2 configuration menu

PCSX2 renderer selection and tweaking
When it comes to actually selecting a game, some emulators are more user-friendly than others. Prettier, I guess I should say. PCSX2 only offers up a straight file selection window, while Dolphin and ReDream, a Dreamcast emulator, provide lovely selection menus. Being an HCI person I prefer that, but the PCSX2 barebones method works just as well.
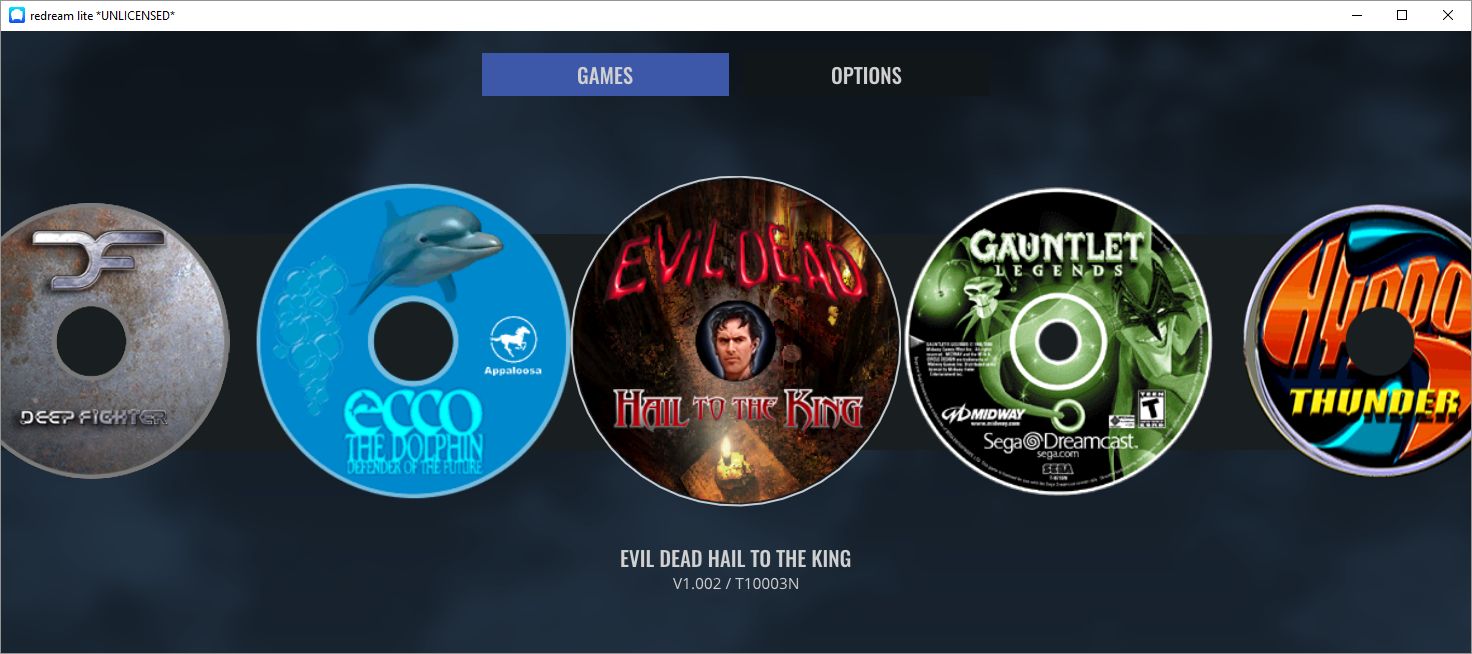
ReDream game browser

Dolphin game browser
So now that we have the details out of the way, what about running them on the TVs in Oculus home? I’m glad to report it works perfectly! There is, however, one big caveat: You can choose to embed the emulator window that’s displaying the game, however the window won’t be listed as a panel if it’s fullscreen, so you’d have to window the emulator on the desktop, then embed the window, then maximize it on the desktop. The better choice is to fullscreen the emulator window then embed the desktop itself. If you do that, it will work perfectly, with no lag (either visual or input), no jitter, no performance hit. For PLEX and even for a couple of emulators, if they’re fullscreen, Oculus Home won’t recognize them anyway so you’ll have to embed the desktop no matter what: It’s just a better all-around option.

Panel selection
It also works for running MAME through the arcade cabinet, as seen below:
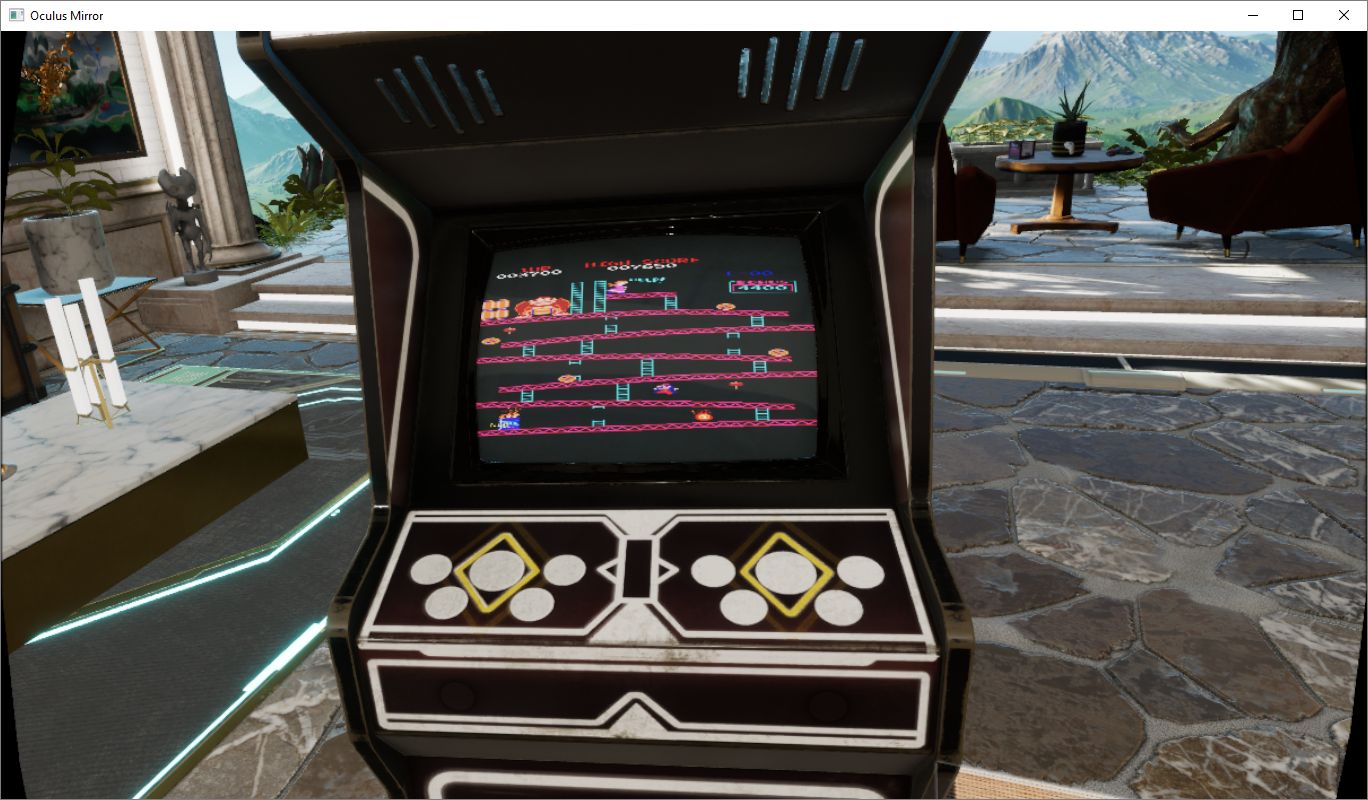
Running MAME in the arcade cabinet
If you’re interested in running PLEX, I have a separate video series on ripping videos and setting up PLEX (part 1 (Ripping), part 2 (PLEX)), and while it’s also not difficult, it’s beyond the scope of this post. Even so, the process of embedding is the same, especially since, as mentioned earlier, PLEX doesn’t show up in the panel selection menu anyhow.
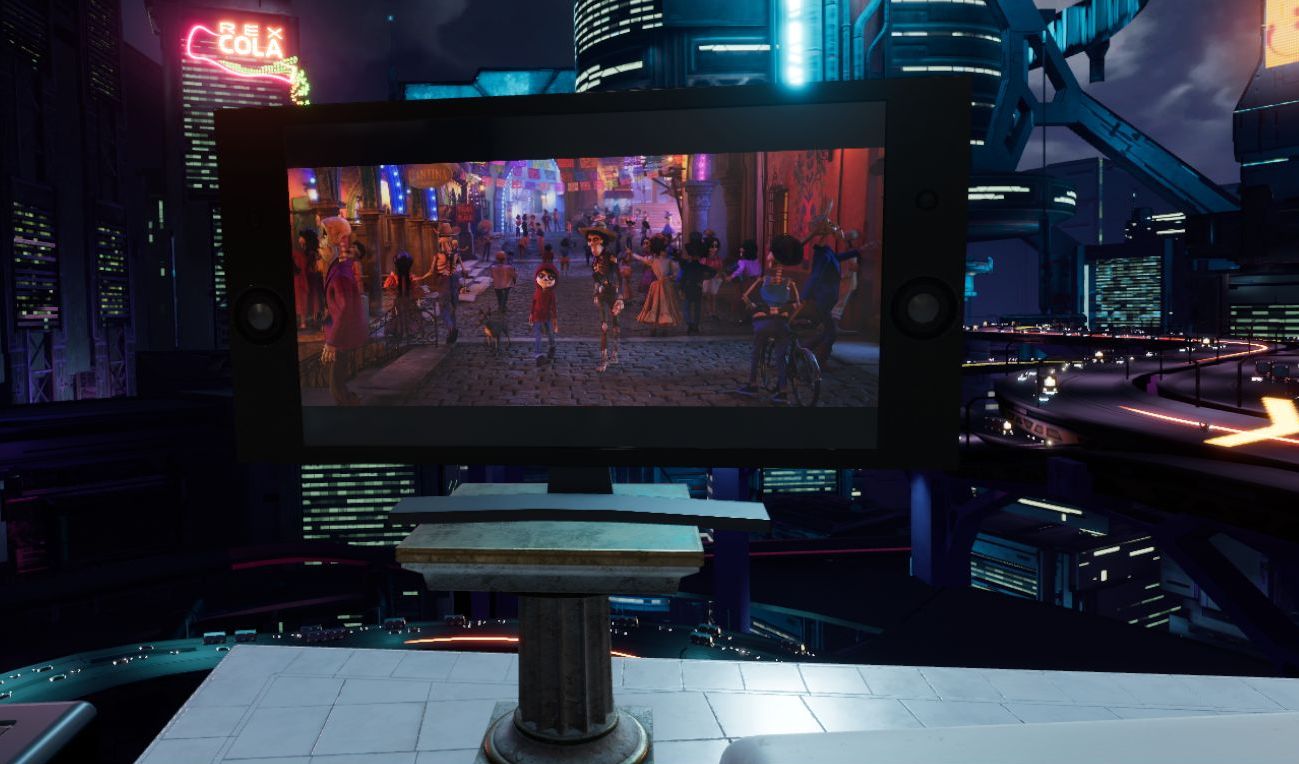
Here’s the video showing four different emulators running on the Virtual TV in Oculus Home, as well as PLEX running a streaming rip of Coco from a network drive, and there is also a wall-mounted TV option along with a computer monitor. It all worked incredibly well, much better than expected.
The new oculus home and store experience

Facebook-owned Oculus released their Rift Core 2.0 software a couple of days ago, completely revamping the out-of-app experience users have when they don their Rift headset. It’s a vastly improved experience over the original Oculus home (which wasn’t all that bad, to be honest); much more feature-rich, streamlined, and user-friendly, however it is still clearly in beta, which is a good thing because it is also still, bafflingly, missing some foundational functionality. According to the Oculus developer blog, there is much more coming and I am very much looking forward to it.
I have made a video, embedded at the end of this post, however that was not without some strange difficulty. You see, when you are in a VR app, the app is automatically mirrored to a window on the desktop, but not when you are in Home or the store. For reasons we may never know, the developers made that window a hidden window, and it required a third-party app, cleverly named HomeUnhider, to make it visible. I would have used the more popular OculusMirror.exe, supplied with the Oculus software itself, however unlike everyone else on earth, my Oculus program folder was empty, with none of the software that was supposed to be installed along with the core experience, and it’s not available for download.
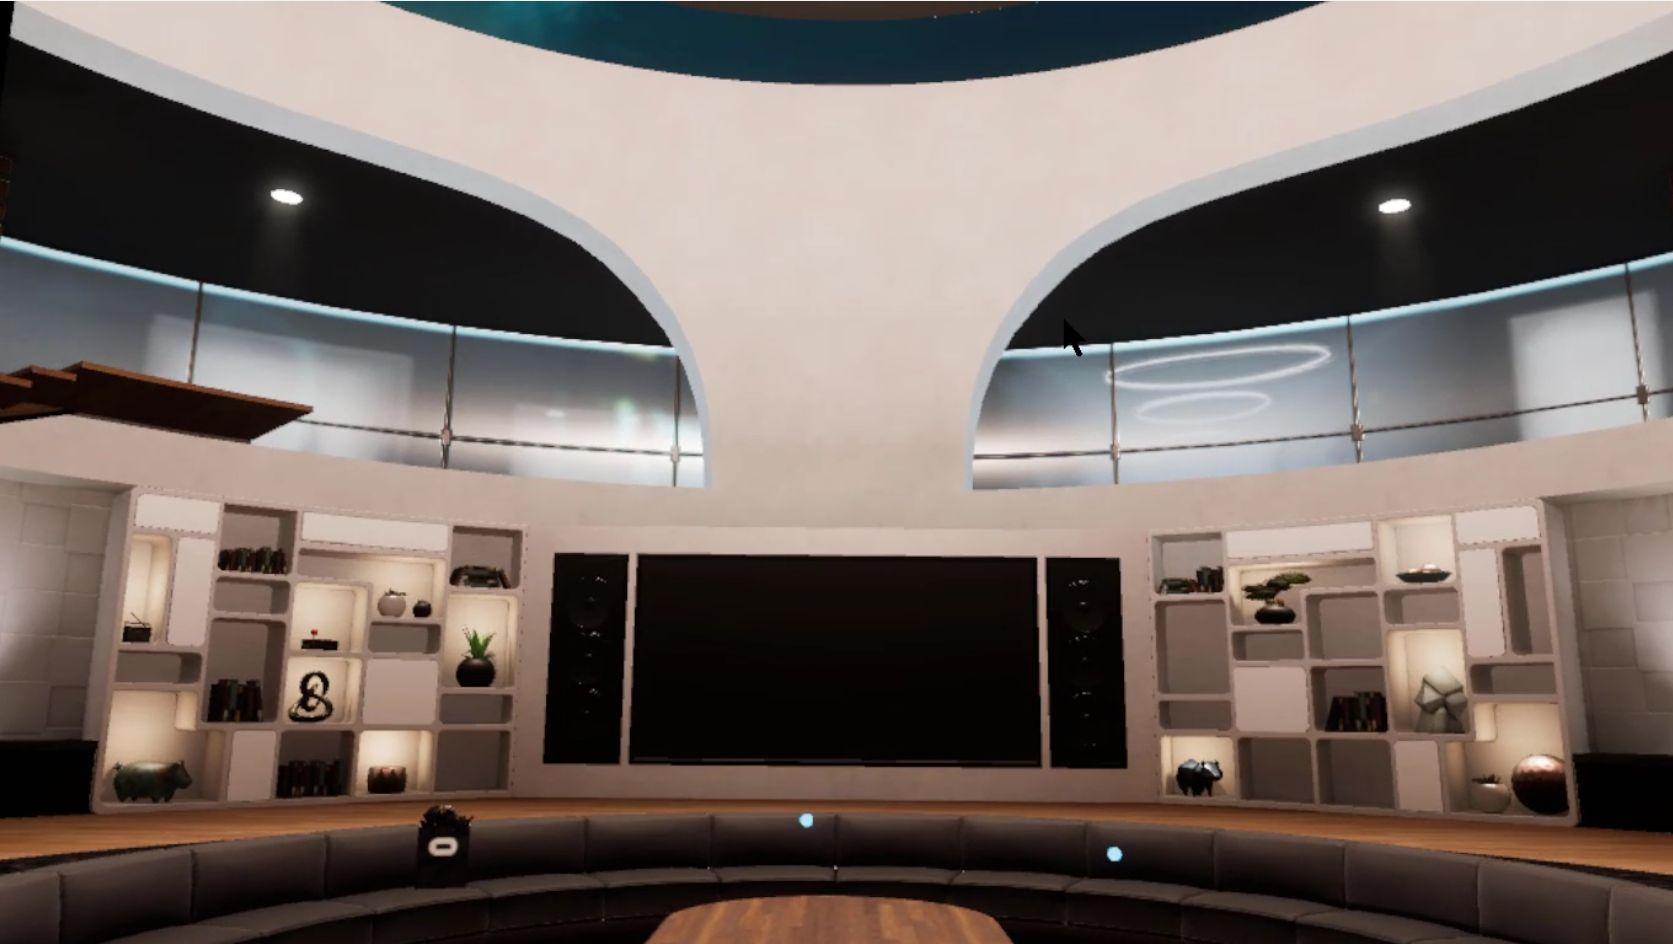
“No problem,” I thought confidently, “I’ll just use HomeUnhider.” Great idea, except HomeUnhider doesn’t work with the new beta experience, giving an error that reads ‘Oculus Home not found.’ It required a complete uninstall and reinstall of the Oculus software, but I did then get the mirror program that allowed me to capture the video (for those interested, the complete path is C:\Program Files\Oculus\Support\oculus-diagnostics\OculusMirror.exe). Camtasia then proceeded to cut off the bottom bit of the video so you can’t see the dashboard as much as I’d hoped. It’s also a weirdly low-res video, which is strange as I use Camtasia a lot and don’t normally have that issue. Here’s a pic of the original Oculus home, lifted from the Windows Central forums, to set a baseline.
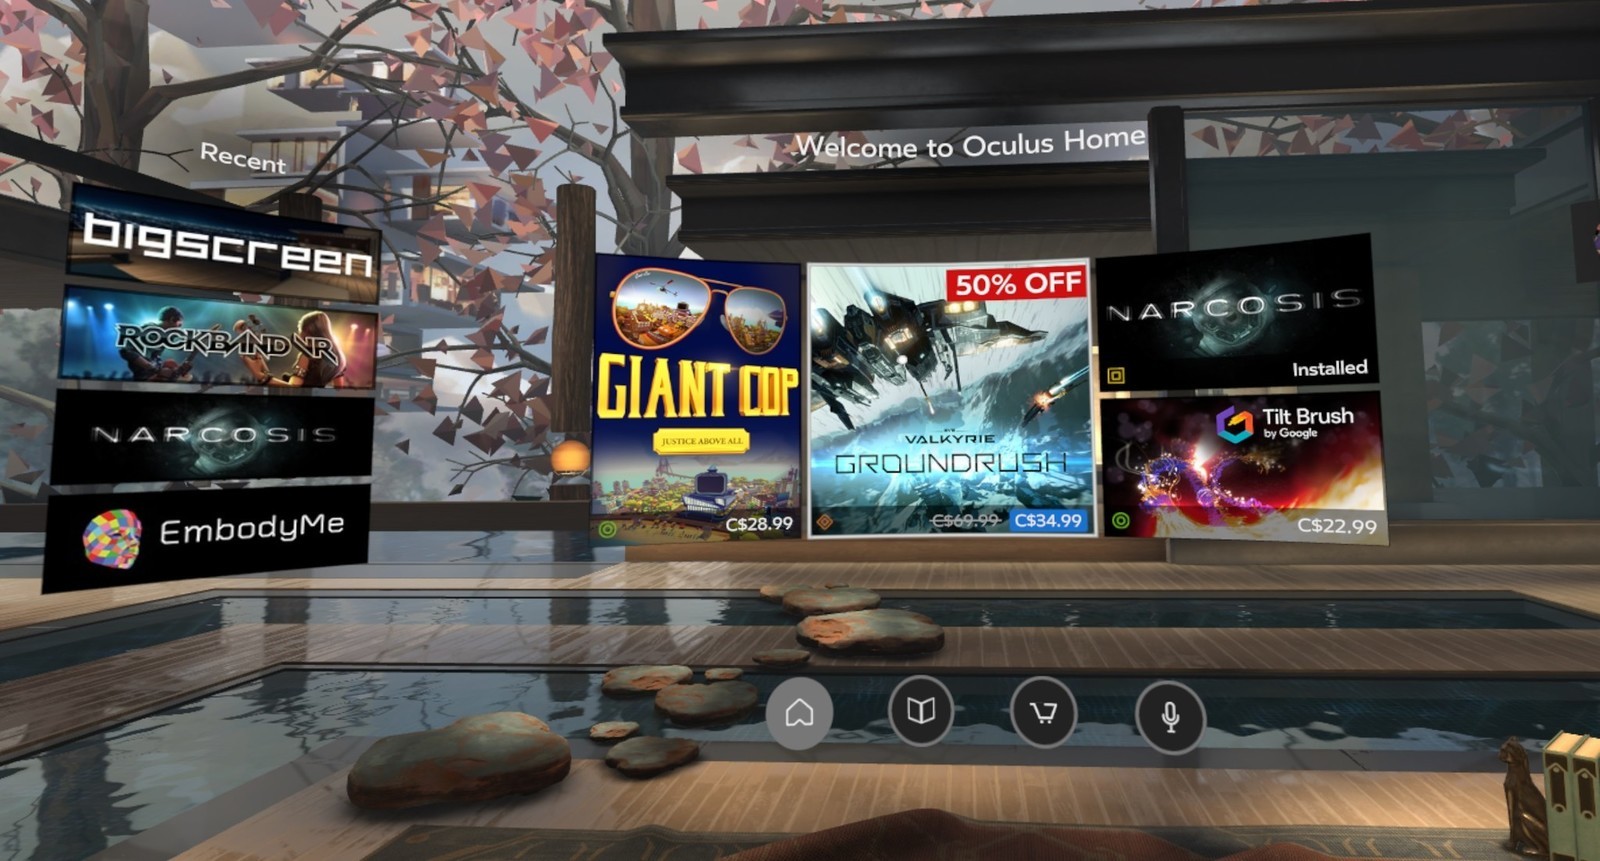
Original Oculus Home
As you can see, it’s not bad. It has a nifty, pseudo-futuristic-while-simultaneously-rustic vibe going on, and the home and store functionality is combined into a single interface. You can see yourself, your friends (yeah, right), highlights from the store, and recently accessed apps. The image is actually an older version of home; it had been upgraded from the design you see in the image above, with additional navigation, categories, and so on. It looked generally the same, but with some additional functionality. Of course, you could look around your home if you just wanted to chill, as the kids say.
In the just released beta, however, it has been completely revamped. Your house now sits on what appears to be the cliffs of a…Mediterranean, perhaps, or maybe Spanish inlet, part of a larger coastal village, with your balcony looking out over the water, which also happens to have some pirate ships. Can’t argue with the view!

My new (virtual) view
There are also some activities you can do, such as shoot a bow and arrow at nothing in particular, shoot what appears to be a virtual incarnation of the Sega Master System Light Phaser (which could be dangerous in the wrong hands) at similarly 8-bit targets, or lob golf balls into the water. For being such simple activities, they’re oddly fun. You can navigate around your house, something you couldn’t do before, and you can now do some limited decorating. By selecting different patterns you can change the look of the ceiling and walls, and other accouterments can be placed around as well. The carrot here is that by playing games and using apps, or simply spending time in Home, you’ll earn additional items and decorations that you can use to further spice up your space. And don’t worry, there are no lootboxes here.
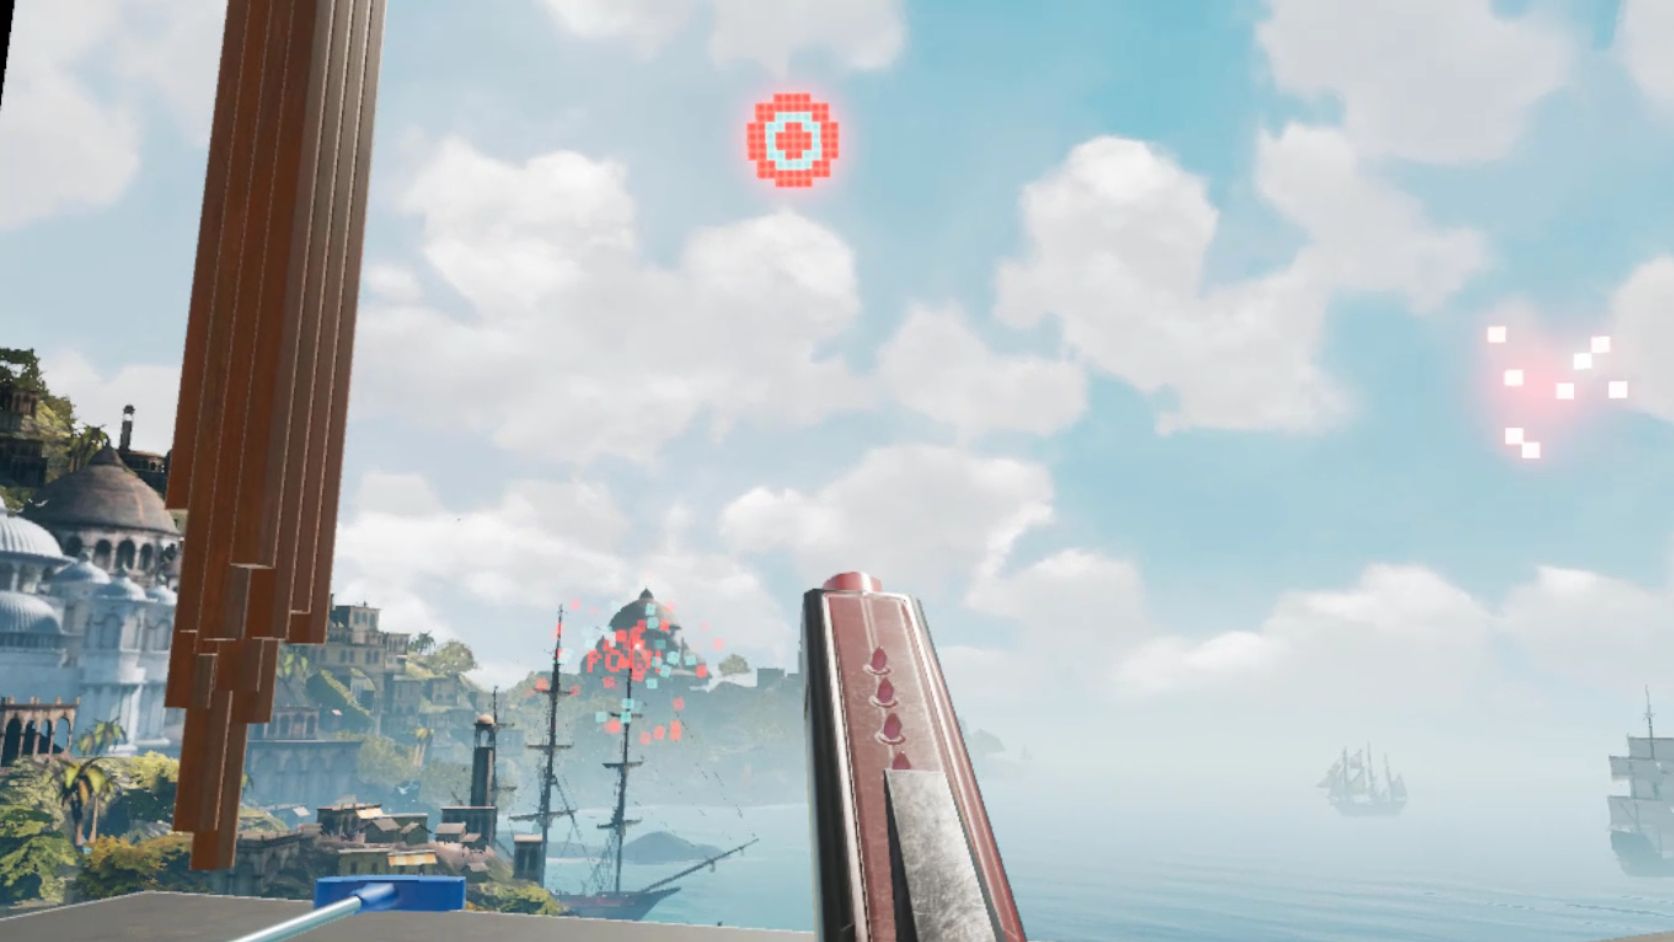
Shooting 8-bit targets
I suspect that there will eventually be many more ‘homes’ from which one may choose: On the developer blog linked earlier, there is what appears to be a house in outer space as opposed to the seaside location it’s in currently, and my guess is there will be more than that. The blog states they’ll be rolling out content over the course of the next year, and I suspect further on past that. Hey, Sony’s Playstation Home may not have been a hit, but the homes you could buy were spectacular, and it never came out of beta! I can only imagine what it will be like if we can get homes like that in VR – I’d buy every single one. They even had one that was completely underwater with whales and whatnot swimming outside massive windows…Now I’m nostalgic and I can’t find a single picture of that house, so instead here’s a picture of an underwater, Bioshock-themed apartment you could get. Still pretty impressive, and apparently there’s some weird version of Playstation Home that still exists on the PS4.

Bioshock Apartment from Playstation Home
GLORIOUS UPDATE: It turns out the environments are already available! I wasn’t aware you could scroll through decoration options within categories, however I began to suspect something was up earlier today when it said I had 78 objects but was only showing a few. After figuring out how to scroll, guess what appeared! That’s right: A space environment, and my new favorite, a city environment called ‘Vertigo.’ I made an additional video just to show them. They’re very impressive, and now I can’t wait to see the others that I’m certain will be available in the future – fingers crossed for an underwater theme!
So back to Oculus – there is the new dashboard, which I think is a huge, and much needed, improvement. It now curves around you like a futuristic control panel, offering access to settings, recently used apps, some status info, the store, and social info. It’s easier to use, especially if you’re standing up; using it while sitting requires you do some contortions with your wrists to get the pointers in the proper place. There is also a Desktop button that mirrors your monitor right there in VR, and if you have multiple monitors it will ask which one you’d like to see. The insanely nifty thing about that is that you can pin programs to the curved dash just like you can with the Windows or Mac taskbar, and even pull windows off of your desktop and pin them right in the air in your virtual house! They’ll follow you around – you can watch YouTube videos, play a game, browse the web, all as you mosey through your virtual environment. It’s an incredibly useful feature, however you can’t pin them, say, to the wall like a picture, which I think would push it over the edge into unparalleled awesomeness. Rather, they hover right next to you, although they can even overlay over an app you’re using, so you never have to be away from that admittedly very important video that finally proved the existence of life on another planet.
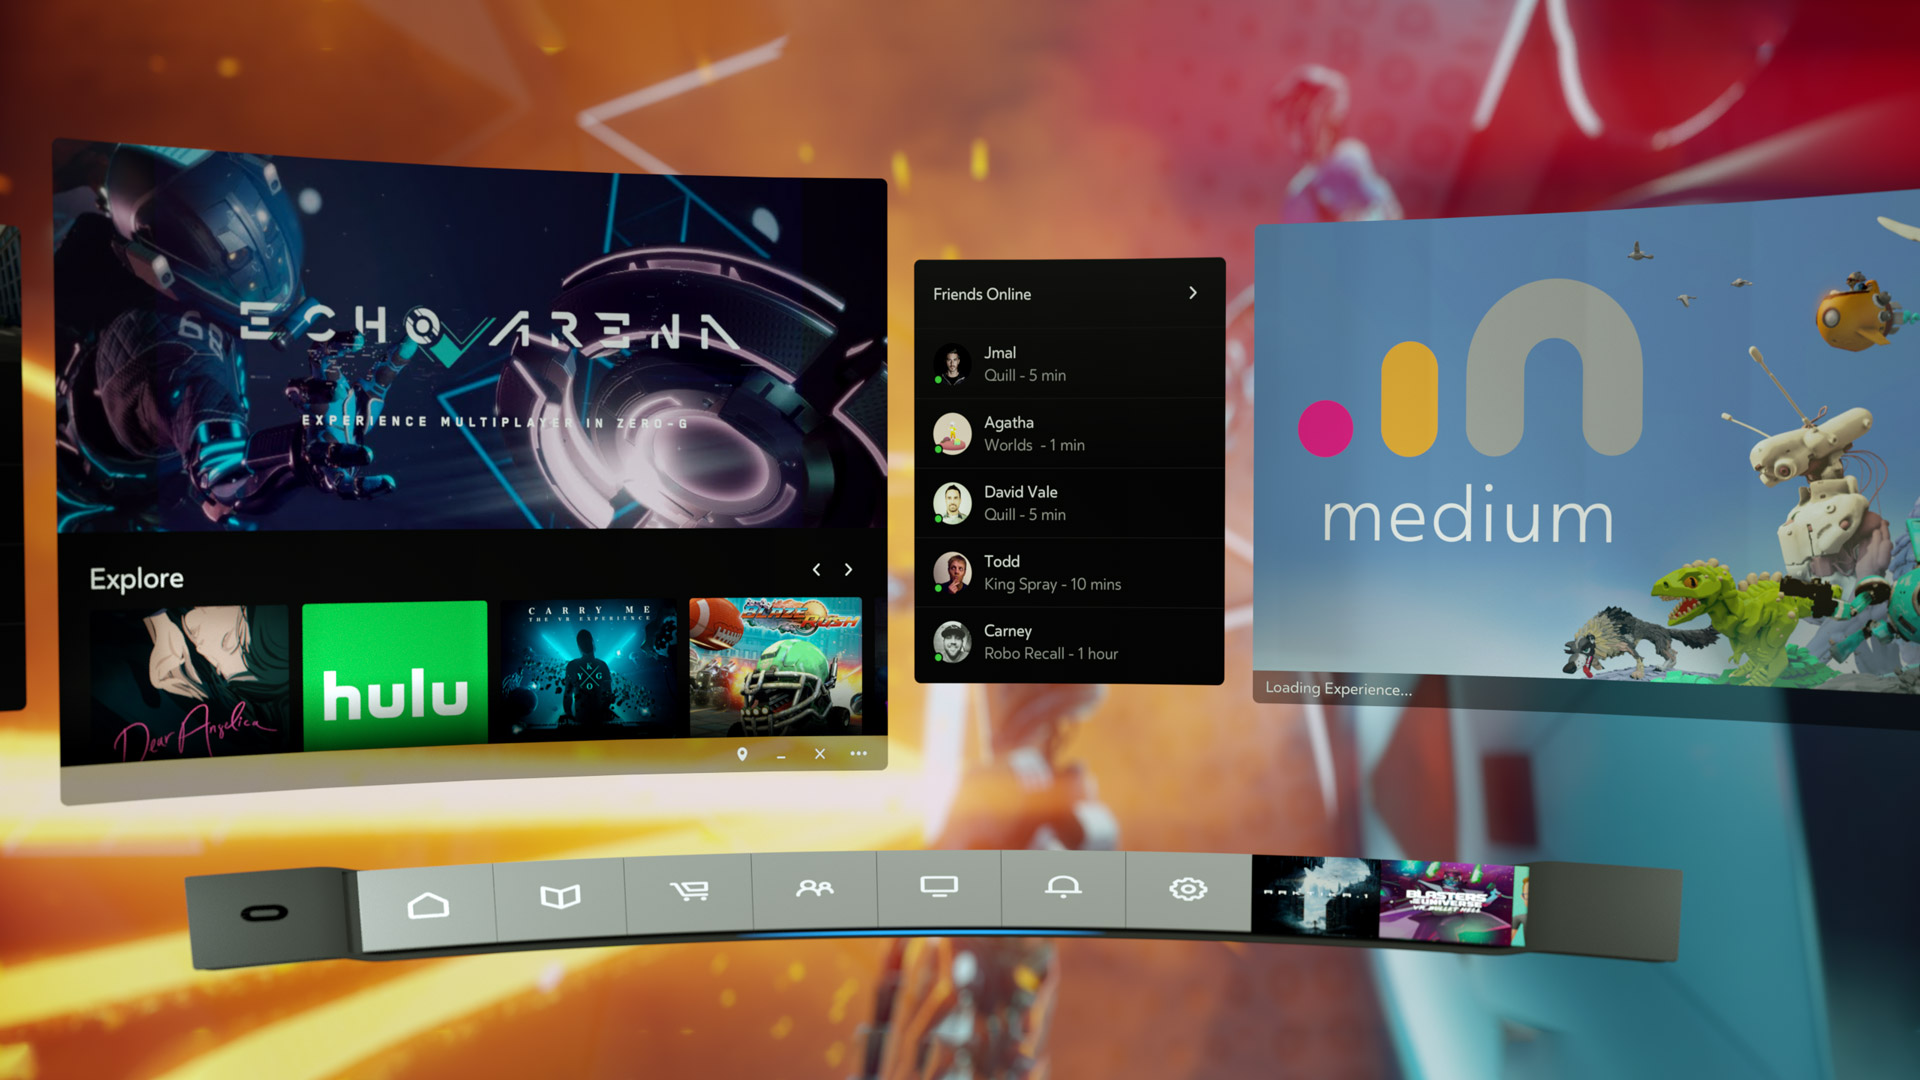
Oculus Dash (from Oculus – notice the different home in the background)
The store has been separated out as its own location, designed as a post-modern, I don’t know, office lobby? There’s a very natural theme to it with an Oculus-branded waterfall, wooden curved steps on either side of the round room, metal balls rolling along tracks under a glass floor, and you can even see silhouettes wandering around behind the upstairs windows. Oddly, and at the same time pretty awesomely, if you turn around you’ll see a very futuristic, yet also immersion-ruining unanimated cityscape. No blinking lights in windows, animated billboards, blinking stars, nothing. But it is an interesting contrast between what’s in front of you and what’s behind, one you can see below.
The new store location

Looking behind you in the store
The store functionality is generally the same as it was before, which is a problem. They have finally added video previews of apps you’re viewing, something the Gear, the mobile version of the Rift, has had forever – the fact it’s been added to Rift now is just playing catch-up. Additionally, although it’s not an addition at all, it’s a maddening omission, there is still no search function, which is as basic a usability function as there is, especially when the list of apps can, in some categories, go for 100 pages! While apps are normally listed six at a time, their ‘Gallery’ titles, which are described only with the very vague ‘A broad, less-filtered collection from VR creators,’ are for some reason listed three at a time, and there a hundreds of them! I also have no idea what ‘less-filtered’ means, and when I clicked on ‘Learn More,’ Oculus crashed and wouldn’t restart without a reboot or taskkill because its background process simply wouldn’t quit, even from TaskManager. Anyway, you can sort, but you may still have to scroll through pages and pages and pages and pages of apps to get to the one you want.
There is also no browser, something its little brother the Gear has had for a good while now. It’s very strange; these improvements to Home and new environments for Home and Store are great, but it still lags behind the version that you use by plugging in a phone. The Gear version of home also has voice search, and other things like events, highlighted videos and better social integration, something that even I, with no friends on this or any other game platform, can see is much better on the Gear. That the Rift still lacks the basic functionality that its phone-based counterpart has enjoyed for so long is unforgivable. I’m overjoyed at this new Rift experience, and I have very high hopes, not only for its continued future development and what that will bring us, but also that it can simply be brought on par with what you would expect would be its much less capable sibling.
It’s important to also add that regardless of my complaints and concerns, Oculus is light years ahead of Valve / HTC and their Vive in terms of the interface. The Vive interface, a Frankenstein-like mashup of three, maybe four, maybe as many as seven separate interfaces (it’s hard to tell, it’s so badly designed), is overpoweringly difficult, cumbersome and unintuitive to use. So awful is the Vive interface, and impossible to navigate, that it may be, and I say this in complete seriousness and without hyperbole, the single worst interface I have ever used. In my line of work I use a lot of terrible interfaces, so Vive has really accomplished something here. Not only that, Steam VR incorporates beautifully into Oculus, so there’s no need to use the Vive at all, at least not in my household.
Below are two videos from Oculus, one highlighting the new Home and its potential options for customization, the other introducing the new interface which they call ‘Dash.’ The third video is the one I took on my own Rift in Home and the store.
My experience with the HTC Vive so far
(Crossposted to theexperiencebar.com)
As anyone who reads this blog, or knows me, knows, I went nuts for VR when I tried out the HTC Vive last year. Now, I’ve had my very own Vive for about a week and can offer some opinions regarding where VR is, and where I believe it will be going.
The first thing I should mention is that just getting it was an experience. I received my original confirmation email 14 minutes after ordering, but it didn’t arrive until April 14th. Of course, I was in class that day and missed it, and since it required a signature from me (they couldn’t leave it at the front office like usual, HTC paid extra to ensure my specific signature), I had to go pick it up from the FedEx office.
Finally I got it home, a single big box, and was ready to unpack.
Finally!

It seems like I’ve been waiting forever.
I received an email from HTC telling me my Vive order is being processed! Hooray! At last, I can escape this infernal earth (which isn’t a band name, but it should be) and spend my time working a boring corporate job.
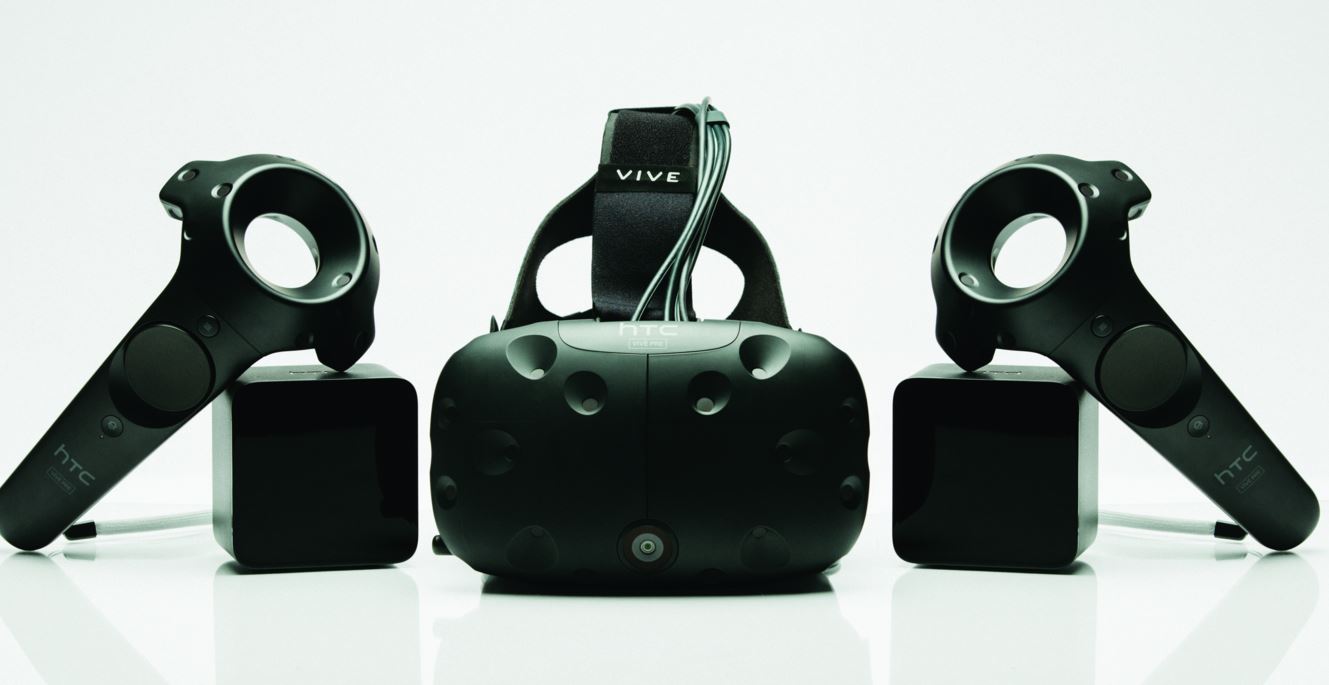
Here’s what I received:

Hooray!

Sounds good
I’ve never ordered something that comes with an ‘Alternate Face Cushion.’ UPDATE: I learned after making this post that the email I received was sent to everyone who ordered one, and does not, according to a Vive post on Twitter, indicate anything about the shipping date.
I eagerly clicked on “look up your order online,” anticipating seeing the HTC elves furiously building my machine, however it took me to page in which I could do a ‘quick lookup’ using my email address and the last 5 digits of my credit card number, or my order number and a password.

Hmm. Ok.
The thing is, I didn’t recall receiving a confirmation email when I first ordered, no order number or anything, and I had no idea what password they’re referring to.
So I entered my email address and digits of my CC#, and it said ‘Incorrect order # or Password,’ which is weird because I entered neither of those things. I tried again. And again, and again. Nothing worked. It said I could reset my Order Password, but I would need my order number to do that, and I don’t believe I have a password anyway!

Dammit
UPDATE: After some searching around, it turns out they *did* send me a confirmation email that didn’t come up when I searched my inbox. I had to go through my messages one by one, and it was an email that wouldn’t convert to HTML. So I had to scan through a bunch of HTML and CSS to discover my order number and password (which they sent in the email), and finally got to the status page. it didn’t tell me a whole lot.
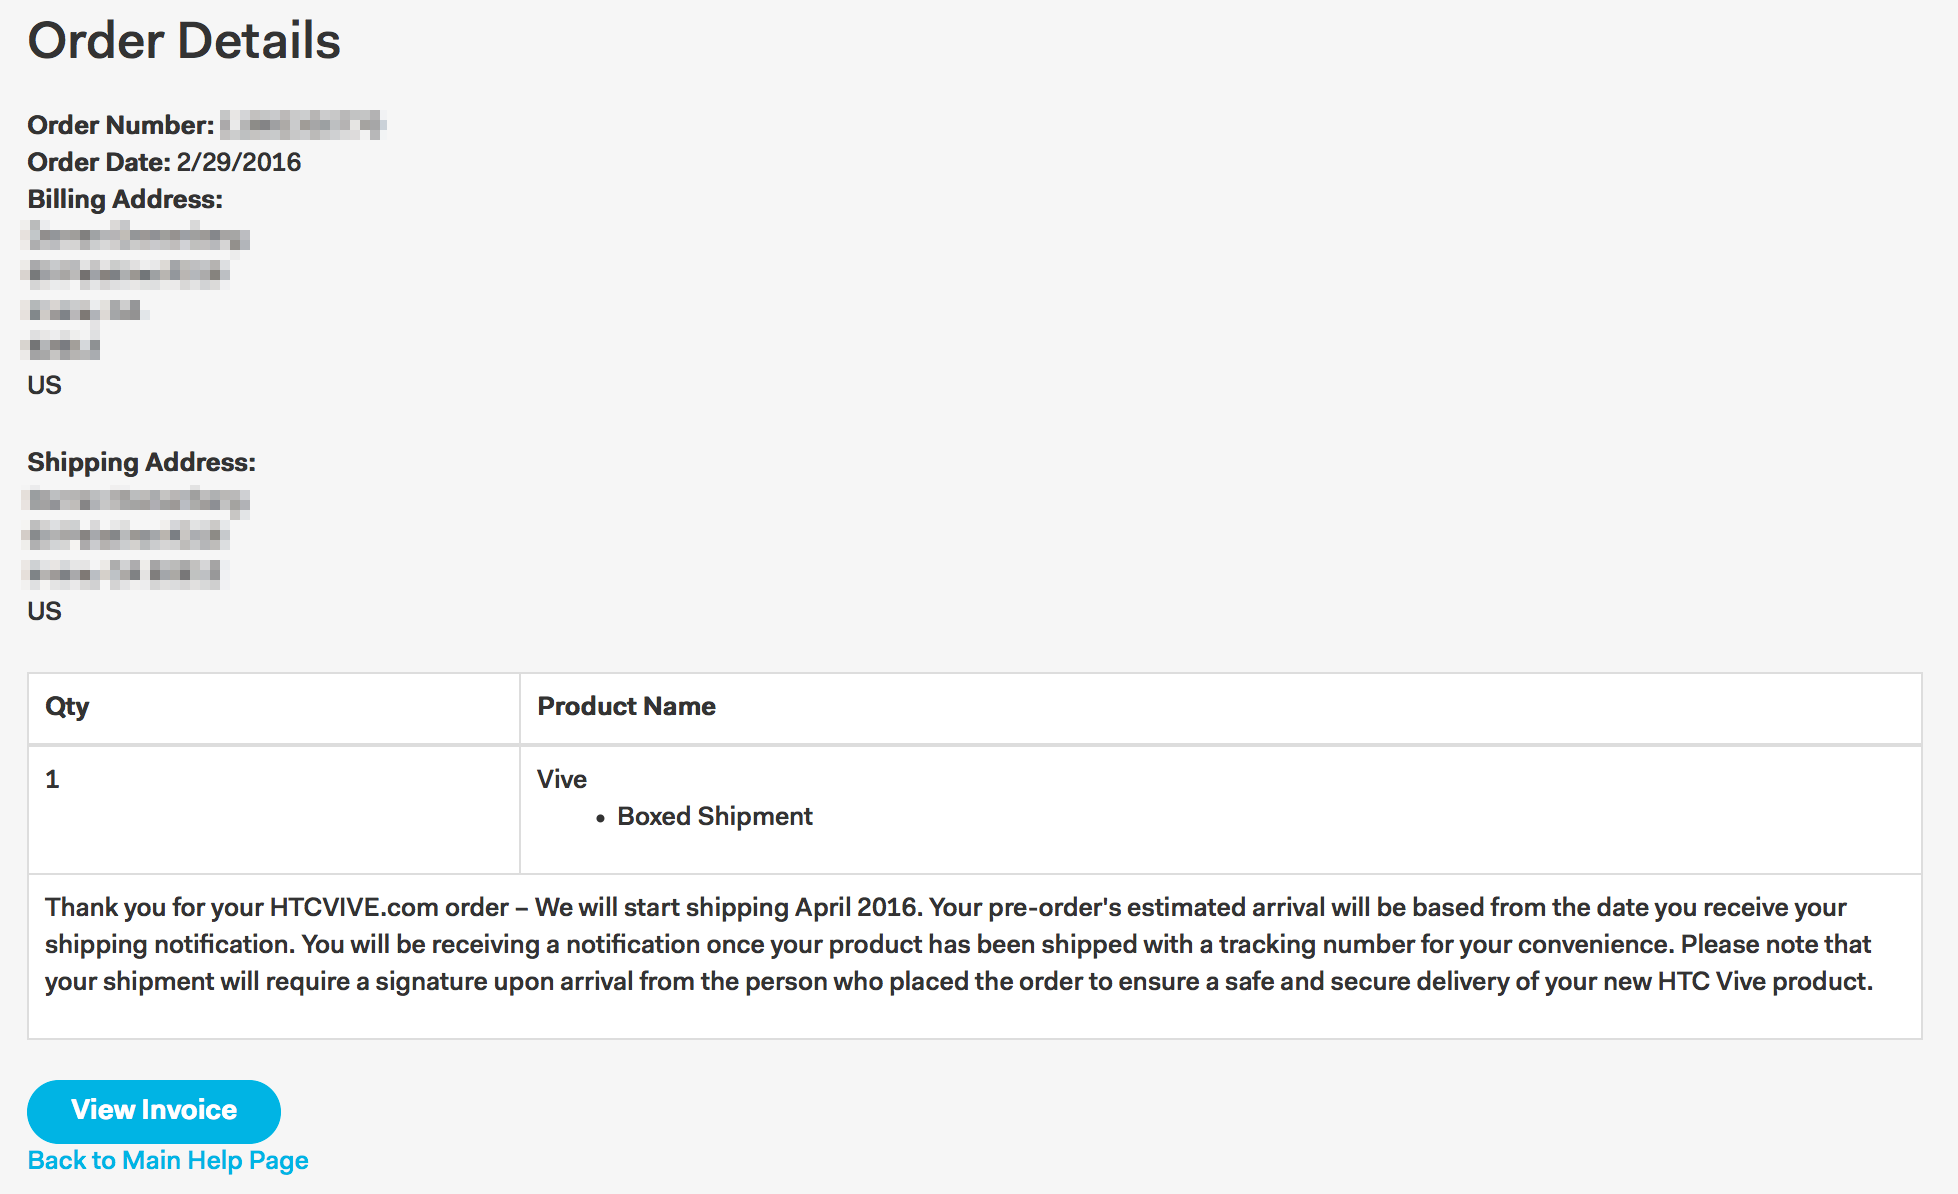
You didn’t think I’d show you where I live, did you?
What *is* interesting is the statement that they will start shipping in April, and the estimated arrival will be based on the date the shipping notification is received. What it doesn’t say is that those who ordered early should receive them early, and I ordered it the second they became available to do so. Daniel O’Brien, HTC’s VP of VR, clarified on Twitter that April 5th is the day they will start arriving to consumers, not the day they’ll start shipping. I also read that some people received emails specifying orders will start shipping in May, not April, which would indicate they are being very particular about order order. You know what I mean.
In other words, on April 5th or thereabouts (it better be thereabouts, dammit), I’m going to take the next 97 days off. You heard me.
Whenever it arrives, I’ll put up a full unboxing and setup soon after.
Bam!

It’s finally happening! Vive Preorders will start on Feb. 29, and I’ll be there even though ordering one will force me to give up luxuries like food and shelter for a few months. It will be worth it, I’m sure, however one of the lingering issues many people are facing is whether their PC will be powerful enough to drive the hardware for a compelling experience.
That’s a valid question, with HTC themselves providing some recommendations for VR-ready PCs. I have a PC, though, one I almost bankrupted myself to build, so needless to say I was crossing my fingers it would be enough.
Thoughtfully, Valve released a test via Steam that determines if your PC is VR ready. I downloaded it, it ran a neat – if two-screened – version of the Aperture Labs demo from when I tried the Vive back in November, and gave me my results.
VR, here I come!
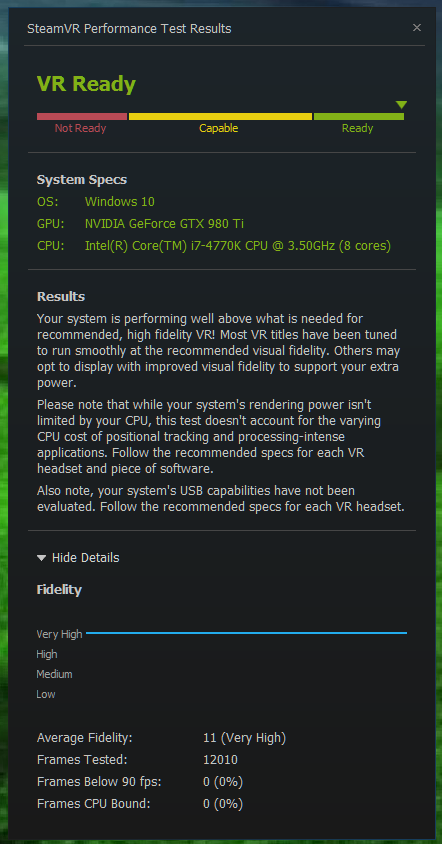
Damn right
If you’re interested, here’s what the demo looked like while running (Screenshot taken from Steam store page, although it looked exactly the same on my machine).
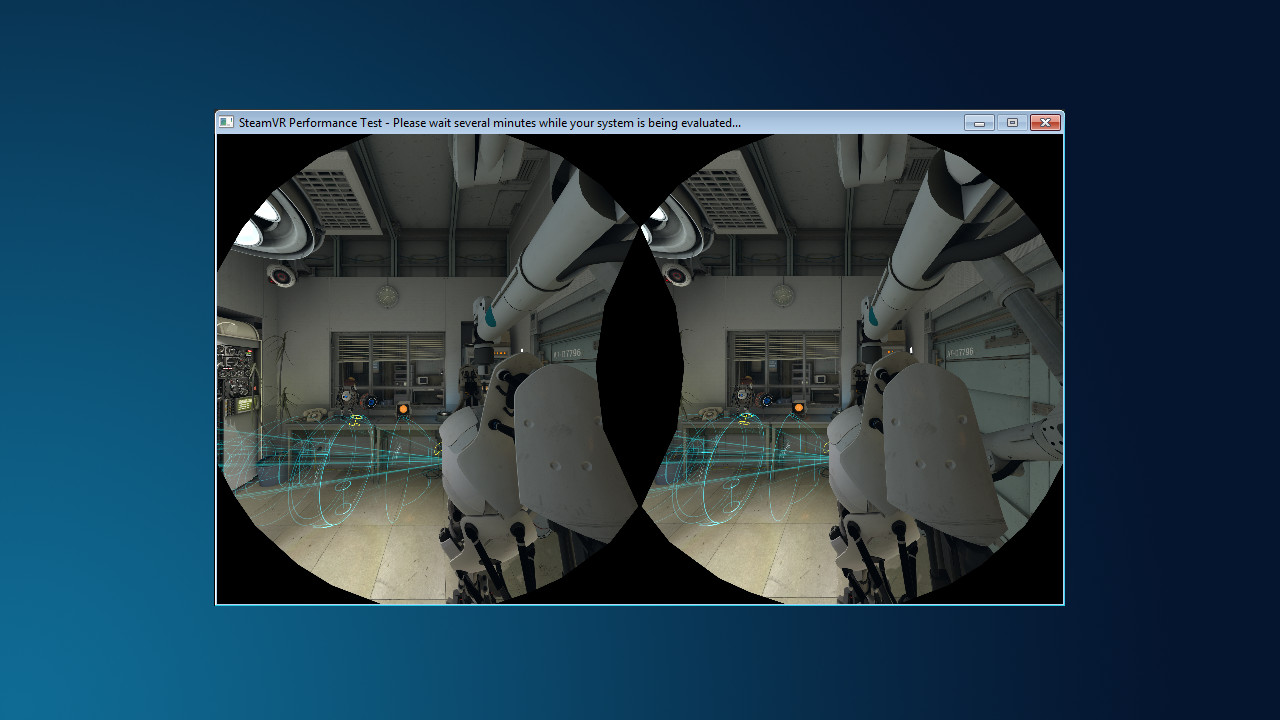
Vive test
A tiny (but expensive) jump into VR

As all my readers know, I am a die-hard proponent of the upcoming VR revolution, and it will be glorious. I thought I could wait for the full-fledged headsets releasing later this year, however after a presentation by a VR company that is partnering with a course I’m teaching, and a demonstration of the latest GearVR headset, I took the plunge.
I went to best buy, got a Samsung Galaxy S and a GearVR, and brought them home. What I had experienced with them already was a fascinating look at current consumer grade VR technology, so I thought it was time to invest, take the plunge, and start experimenting with it on my own.
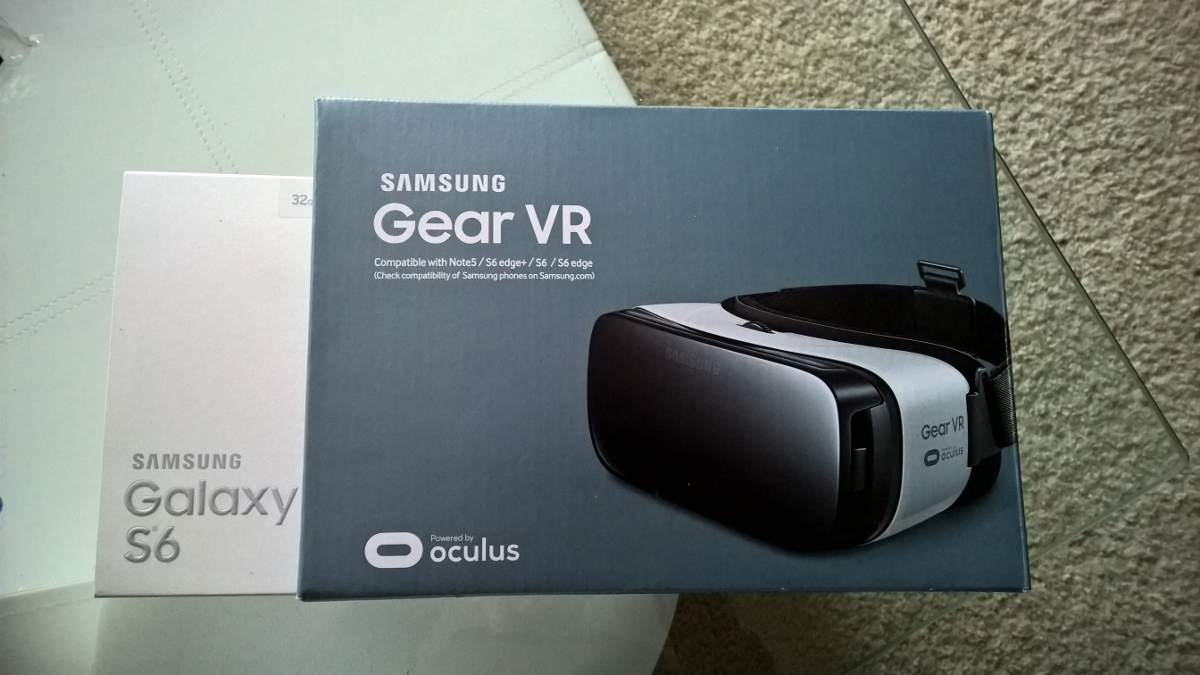
The Boxes
The process was interesting. First, the phone had to charge, and even with it’s Quick Charge technology it still took about 30 minutes. then, getting the plastic carrier out of the Gear VR box was tough, as it was caught on something. I was worried I would destroy the box or the plastic thing to get it out, but somehow I managed with minimal destruction. It did require carefully manipulating it at both ends of the box, and gentle finagling to finally set it free.

The most difficult part of the process