
Tag Archives: Music
DigiTech RP360 XP: The best effects pedal I’ve ever used
I don’t often have the opportunity to talk about music gear on this site, so today is doubly exciting as I not only get to do that, but I get to present what is easily the best effects pedal I have ever used – and I’ve used a lot – the DigiTech RP360 XP.
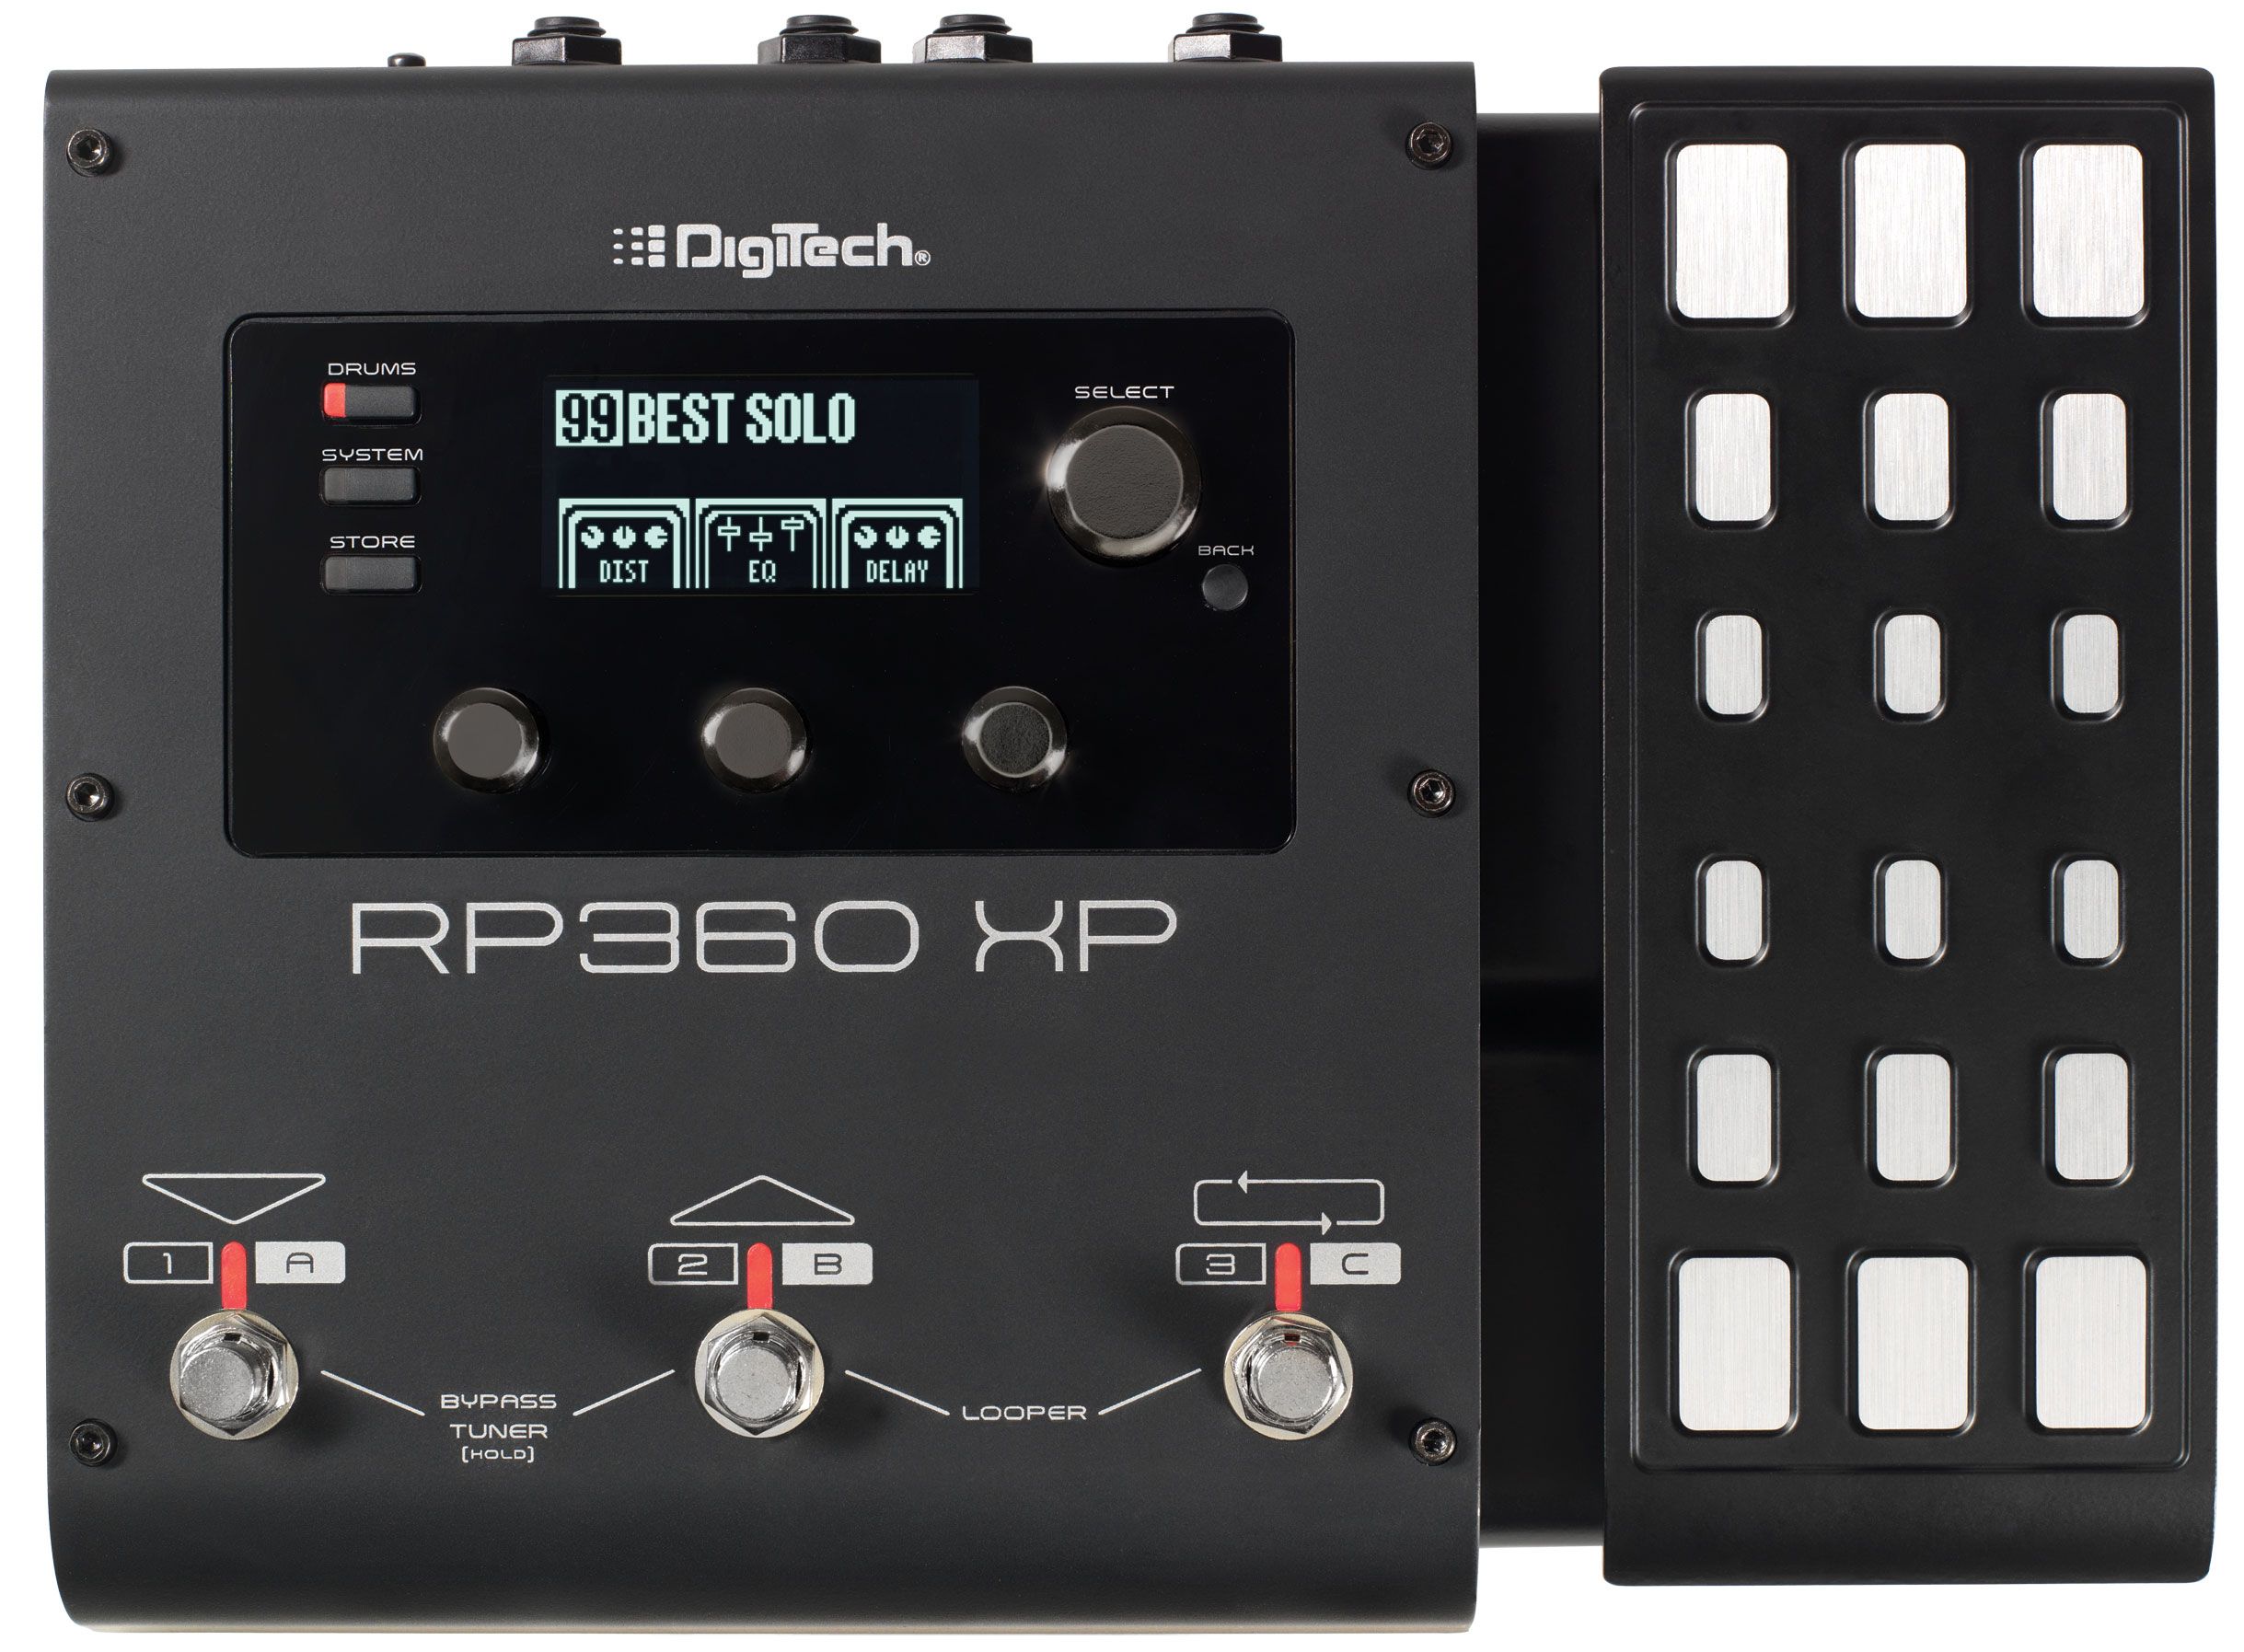
DigiTech RP360 XP
The pedal has so much going on, and it’s all implemented so perfectly, it could be difficult to figure out a place to start, so I’ll start with what it is: the pedal is what’s known as a multi-effects processor; it’s like having a bunch of effects pedals in one. There are 99 individual effects you can choose from, things like distortion and flange and delay and chorus and all the other types of effects you can have and buy individual pedals for, but these are all preset into the RP360 itself. Not only that, for the true tone savant, it comes with powerful software that lets you create your own effects via virtual pedals which I’ll talk about later on. One of it’s biggest advantages is that it plugs directly into your PC, bypassing the need for an amplifier. To say it’s convenient is the understatement of the century.
The pedal has many other functionalities which work beautifully as well. First off, there is a chromatic tuner (if you love going down rabbit holes, compare chromatic tuners to the superior, both in function and price, strobe tuners). There is also a drum machine that, surprisingly, works better than any other I have ever used, even those built into Digital Audio Workstations (DAWs), with the only handicap being they can’t fill out at the end of a song, meaning play a fill at the very end of the song rather than just cut off the beat, something DAW-based drum kits will do. The thing I have mostly appreciated about the built in drums is that they are very straight-forward beats, nothing fancy like jazz beats or break beats or that nonsense, just good, rockin’ beats. Of course, it also has a looper, which allows you to play a musical sequence then loop it back so you can play over it, making you a one man band; if you’ve ever seen those people who play at little fairs or sidewalks or cafes, and it’s just one person but they sound like a whole band, they’re using a type of looper – you can actually get pedals that just do that.
Then, there is the pedal within the pedal, as you can see on the right hand side of the device, and which is why this model has the ‘XP’ on the end. Digitech also makes a pedal-less version simply named the RP360, but it’s worth spending the extra $50 and getting the expression pedal (so called because it allows you to alter the impact of an effect in a continuous manner, such as volume or effect intensity). I love that expression pedal; just using it as a volume control is liberating. On the other hand, if you want to use it for wah or other tonal adjustments, you do you. It’s very versatile just in and of itself and really expands the range of what the whole thing can do. I can’t imagine having the RP360 without it; it’s definitely worth the slight overhead.
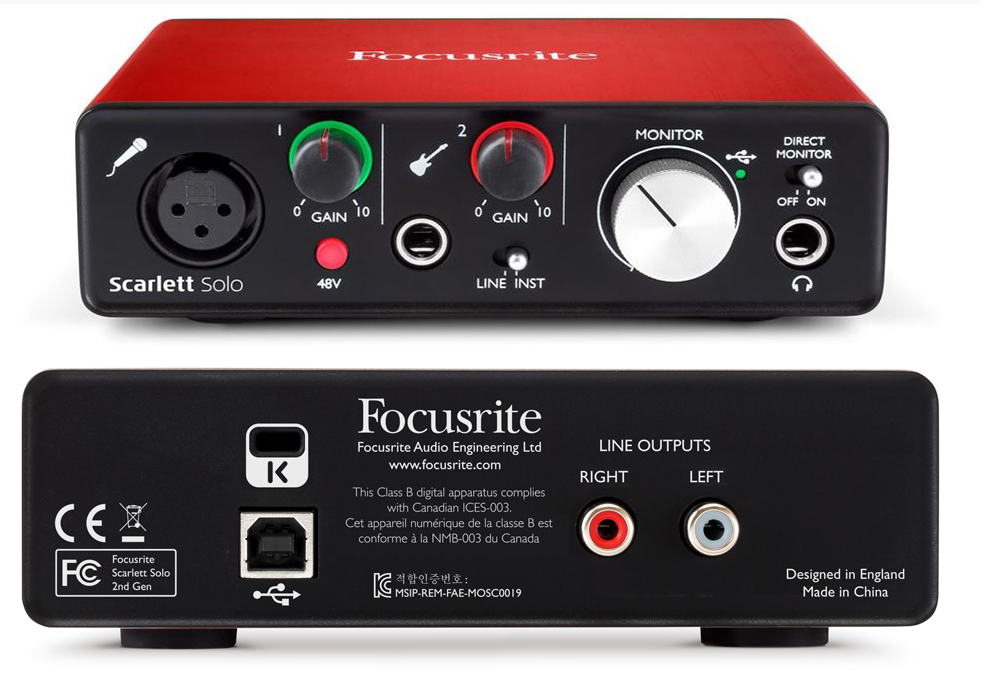
Something else to keep in mind about these pedals is that unlike plugging your axe into an amp, you plug your guitar into the pedal and the pedal into your PC. This can be more serpentine than it sounds. For example, in my setup, I plug my guitar into the pedal, then plug the pedal into a Focusrite Scarlett Solo seen below – that serves as the interface between the instrument / pedal and the PC.
Focusrite Scarlett Solo
This isn’t a post about the Scarlett Solo, so I won’t go into too much detail other than to say you can see there isn’t a lot going on in back; I connected the right and left outputs to a set of Mackie studio monitors and plugged the USB into an open port on my PC – very easy. The front of the thing is where I plug in the pedal using the jack under the little guitar icon (and I only use custom Spectraflex cables – if you’re going to do it, do it right!). Curiously, I have to set the monitor switch to instrument, not line, in order to get proper output levels; I haven’t yet figured out why that is although I’ve been working on it. I also have a separate Blue Yeti microphone I use, so the XLR input there on the left goes unused, at least for now. Here’s the current setup I’m running at home, with an Oculus Rift thrown in for good measure – you can see the DigiTech on the floor, and the Scarlett Solo on the desk. The cable running fro the pedal and into nothing on the floor is what plugs into the guitar. All that’s left now is the cable management.

The setup
You don’t need to do it this way, you can simply run the pedal itself straight into your PC. That being said, the beauty of this whole setup is the amount of fine control it provides over all aspects of the sound. If I’m playing along to a track while recording, or a music file, or even to YouTube, I can set all the levels independently. I can adjust overall volume using the large dial on the right of the Scarlett while adjusting the levels of the instrument itself using the smaller gain knob, but you have to be careful with those: cranking up the gain can introduce distortion, and while gain is often purposefully used for that, unwanted distortion will destroy your carefully crafted tone. That’s why the light around the smaller dial will flash red if the gain is too high, and flash green if you’re within acceptable range. Of course, there are a myriad other ways to adjust sound through software specific methods such as Windows or app specific audio controls, like the volume within a YouTube video or audio application.
So back to the DigiTech. As mentioned earlier, it has 99 preset sounds built in, with flashy names such as White Limo, La Grange, and my personal favorite effect, DualPetaluma – it’s a nice, fuzzy yet subtle overdrive. Some of the names, such as DC/AC, SabbathVoid, Slayed and Gilmour, are obvious, blatant nods to the type of tone they provide. Here’s the list of all preset tones from the manual:
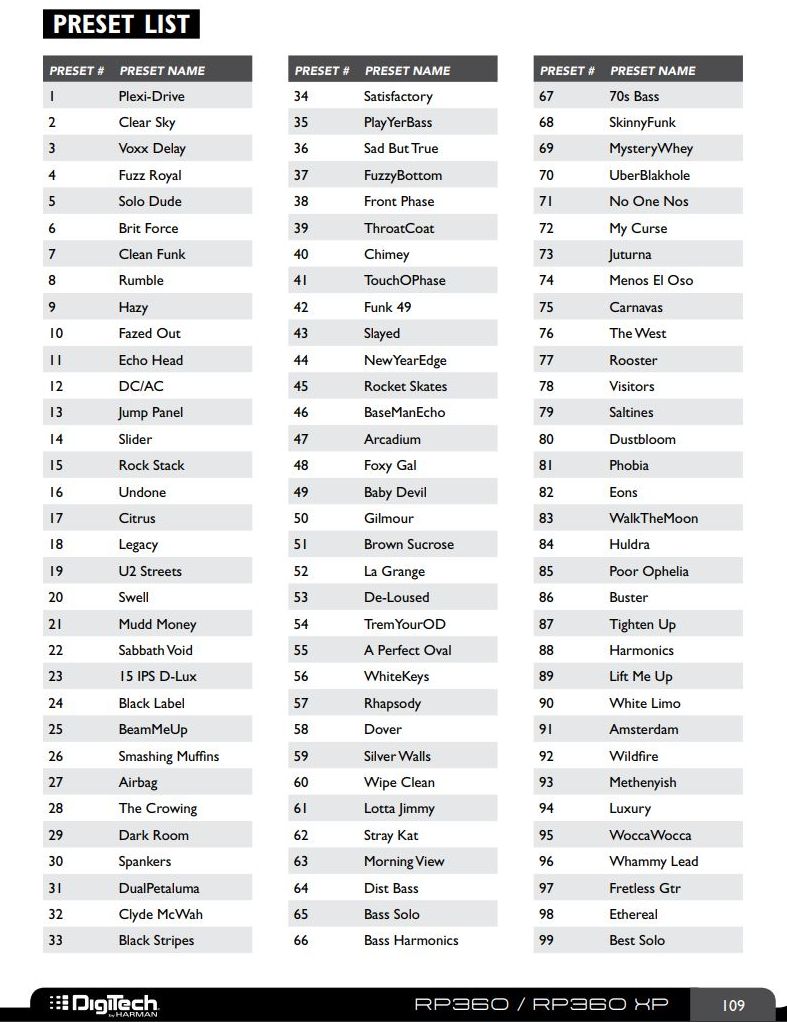
RP360 XP Tones
As also mentioned earlier, DigiTech has made available software called ‘Nexus’ that gives you the ability to set your own sounds effects and tweak them to your heart’s content by using virtual pedal boards. This brings up two very important points that need to be made: First, if you ever watch a professional guitar player, they will have a pedalboard on stage that they use to change the sound of their guitar depending on which pedals are active and which aren’t, and how those pedals are configured. I have a few pedals in my office, if you can believe it, although there is a vast variety of pedals, effects, and manufacturers who supply them. I’ve included a couple of pictures below; the first is one I just found on the web somewhere, and it shows a tiny sample of the variety available, although those are mainly footswitches, meaning you step on a switch to activate them, whereas footpedals seen in the second picture from my office are more traditional (and colloquially known as) stompboxes, where you step on a pedal to activate the effect. Of course, stepping on the pedal just activates a switch anyway – see how it all comes together?
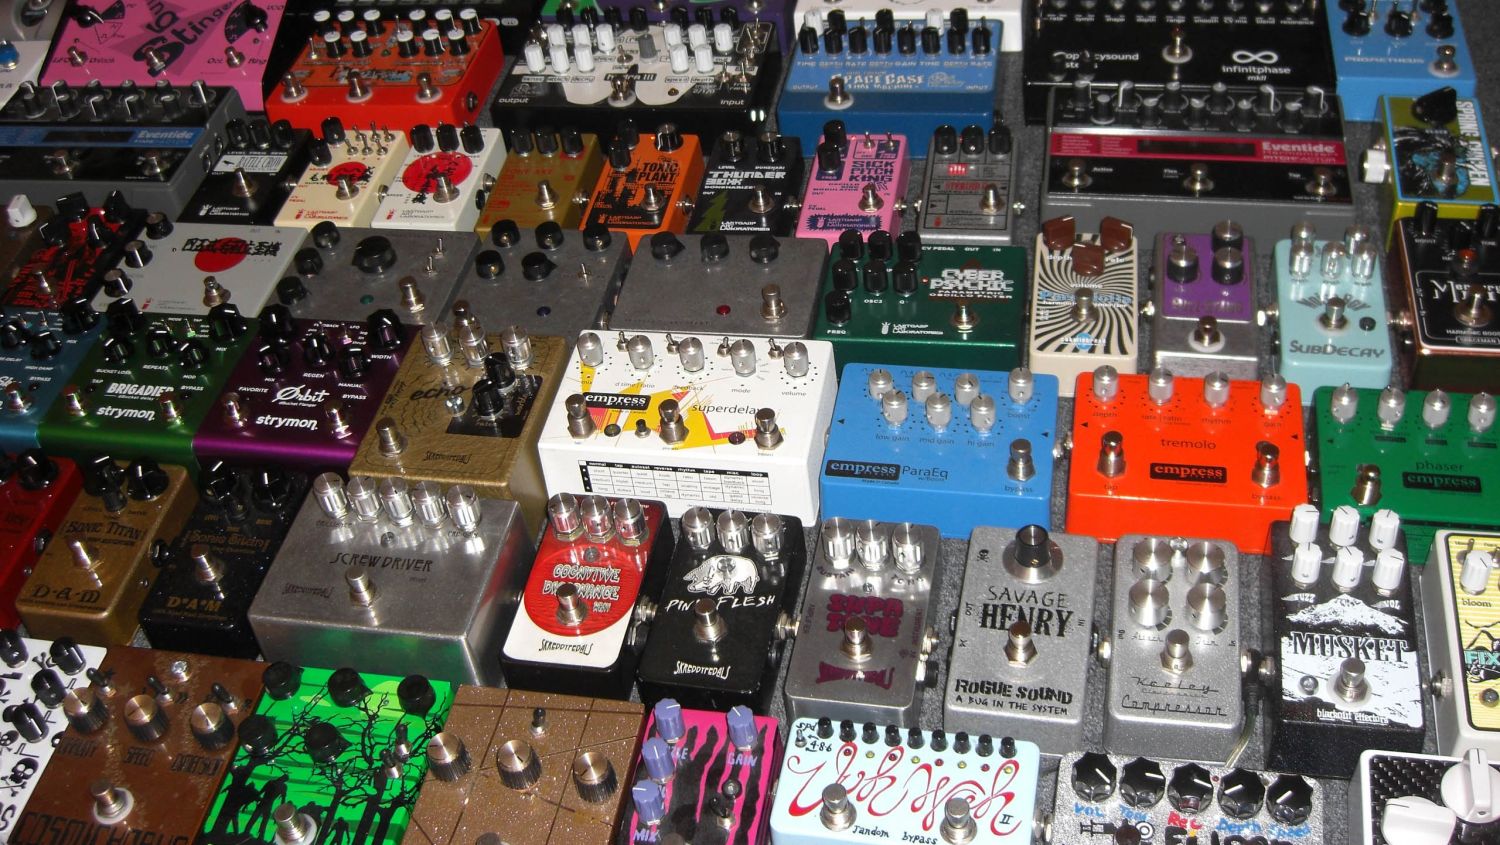
So many footswitches
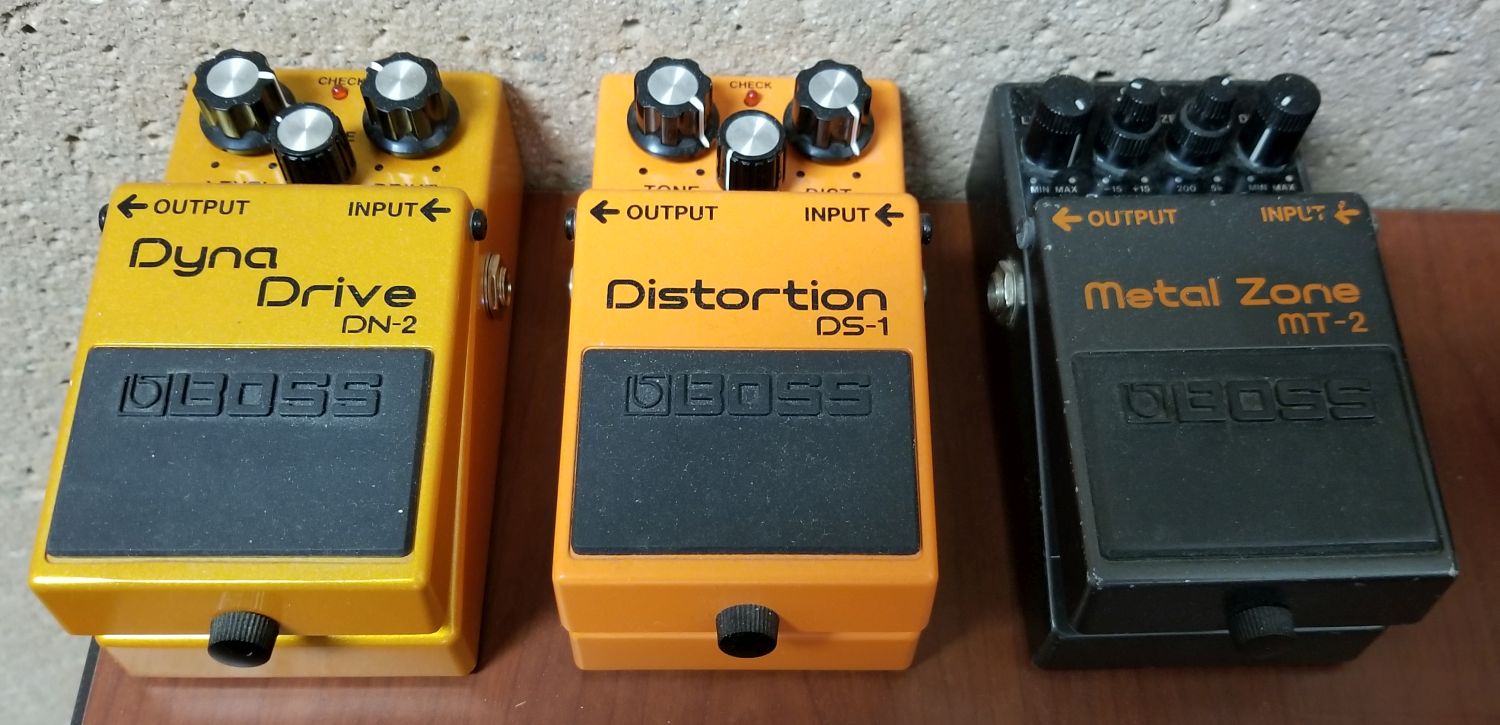
You weren’t an 80s metalhead if you didn’t have a few BOSS pedals
It’s important to mention footswitches and footpedals because the RP360 replaces all of them with a single unit, but it also includes a bunch of individual, virtual pedals that you can tweak to your heart’s content using the aforementioned Nexus software. The other thing to know about guitar players specifically is that we chase tone eternally, always searching for the perfect sound. It’s like the Holy grail; it’s never meant to be found, the truth is in the chase itself, and good thing, too, because perfect tone has never been achieved by anyone that I’m aware of, and we are all still chasing it.
That’s important because Nexus feeds that addiction. You can string all sorts of virtual pedals together, tweak the settings of each one, and play with tone until the end of time. There are many open slots in which you can store your own creations and make them available from the pedal itself, calling forth the glory of your tonal creations with a simple step on the switch.
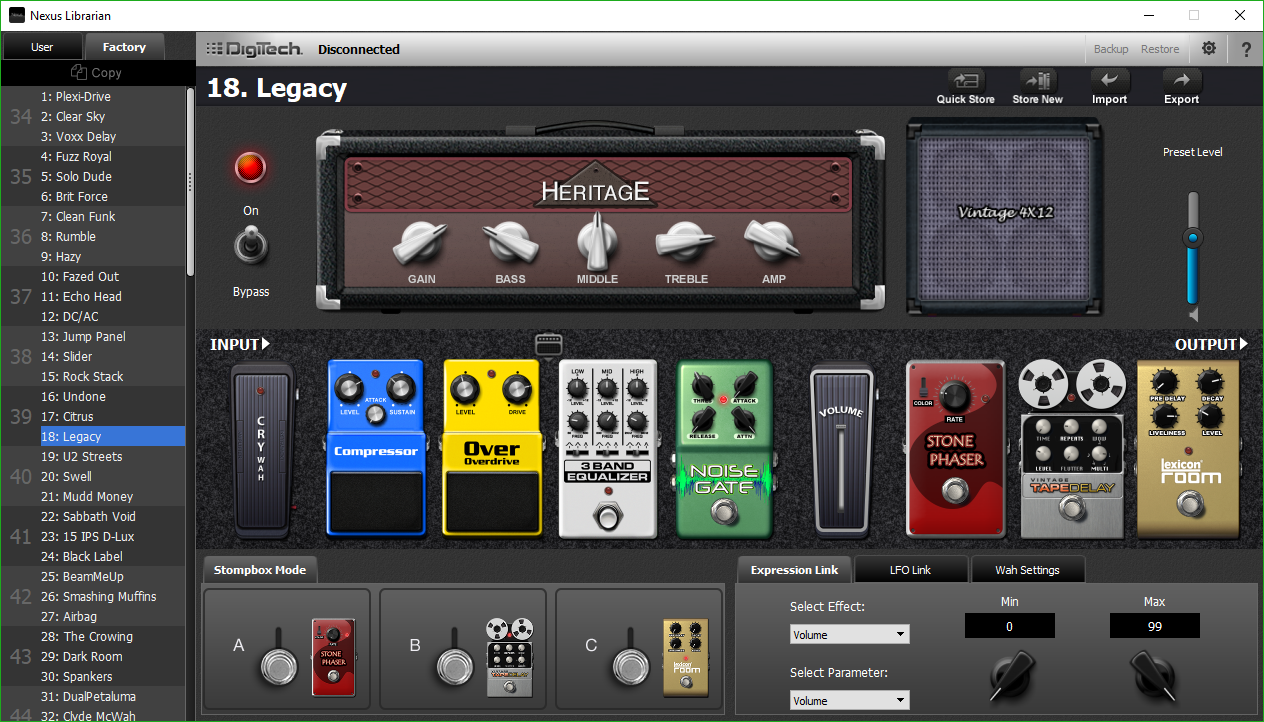
Nexus software
As you can see, you can set up a virtual pedal board with an infinite number of pedal combinations and setting for each. Again, when performing live, even for big shows in stadiums or arenas, guitarists will have actual pedal boards that don’t look too different from what you see here, and even the order of how the pedals are daisy-chained can have a big impact on sound with later pedals processing earlier pedals’ sound. But the DigiTech comes to the rescue and puts them all in one, although order still matters. I’d also like to give them credit for so carefully avoiding a copyright issue – these are all modeled after real pedals, and some are pretty close. For example, if you look at the far left, you’l see what they call the ‘Cry Wah,’ when there is an actual line of pedals called the Cry Baby wah, so they’re threading the needle here in some cases.
You can also choose the type of amp the thing models, as different amps often have different sounds (Marshall or Fender for straight up rock walls, Vox, known for the British sound of the 60s, similar to Orange, a versatile amp used for decades which also happens to be my personal favorite brand, and many others). All amps have unique, identifying visual designs and you can see that in the head / cabinet setup at the top of the Nexus window they mimic the visual design of actual amps but not the name, just as they did with the pedals. Very nicely done.
Anyway, you can see how someone could just endlessly tweak from now until the end of time, making slight adjustments in their endless pursuit of the perfect tone. This is also where the user would set the impact of the expression pedal; here it’s set to adjust the volume, which is also my main use for it, although it can additionally be used to set the wah effect and impact. LFO is Low Frequency Oscillator which lets you have an effect, well, oscillate in and out, or ‘breathe,’ as musicians say. I’ve never had the need to use that, so I can’t speak to it here.
The last thing I want to mention about the software is that because the pedal, at least in my case, is not connected directly to the PC, the software doesn’t have any effect. I could run a direct USB connection from the pedal directly to the PC to load the sounds and get firmware updates, but the way my own personal set up is being run, I would have to run an additional USB from the pedal to the PC. Just something to keep in mind.
Finally, I use a free software DAW, or Digital Audio Workstation, called CakeWalk for recording, which is a separate post to itself. I’m currently recording a song called ‘Howl,’ and here’s a screenshot of the DAW in the middle of that process. You can see I’ve already laid down rhythm guitar, lead guitar, drums straight from the pedal, and am getting ready to add vocals, which usually come last. The ‘wolf’ tracks are sound effects which I’ll merge into a single track later.
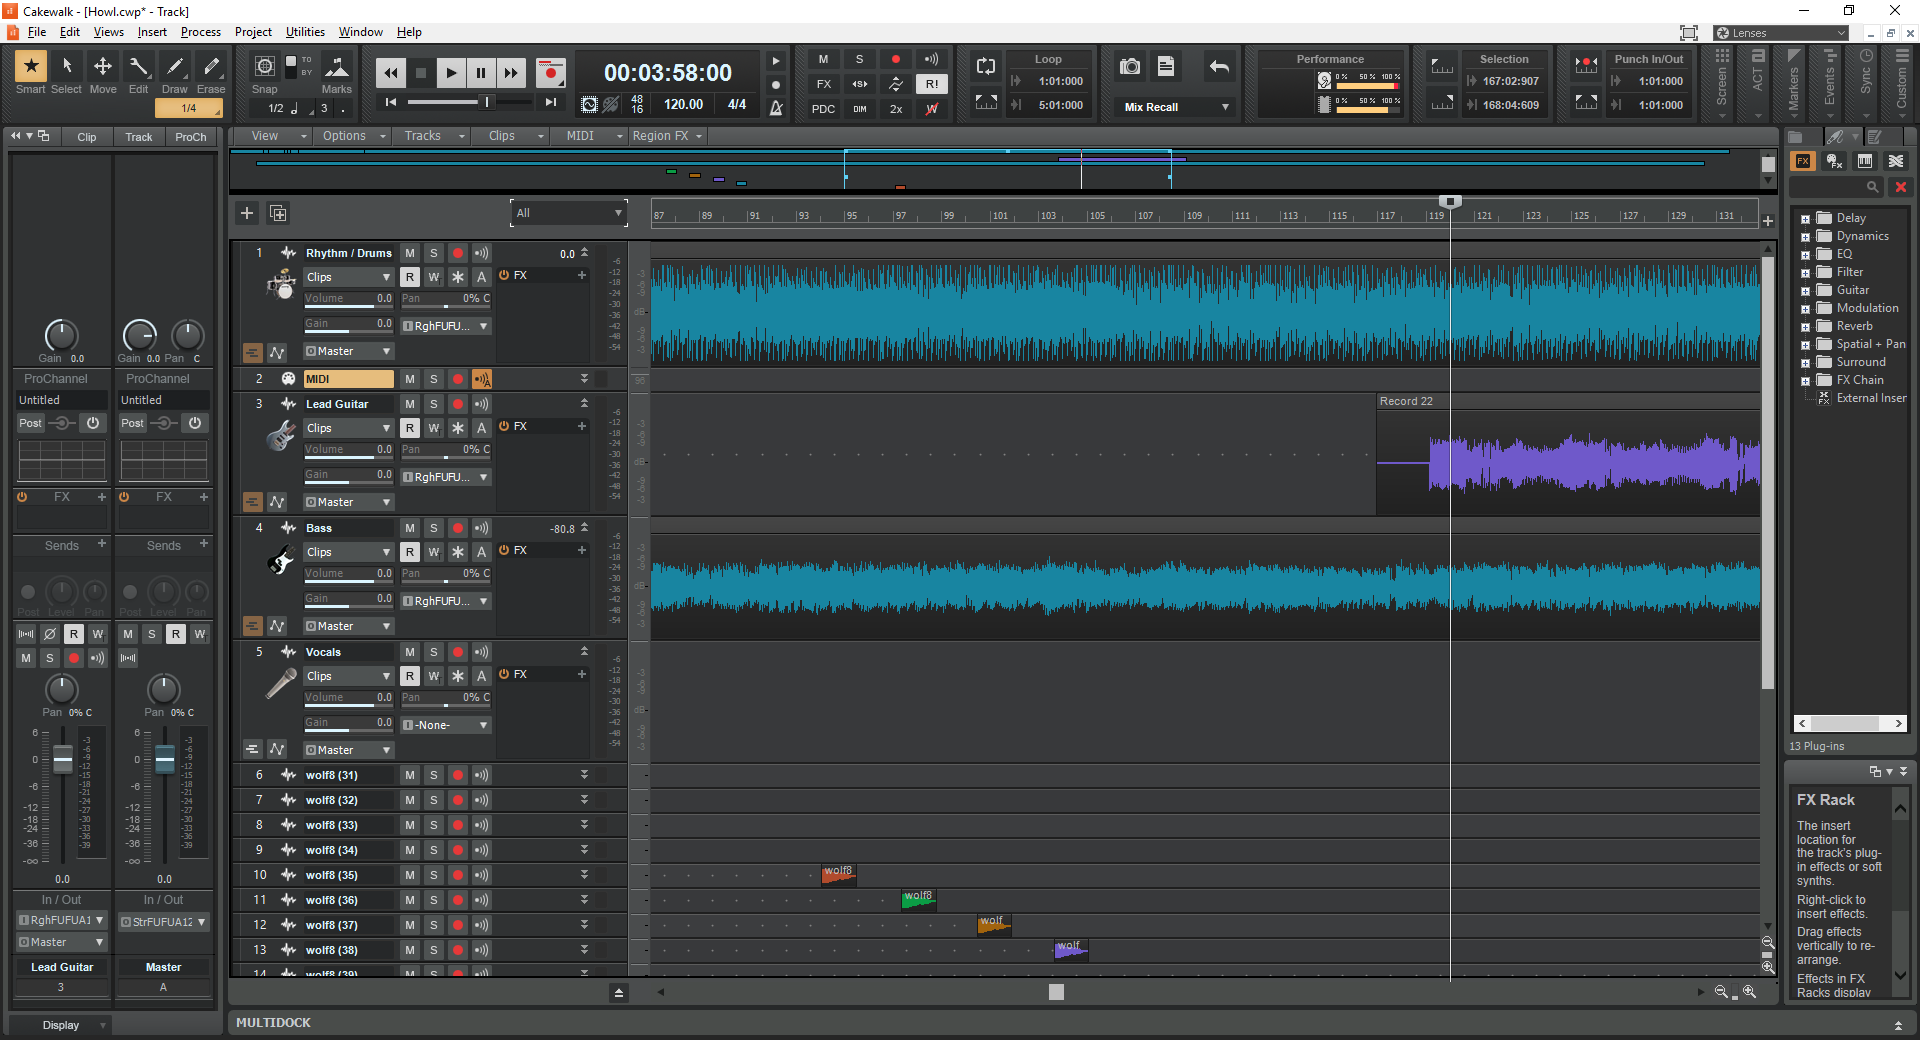
Cakewalk
Using the pedal, whatever I play gets recorded straight in, and since I use a separate mic, and the pedal has built-in drums (whose tracks can be a nightmare to separate from any pedal-routed guitar tracks), and it can be used with bass or anything else, I can record whole songs on my own, without having to go into a studio. While I have lots – LOTS – of studio experience, being able to record at home is so nice. I can send tracks I’ve recorded around to others, or they can be sent to me, and so when the principal songwriter of the band I play with writes a new song, we can each record our own parts then mix the whole thing down, or one person can record his part, then send the track to the next person who adds his track, and so on until the song is complete. Really easy and doesn’t require everyone in the same place at the same time for the ever-increasing expense of studio time. On a side note, if you’re interested, you can hear a sample of our stuff, with me on bass, here (pop), here (surf), and here (hard rock).
So let’s give it a listen, see how it sounds, see how it works, and if you’re looking to expand your sound, consolidate your pedals, do some recording, I can’t recommended this pedal enough. It’s not just the best pedal I’ve ever used, it’s one of the best anything I’ve ever used.
Let’s listen to some (obscure) game music!
(Crossposted from theexperiencebar.com)
This isn’t an article about JRPG soundtracks being performed by symphonies or the great song selection in Grand Theft Auto or the Fallout series, or Song of the Dragonborn, or the track lists for Guitar Hero/Rock Band/other random plastic-instrument game. Those already get a lot of attention.
Here, I wanted to focus on the really obscure songs that I think add immeasurably to a game yet never got the recognition they deserved. I have a couple that were written specifically for games that stand on their own as eminently listenable songs in their own right, and a couple that so complimented their game that the entire game would have been lesser without them.
And I’ll even give you a surprise at the end.
There aren’t that many that spring to mind, so luckily this will be short and not one of those absurd “100 best video game songs of all time” lists.
Off we go!
I’ve jumped into home recording
I have always adhered to the belief that because sound is analog, it should be recorded, stored, played back and heard as such. It is not meant to be digital, either in form or function, and I am glad to see that there has been a not-so recent resurgence in the vinyl album market as people begin to realize the shortcomings of digital music (or the advantages, if you do it right).
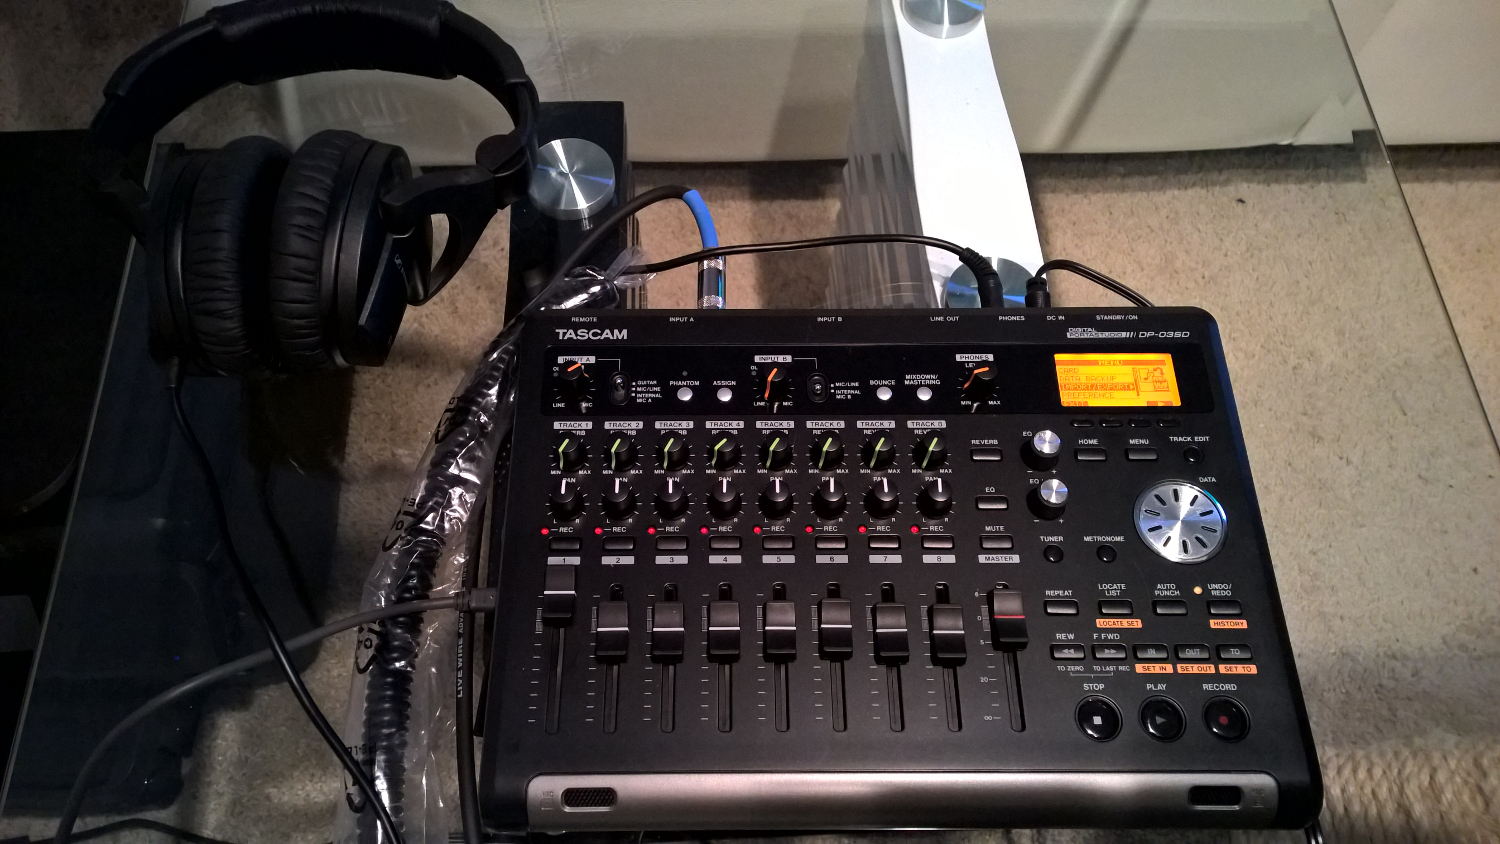
However, a couple of years ago, I went into a Maryland studio with my bandmates to record our latest opus, and was looking forward to what is always a soul-cleansing experience – creation. Taking a song that came from nothing and going through the recording process to create something tangible and permanent is one of the joys of my life. I never get tired of being in the studio, ever.
We had worked with our producer many times before over the last twenty years, from his humble beginnings with a small mixer to his current status as a world-renowned engineer and faculty member at Johns Hopkins’ Peabody Institute. Throughout those years we used many forms of storage for the recordings. We recorded to ADAT, SVHS (the latter dependent on the former and vice versa), even regular old cassette, all sorts of media that was considered the best at the time. Regardless, even though some like ADAT will claim they’re digital, the medium is not; it’s still magnetic tape.
Set up your own personal streaming video library
(This post will be sticky for a few days, so new posts will appear underneath it)
Based on some feedback I received both in class and via email, I decided I would write a post that walked through the steps of ripping and naming files and configuring clients. After taking around fifty screenshots and writing a whole lot, I realized it would be much easier for me to record some videos, and hopefully much easier for you as I could cram a lot of information into a hands-on demonstration that would provide visual context. .
Therefore, over the weekend I recorded three videos, each covering a particular aspect of setting up a media library, and I have embedded them below. I will also post them to their permanent spot on our brand new Videos page. Each is about 20 minutes long, and they’re easily digestible (I hope). The first covers riping and properly naming your media, the second covers using PLEX Server to set up streaming, and the third covers using XBMC as a dedicated media manager.
As I mention in the first video, the process isn’t necessarily complex, but there are steps involved and considerations that have to be made. Once you’ve you’ve gone through the initial setup, however, adding media is relatively easy.

A different view of XBMC than what you’ll see in the video