
Category Archives: Technology
The Lawnmower Man, and Vintage CGI

Inspired by a couple of Reddit forums to which I am subscribed, VintagePixelArt and VintageCGI, and being a fan of all things historical as it pertains to technology, I uploaded to the latter a brief scene from the 1992 CGI-fest movie The Lawnmower Man,’ supposedly about a guy who killed people using a lawnmower. Based on a book of the same name by Stephen King, King sued to have his name removed from the movie as it bore – barring one minor scene – absolutely no connection to the book. Rather, the movie was used as a vehicle to show off what the state of CGI, or Computer Generated Imagery, was at the time. The 30-second plotline is Dr. Angelo, a scientist funded by a shadowy company, is researching whether or not Virtual Reality can be used to enhance the human cognitive capabilities, or even unlock potential powers. He recruits Jobe, who helps around the grounds at local church and suffers from cognitive disabilities, and straps him into a complicated VR setup that turns Jobe into a god who ends up not acting very godlike.
The movie was fun, but the real purpose of the thing was to show off what the state of the art was in terms of CGI at the time, and also present what was at that time a still-unknown technology: Virtual Reality. Here is the clip I uploaded; I just clipped the scene out of the movie file:
In 1992 when the movie was released, commercial-grade computer generated imagery was created primarily on Silicon Graphics workstations, which at the time were the powerhouse machines of the day. Now, we have laptops with more computing power, but back then SGI workstations were the top of the line pro setup, and everyone from movie studios to science labs to government agencies wanted them for their ability to do everything we take for granted today: Simulations, animations, visual manipulation, prediction, etc.
They didn’t necessarily use special processors or OSs, in fact many of them ran on Intel processors and Windows NT, although other versions ran on UNIX. The difference was their proprietary hardware architecture, and compared to what commercial PCs had at the time, the SGIs were far more powerful. $4,000 would get you their low-end model: a Pentium II-powered box with 128MB of RAM. You read that right. This is a Linux box SGI, the O2:
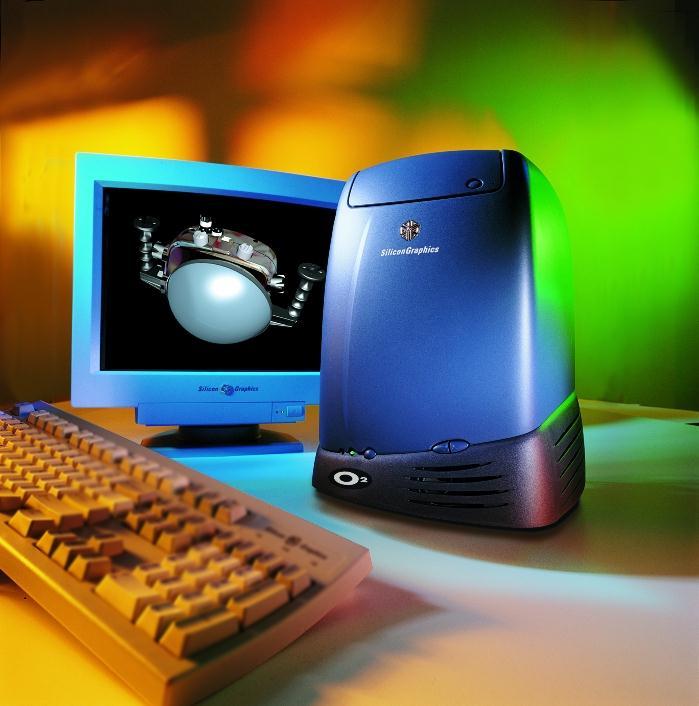
SGI O2
Appropriately, the former SGI building in Santa Clara now holds the Computer History Museum.
Movies were used as vessels to show off incredible, and sometimes not so incredible, computer imagery quite often. The absolute king of the hill in this area is the original TRON (1982), which not only used CGI but many other tricks as well, and gave us a glimpse of what life might be like inside a machine when computers and technology were still largely undiscovered country but arcade machines had already left an indelible mark. A perfect example of TRON’s influence is in the famous light cycle scene.\
The first ever use of CGI in a movie was all the way back in 1976’s Futureworld. This movie used a scene of a CGI hand that had originally been developed by Ed Catmull, a computer scientist at – wait for it – teh University of Utah (see below) who went on to create Pixar! Here’s the scene from Futureworld.
Computer capabilities in terms of imagery, visualization and rendering has been the fascination of many for a long time. One image has even gained celebrity status: The Utah Teapot. (Side note: I usually prefer not linking to Wikipedia, however the University of Utah’s own Utah Teapot page links there!).
The Utah Teapot, created in 1975 based on the need for a perfect shape, has since become the introduction to computer graphics, and has been featured extensively in other computer animated environments, with my personal favorite of course being its appearance in the animated sequence from The Simpsons’ Treehouse of Horror episode, titled Homer(3), in which Homer gets sucked into the horrific THIRD DIMENSION. You can see the teapot at 2:21 when Homer realizes he is ‘so bulgy.’ There are many other neat references in the scene. This scene was based on an episode of The Twilight Zone, a prophetic show in and of itself, called ‘Little Girl Lost,’ in which a girl is transported to the fourth dimension from the third.
Because we didn’t have immediate access to the capabilities of technology back then, especially computer animation, seeing it was a revelation. This was capitalized on by a series of (originally) DVDs, later laserdiscs, titled ‘The Mind’s Eye (1990).’ The followups were Beyond the Mind’s Eye (1992), Gate to the Mind’s Eye (1994), and Odyssey Into the Mind’s Eye (1996). Each was about an hour long and contained a series of CGI vignettes set to music. These vignettes were created by graphics firms, advertising firms, and others, and often scenes created by different companies were woven together and set to music to tell a story.
I first saw a scene from The Mind’s Eye being displayed on a giant display TV in front of a store (I don’t even remember which store!) in Security Square Mall in 1990, and I was mesmerized. I should have been amazed by the TV, but it was the visuals on it that really blew me away. It’s not my favorite scene in the series, but it holds a special place in my heart for introducing me to the series and for telling a touching story to boot, about a bird and a fish that destiny has deemed will be together. A hopeful allegory for today. Here it is:
I can’t find any information about who actually created this animation, so if you know, please pass it on! You can also watch the entire movie on The Internet Archive.
My favorite scene from the Series is found on the Second release, Beyond the Mind’s Eye. This one is called ‘Too Far’ and contains multiple scenes from various artists, including what might be my favorite animated character ever, the once famous Clark. There’s a lot going on in this segment, and it’s a masterpiece of CGI of the time.
Now here’s where it all ties together: The CGI created for the Lawnmower Man was also included in scenes from Beyond the Mind’s Eye. Not only that, the movie’s CGI was created by Angel Studios, which would later become part of billion-dollar video game powerhouse Rockstar San Diego. See how it all comes together?
In the years that followed, machines like the Amiga and of course Macs and PCs overcame the need for dedicated workstations, although the term persists. And now easy access to all sorts of graphical capabilities is at our fingertips, with engines being able to calculate what we can see and what we can’t and render accordingly, or cast rays of light based on reflection and refraction, or apply textures to surfaces, and so on. But that’s what makes these creations so much more impressive; using the tools of the time, they still were able to create such magical animations.
Jony Ive leaves Apple

As someone who teaches extensively about design as it intersects with technology, and is also a computer and technology historian, I am conflicted about Jonathan (Jony) Ive leaving Apple. Mainly because he’s not really leaving, however any sense of him doing so makes me think Apple will continue to move away from the designs for which it is so noted.
While he will no longer be part of Apple, he has decided to start his own design firm and will continue to contribute to and work with Apple. This seems like a very smart move, especially considering he was the creative force behind such behemoths as the Ipad, original and subsequent IMacs, everything in the IPod / IPhone line, Apple watch, and who could forget one of his first big projects, the TAM, or Twentieth Anniversary Macintosh, priced at an insane $7500 in 1997, but having many luxury amenities such as a leather wristwrest and no two being the same (none had the same startup chime or color, for example).

The TAM, or Twentieth Anniversary Mac
Not all of his ideas were a success; while the TAM was his first big contribution to Apple design, he had also worked on the Newton, which by the time he got involved was already flailing and clearly on its way out. In fact, it’s one of the first things killed off when Steve Jobs returned to save Apple. It was at the time of that return that Jobs asked Ive to stay on as a designer and help get Apple, who was in financial distress at the time, back on its feet. It’s well known that Jobs and Ive were aligned in terms of what design is and what it should be, and with the two of them working together the result is a company that is now one of, and often the, most highly valued companies not just in the world, but of all time.
In a bittersweet way, Ive’s leaving Apple signals the end of Steve Jobs’ influence in the company he helped found, which may be one of the reasons Ive has decided to now forge his own path. When Jobs returned to help the floundering company, and asked Ive to help him, a powerhouse was formed. With Jobs gone and Ive leaving, it is now the company that it is, and I fear for its future as it moves away from the design principles that made it what it is and into more services that may dilute its brand.
I have a deep and profound admiration of Apple, even as they seemed to have recently lost their way: A focus on subscription services and less of a focus on hardware and design, but they were the company that made computing and technology popular and sort-of accessible back in the day. Believe it or not, Apple, especially with their IIe line, was the computer to have for gaming and productivity, and you can still experience that through multiple online emulators such as VirtualApple.org, AppleIIjs, or using the AppleWin emulator and the massive disk image collection at the Asimov archive or Internet Archive.
They were instrumental in bringing design to what was other fairly mundane technological designs. Indeed, PCs of the day were commonly referred to as ‘beige boxes,’ because that’s just what they were. Have a look (images sourced from the vogons.org message board about showing off your old PCs, and has many other great pictures).
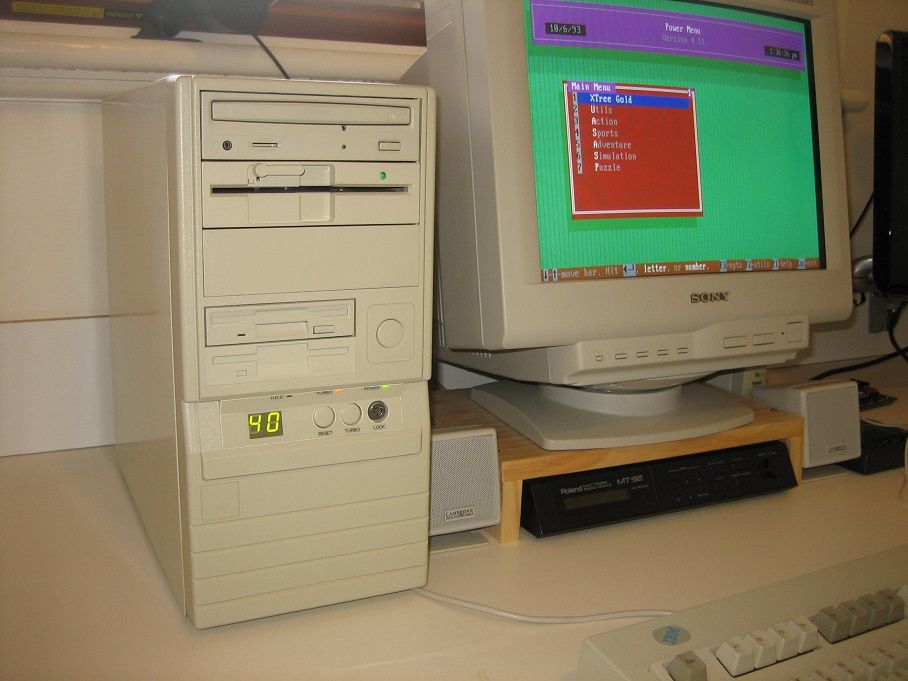
A ‘beige box’ computer
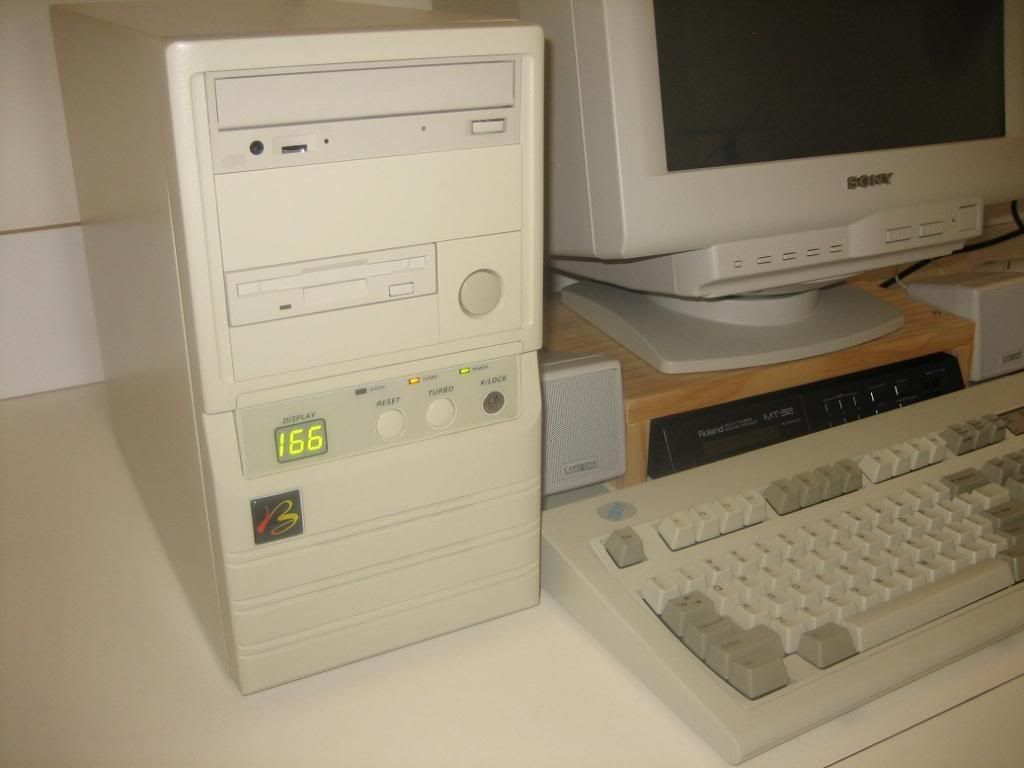
Another ‘beige box’ computer
Side note: Surprisingly, although I consider myself design focused, I don’t hate these. Probably because of nostalgia and the many fond memories I have of the days of manually setting IRQs and needing to display your current processor speed, but nostalgia powers many things.
Side note number two: I actually went to the same high school as both Steve Jobs and Steve Wozniak; Homestead High in Cupertino.
So farewell to Jony and hopefully you give us many more outstanding designs in the future, farewell to the Jobs era of Apple as the company struggles creatively without him, and I am keeping hope alive that form and function in design will continue to reign.
Determine what application is preventing your USB drive from ejecting [Win 10]

Boy, I haven’t posted in a while; it has been very, VERY busy here. As penance, I will make up for that with a post that addresses a common problem that afflicts us all: How to determine what application is preventing your USB drive from properly ejecting.
You know the deal: You try to eject your USB drive properly (which you should; otherwise a voltage change or write operation could damage data or the drive), only to have Windows give you the following dreaded dialog:
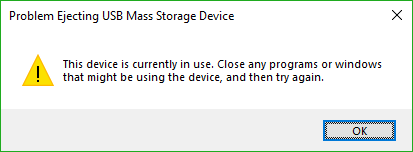
Uh Oh
The problem is, this dialog tell you absolutely nothing, other than something is using your USB drive. What are you supposed to do about this? Randomly shut down applications until it ejects properly? Save everything and reboot? What if the problem is not an open app, but a background process? How can you actually find out what app is causing this conflict.
Turns out, it’s not too difficult.
The first thing you want to do is open the Event Viewer, which allows you to see everything that is happening in your system, including recent alerts and what caused them. If you search from the start menu, it’s the only result you’ll see.
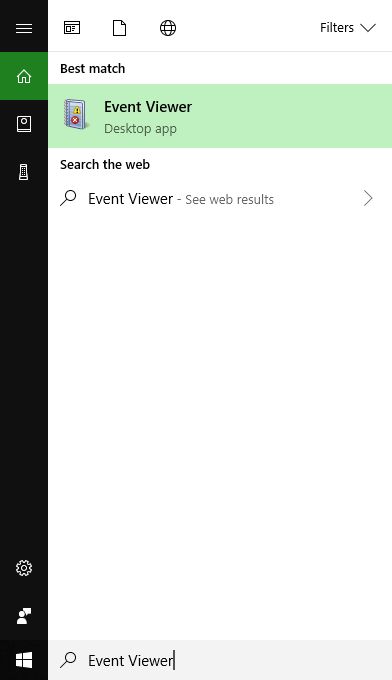
Click on the that, and the main Event Viewer interface will appear.
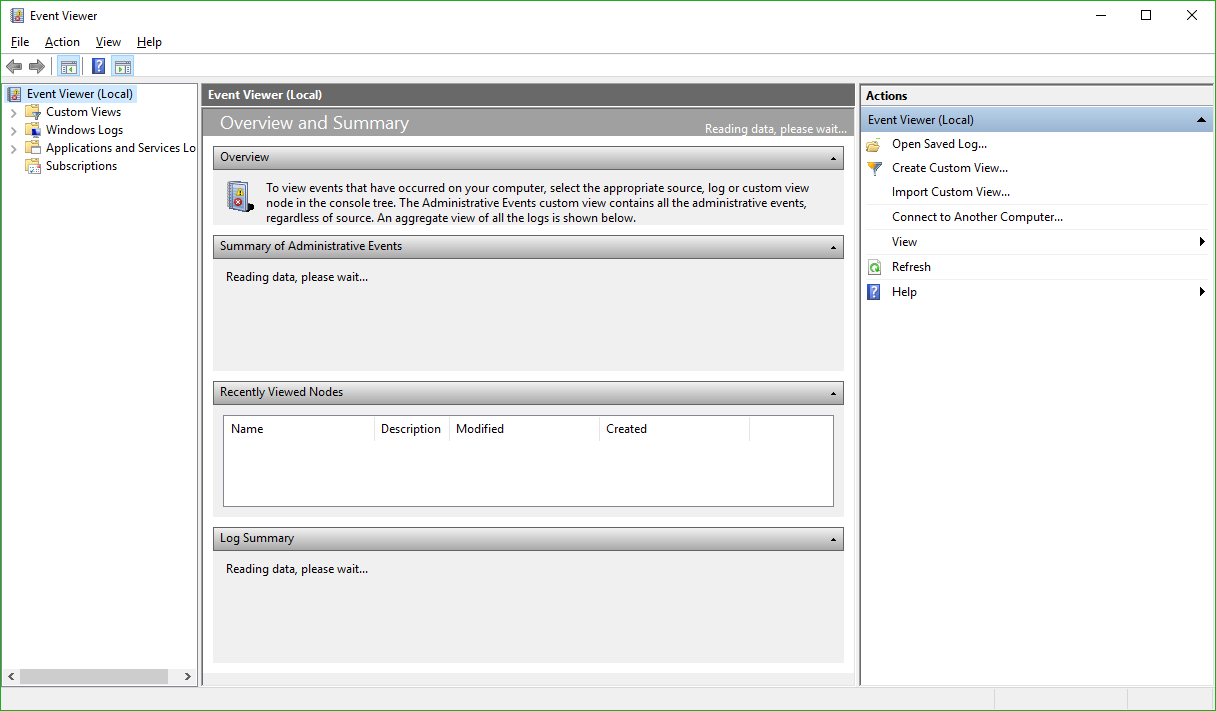
Main Event Viewer Interface
There are a lot of options, and a lot you can do from here. In fact, Event Viewer is a very powerful tool that it doesn’t hurt to become familiar with. For our purposes however, we will need to expand the ‘Windows Logs’ menu on the left hand side, then choose the ‘System’ log underneath that as non-ejecting is a system event.
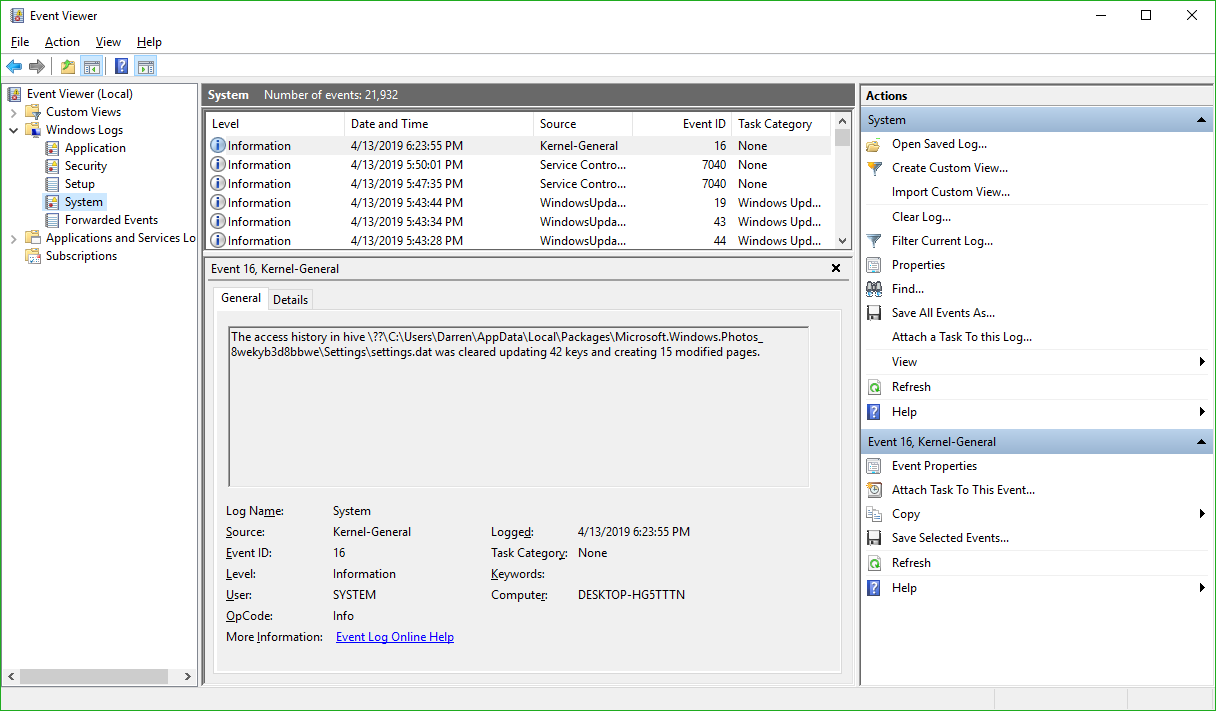
System Log in Event Viewer
You’ll notice the fourth column in the main window is ‘Event ID.’ We need to see events that have an Event ID of 225. If you examine this log immediately after your USB drive fails to eject, you’ll see what you need to see right at the top of the list. However in the image above we don’t have that, so we have to filter the results to only show us events classified as 225.
In the right hand panel of the window, you can see the option to ‘Filter Current Log’ as the fifth entry down. Select that, and the filter window appears:
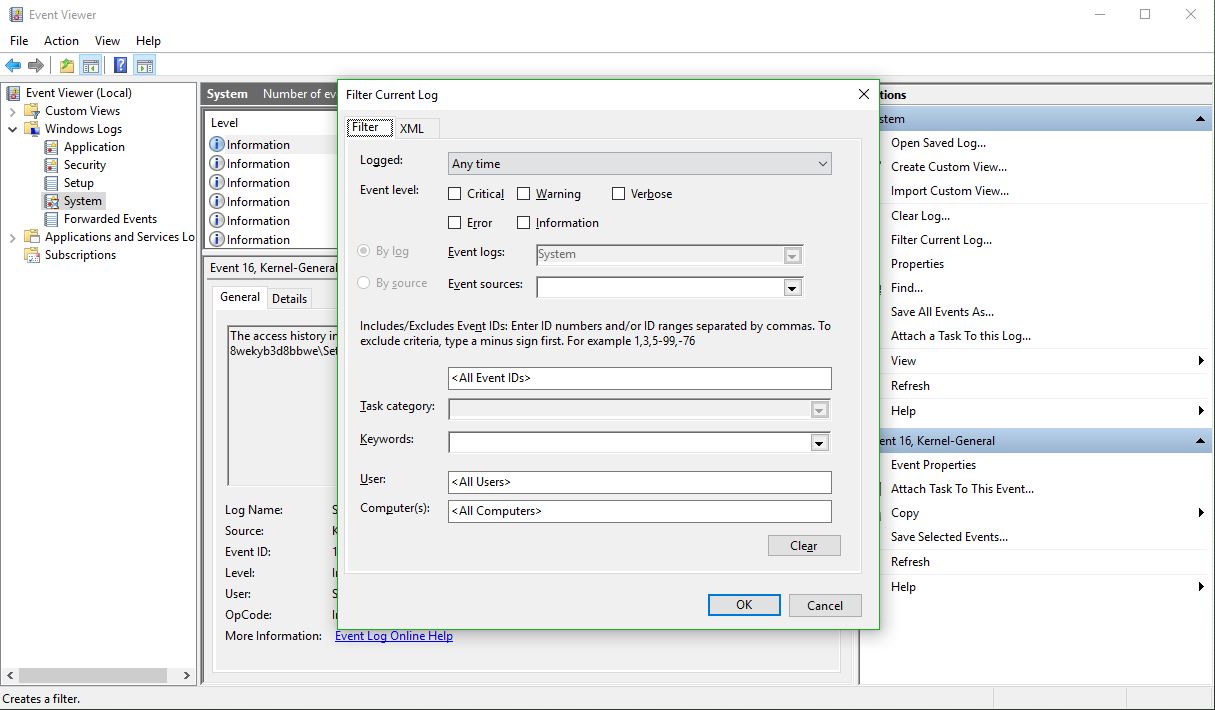
Filter Current Log dialog
There’s a lot you can do here as well, however all you need to do to determine the offending app is enter ‘225’ in the box that currently says <All Event IDs> then click [OK]. Once you do that, you’ll see every 225, or non-eject, event.

All events tagged 225
The top one is the most recent one that happened, and highlighting it will, under the general tab in the lower window, tell you exactly which program or process prevented the USB drive from ejecting. In this case, if you look at the full path you can see it is the ‘adobe_licutil.exe’ process, there at the end. Once you know that, it’s a simple process of the well-known [Ctrl]+[Alt]+[Esc] to bring up the task manager and shut the task down from there.

Task Manager
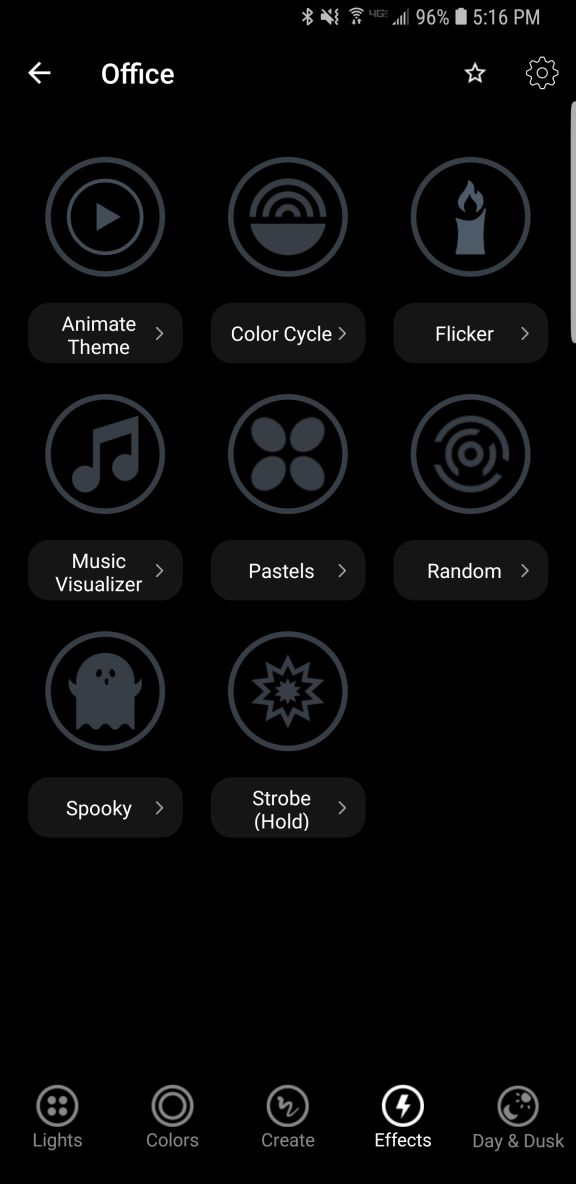
However, If it is still difficult to determine the specific process from the task manager because of a naming inconsistency, which has happened here, event viewer was also kind enough to provide us the Process ID, or PID, in this case 12592. In this case, if you want to be extra-double-sure, you can use Microsoft’s Process Explorer, a separate download, to identify the process by its PID instead of name, and shut it down from there.
Here’s an example of my Process Explorer, although out of habit I closed the task before taking the screenshot! But you can see the PID column and from there you can definitively ID the offending process.
Process Explorer
Remember, having to go to the extreme of Process Explorer is rarely required, and simply identifying the process and shutting it down from Task Manager is usually all it takes.
My experience with the Lifx no-hub smart light
Note: Review follows video
Disclaimer: I have no connection to this company, in fact never heard of them until about four months ago. They didn’t ask me for this review, they didn’t pay me, didn’t send me the bulbs, I bought them on my own, this is all my own opinion, as it always is.
I recently needed to get a smart light, one I could control remotely. You know the kind of thing; turn it off and on once in a while, make it look like someone’s home, give the illusion of life. The thing was, I had never looked into these kinds of lights too deeply, and I still haven’t so this isn’t a condoning or condemnation of other brands, but rather my impressions of the one I ended up getting.
I went to the local Best Buy, a store I rarely visit, because I knew they had a lot of them and I was going to be shooting into the wind. My need for this light happened rather suddenly, so I didn’t have time to research and just went in blind. I looked around at the options on display, from well known brands like Philips Hue and lesser known brands like Sengled. At least I think the latter is lesser known..I had never heard of them, but they have a lot of options, and to be fair I’d never heard of the brand I ended up deciding on either.
The issue I have with most of these lighting systems is that they require a hub, or as Philips refers to it, a bridge. I explicitly did not want that, as I was only intending to get a single bulb; no need to complicate it. That’s why I ended up taking a chance on another brand with which I was unfamiliar: Lifx.
Let’s just get this out of the way right now: I had no idea how to pronounce that. “Life-x?” “Liff-x?” No clue. After some Wikipedia-ing, I discovered it’s “Life-x,” and it’s a company that grew out of a successful Kickstarter campaign. I chose them because they do not require a hub and offered the basic functionality that I needed on short notice, and it turned out to be a good choice, with some important caveats.
The specific model of Lifx light I decided on was the Mini Color, which advertised a light output of 800 lumens. That’s pretty good; many LED lights advertise themselves as the equivalent of some wattage, but their lumens are absurdly low, sometimes rating at 300 or 450, which is very dim. 800 lumens is the actual equivalent of a 60-watt bulb, and that’s exactly what I was looking for.
I also liked the fact there was no hub. I wasn’t looking to set up some centrally-controlled network of devices, I just wanted a light bulb, and Lifx fit that bill. In fact, if I recall correctly, it was the only one that did; all the others required some kind of central device to which they would connect, yet since IoT devices like these form a mesh network anyway, the need for a hub when simply using light bulbs just isn’t necessary.
I took it home, screwed it in, and was guided through a relatively simple process (on Android; I can’t speak to IoS) to connect my phone to the light and the light to the network. Once that was complete, I was up and running.
I only wanted to get a light for a garage, but once it was set up I couldn’t help but go through the options available to me in the app. There are four separate screens for normal operation: ‘Colors,’ ‘Create,’ ‘Effects,’ and ‘Day & Dusk.’ There is also a main screen from where you can access groups, Nest integration, IFTTT features, as well as some other integrations and even buy more lights.
I discovered there was much to like about this bulb, and the more I experimented with the app the more pleased I became, even though I had no real need for any of the more esoteric features. I’ll start with the app’s individual feature screens and come back to the main page at the end, because one of the major issues I have manifests there.
The first screen, ‘Colors,’ actually gives you two choices: You can control the white temperature of the bulb, measured in Kelvin, which ranges from a very cold, blue 9000K, like the blue LEDs you see in icicle lights around the holidays, to a very warm 2500K that represents the more amber tone of an incandescent bulb, or even a candle. Incidentally, I know that the higher temperature is referred to as cold and the lower warm, but that’s just the convention here. Also, the ranges this light bulb offer are way past the choices you normally have, giving a much wider set of options for temperature.

Color temperatures
You can select the color temperature by spinning a wheel of temperatures, as it were, to select the temp you’d like. It’s very easy, however it’s also discreet selections, so choosing along a continuum isn’t available; you’d have to do that on the actual color screen discussed next. Not only that, when switching between the coldest blue and warmest warm, a sort of amberish, yellowish hue, the bulb flashed a BRIGHT yellow, which was curious.
Even with the choices it provides for white temperature, I still didn’t find the warm setting to be terribly accurate in terms of its similarity to a warm incandescent, or standard bulb. It isn’t bad, and it’s bright, but it still comes off as artificial. The cold temps, though, the blues, holy cow: They are BLUE. If that’s what you’re looking for, this bulb delivers in spades.
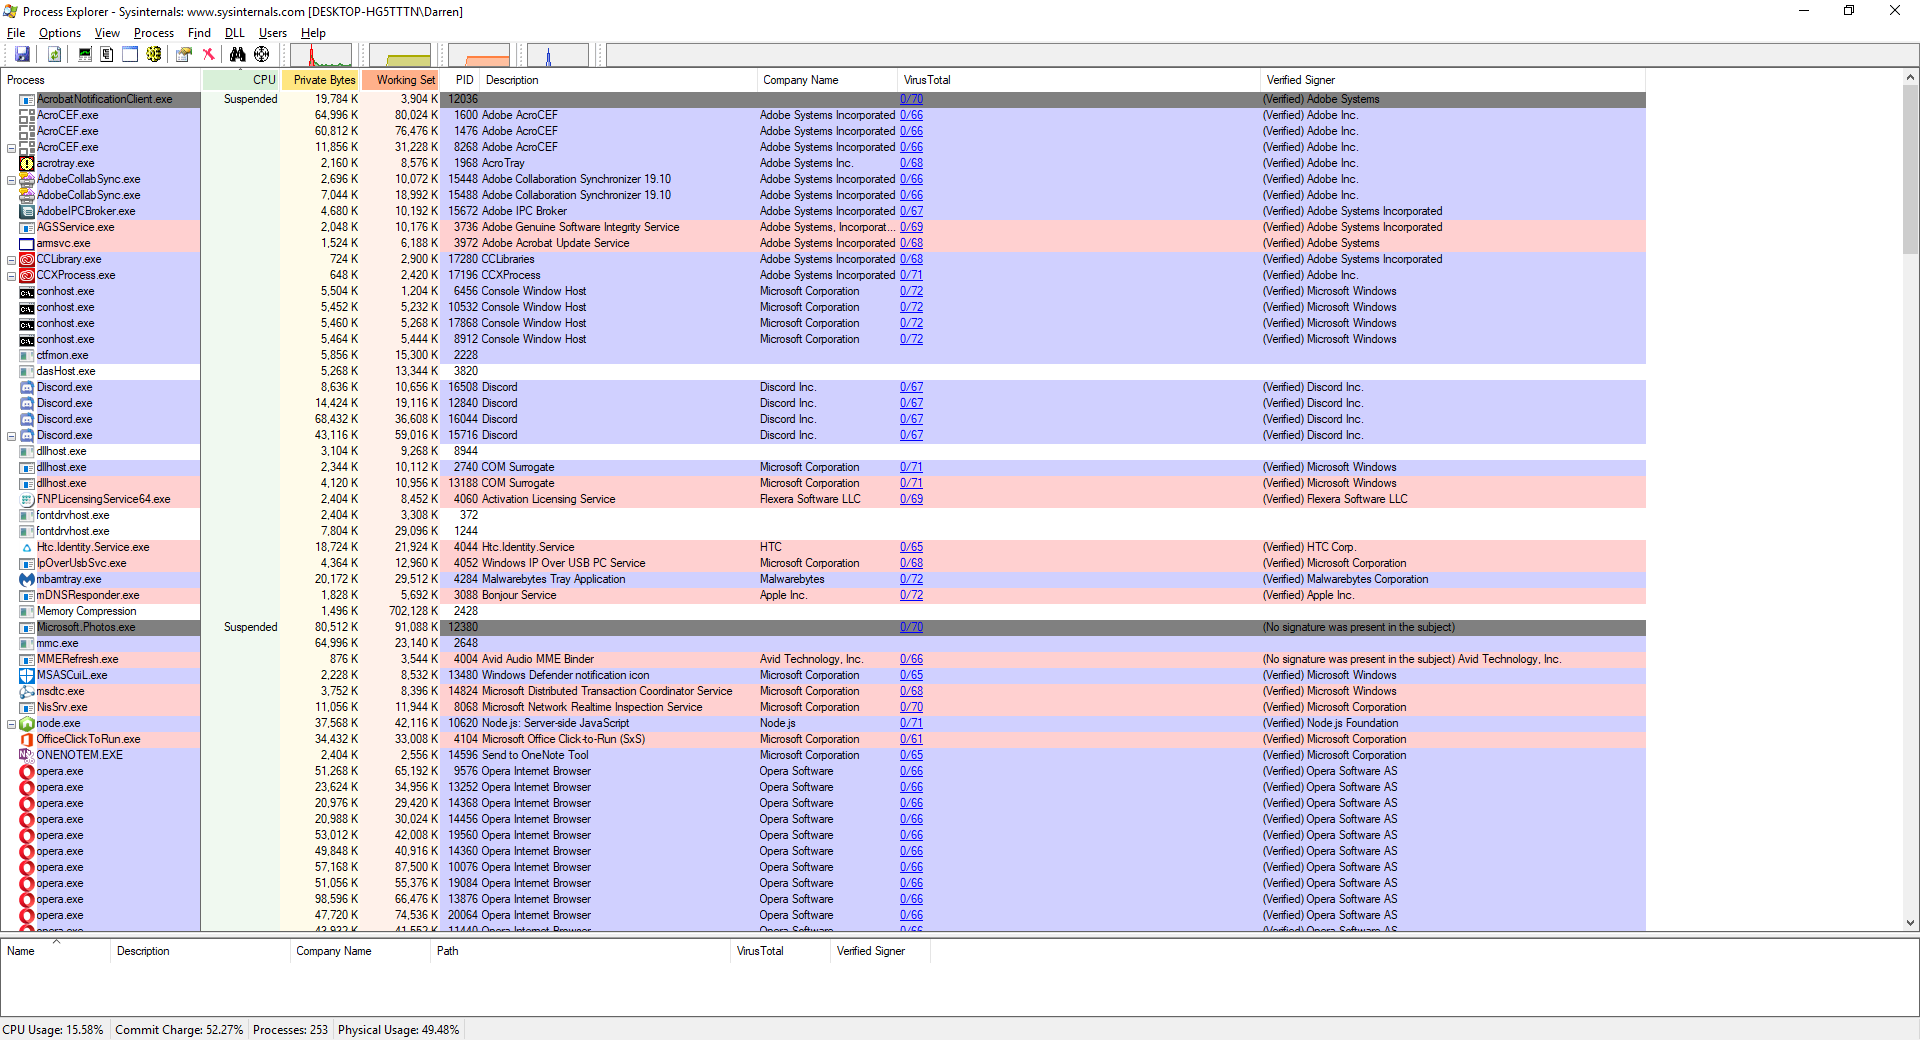
If you are feeling more festive, a Tinder-esque thumb-swipe to the right and you can select from a range of actual colors. It works the same as the white temp screen, by rotating a hue wheel and determining the saturation of the color you select by adjusting a slider on the color wheel. It’s ingenious, really, in its simplicity: Rotate the ring to the color you want, slide the slider to select intensity, and that’s it. It’s very responsive, easy to make adjustments, and easy to use.
Color selection ring
Another nice thing about these screens is that you can dim the light from them as well, using a simple slider. It dims quite far, something not all LEDs can do. Normally, a light bulb dims by reducing power to it, but LEDs can often only dim to about 10% before being cut completely. The Lifx app claims the dimming goes to 1 percent, but it doesn’t look like that to me, although it does seem to dim further than most other LEDs.
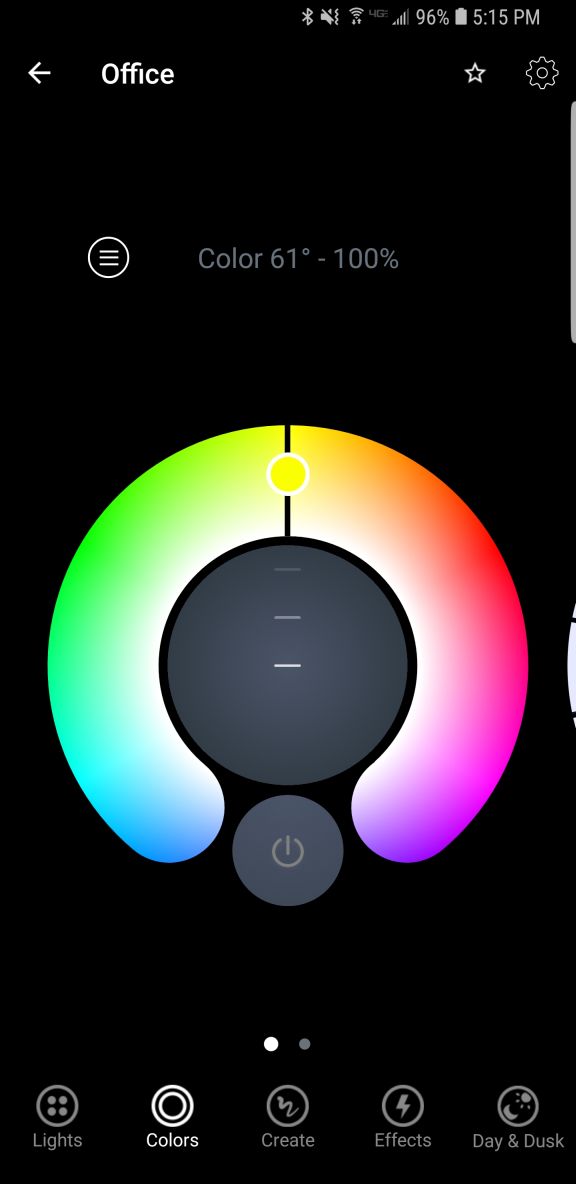
The next option, ‘Create,’ I don’t use that much. It’s misnamed, as you don’t actually create anything here but select from pre-designed themes such as ‘Relaxing,’ ‘Energizing,’ ‘Peaceful,’ and ‘Powerful,’ the image for which is a tropical sunset for some reason. Doesn’t quite match up with Powerful but it’s a minor issue. There are others, and selecting one just changes the color of the light to match up to what I suppose will enhance the chosen mood, and you can change these in a different screen. The second screen under ‘Create’ is just a matrix of colored circles in a ROYGBIV arrangement that you can choose, although I don’t know why you would use this as opposed to the color wheel. Perhaps if you just wanted, say, pure orange and didn’t want to have to make fine adjustments to get it.
Themes / Colors
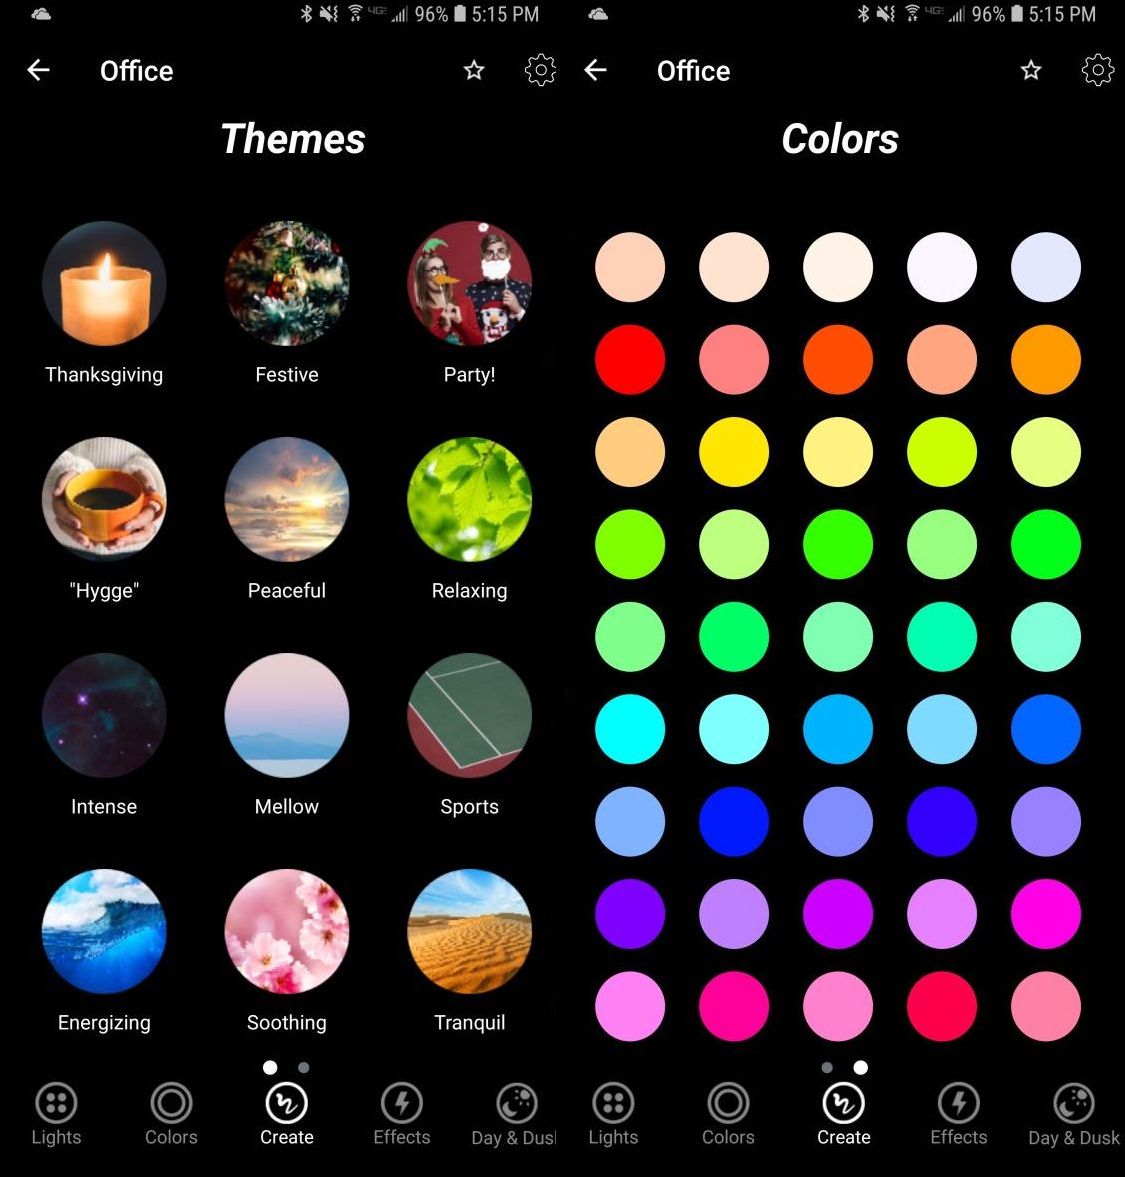
The next screen, ‘Effects,’ is my favorite because of one in particular. There are eight effects to choose from: ‘Animate theme,’ which allows you to modify themes from the previous screen, ‘Color cycle,’ ‘Flicker,’ ‘Music Visualizer,’ ‘Pastels,’ which I would never, ever use, ‘Random,’ ‘Spooky,’ and ‘Strobe.’ Because of the potential health issues that come with strobe lights, you have to hold that one down to use it.
Effects
They’re all self-explanatory, but I have to highlight one and call out another. I loved the ‘Spooky’ effect: Being a fan of horror movies, this one emulates the horror movie trope of the abandoned hospital or car park that has the flickering, randomly flashing light. When selected, it flashes the light randomly for 60 seconds (the minimum, which I REALLY wish could be shortened), then go bright red, then turn off. Beautiful. The big problem with it is that when controlling a grouping of two lights, the ‘Spooky’ effect only worked with one light, even when controlling them as a group. That needs to be fixed.
‘Music Visualizer’ is the one I have to call out. It flashes the lights all over the place when it hears noise, monitored, as it claims, through the phone’s mic. However, when I shut off all music and all sounds, and covered the phones mic, they still flashed randomly. Also, while testing using songs with a heavy rhythmic component from AC/DC and Metallica, the lights flashed randomly, not rhythmically. Therefore, I can only surmise that it is not actually monitoring the sound and just making random color changes. That’s a shame if true, because a visualizer would be a neat feature.
Finally, there is Day & Dusk, which gives options to have the lights come on and go off at certain times of day, intended as a wake up and sleep thing. You can also set timers to change color or temperature at certain times of day, which may be necessary based on ambient light, working conditions, or other factors. I don’t use this feature, but I like it, and feel it would be very useful to many people.
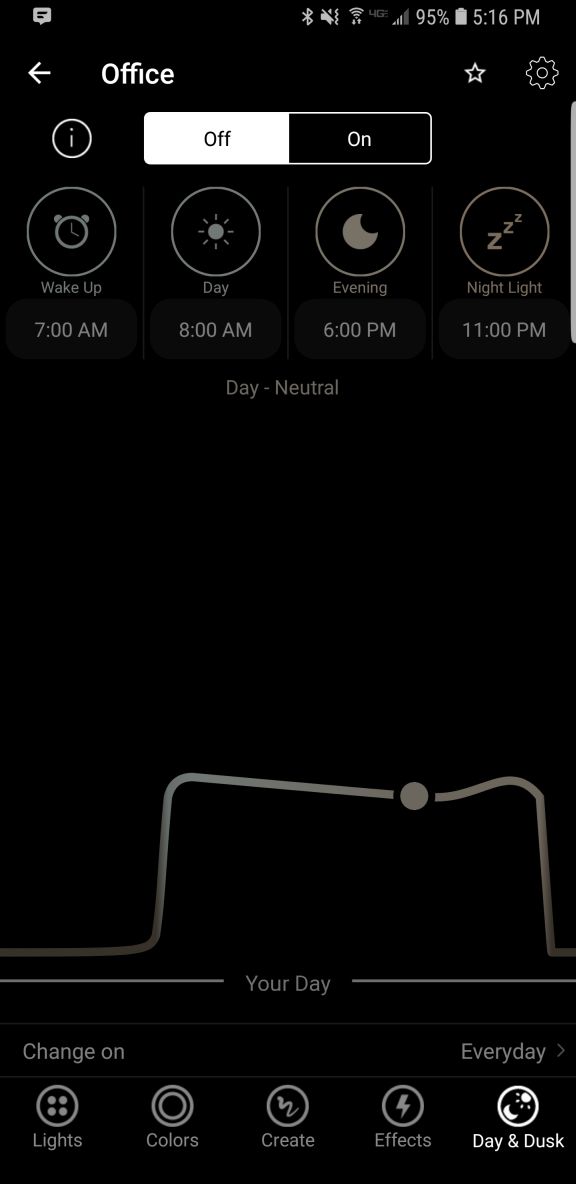
Day & Dusk
Finally comes the main screen. This shows you your lights, your groups (you can group lights together so any changes affect all lights in that group; it’s a fantastic feature and one that really elevates the usefulness of the app, as does being able to switch between multiple locations using a dropdown), create IFTTT (If This Then That) rules, and buy new bulbs. The IFTTT integration makes me worry for humanity: You can set the lights to react to various events, some of which are very useful like blink lights when your Uber arrives, or turn off the lights when you leave home. You can even blink the lights if it starts snowing! But blink when you’re tagged on Facebook? Or mentioned on Twitter? You might have a social media addiction if…
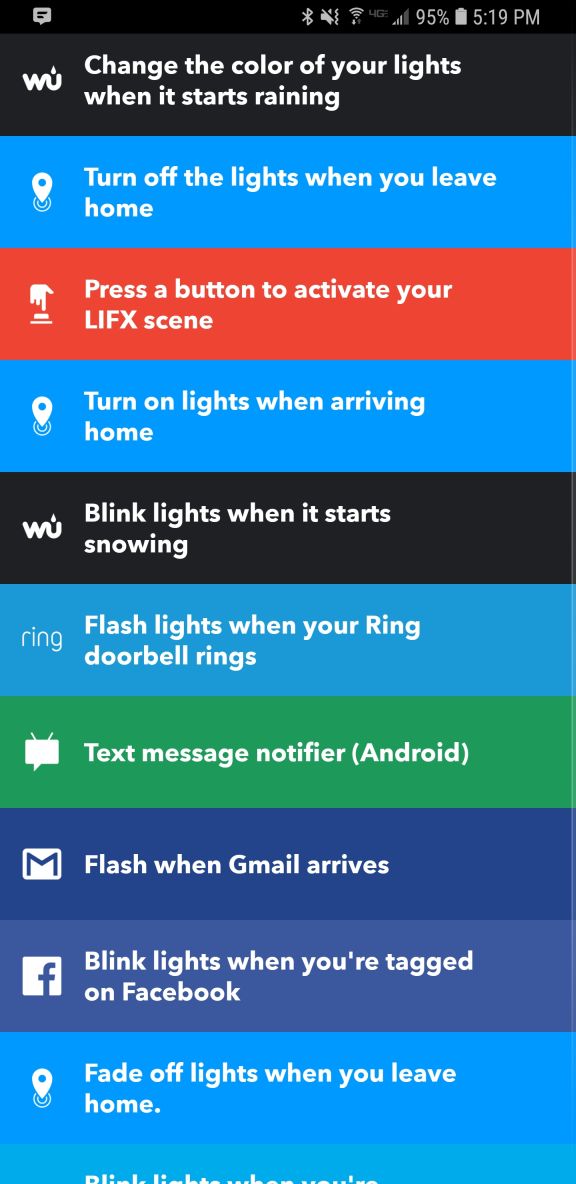
IFTTT Integration
What I really liked, though, and what turned out to be the biggest flaw in this whole setup, is the Nest integration that happens through a program called ‘Works with Nest.’ Lifx lights can be set to flash when a paired Nest smoke / CO2 alarm detects something amiss. As someone who barely survived a high-rise fire, I loved this feature, think it’s incredibly useful and potentially lifesaving, and as I have Nest smoke detectors in both locations where I use these Lifx bulbs, I couldn’t have been happier. HOWEVER: It appears you can only set up this connection at one location. Once you’ve done that, you can’t connect any others. So I connected the light to the detector in my office, but when I use the app to switch my location to home, there’s no option to connect the lights to the Nest detector there: Only to disconnect the other connection already made. I experimented and tested and connected and disconnected and reconnected and switched locations in the app and really tried to find a solution, but was unable, and I find this implementation to be absolutely baffling. So if this is a circumstance that applies to you, choose wisely: You can only connect these lights to a smoke detector at one location regardless of how many you have. This is a major oversight and desperately needs to be addressed.
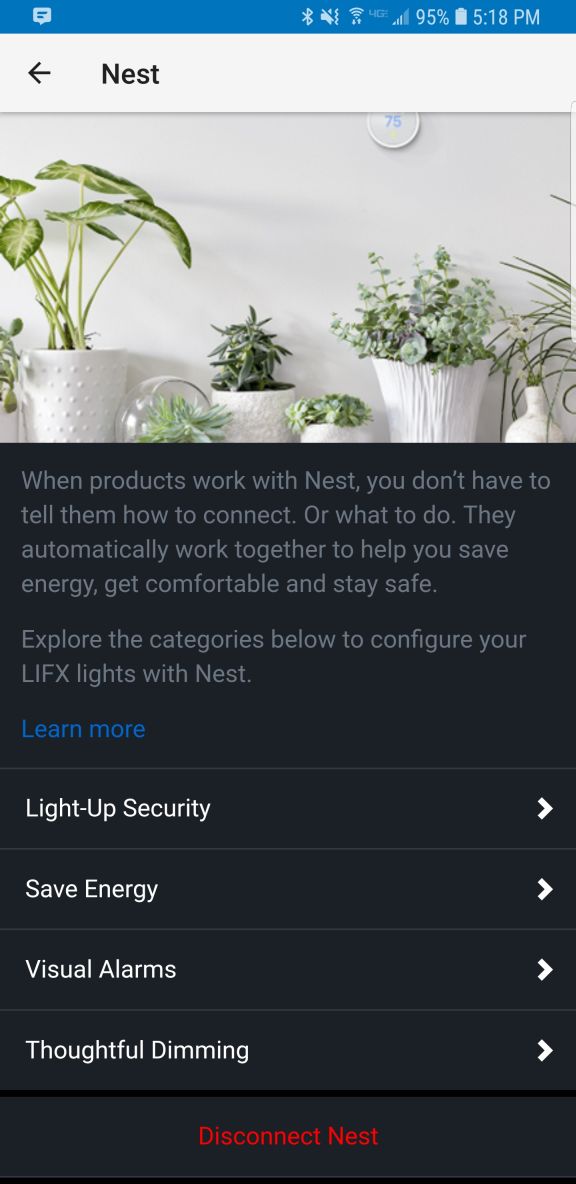
Nest Integration
Other than the fake visualizer, the single-light spooky thing, and the grossly limiting Nest integration, these are good lights and I’m happy with them. Even bought more after using the first one for a while. Bright, easily grouped and controlled, usable app, not overly expensive, and ultimately it’s the app and its features and functionality that needs some fixing, while the bulbs themselves are great.
Recommended.
Happy Birthday TRS-80!

Today, August 3rd, is the 41st anniversary of the release of the Tandy / Radio Shack TRS-80 personal computer, originally released back in 1977 (Tandy was a leather company of all things, and bought out Radio Shack WAY back in 1962 – TRS is an acronym for Tandy Radio Shack). I have a personal place in my heart for this particular machine, the Model III specifically which is shown in the header image, but the whole line, which included pocket-sized, handhelds, portables, luggables, and multiple desktop models over the years, is easily one of my favorites.
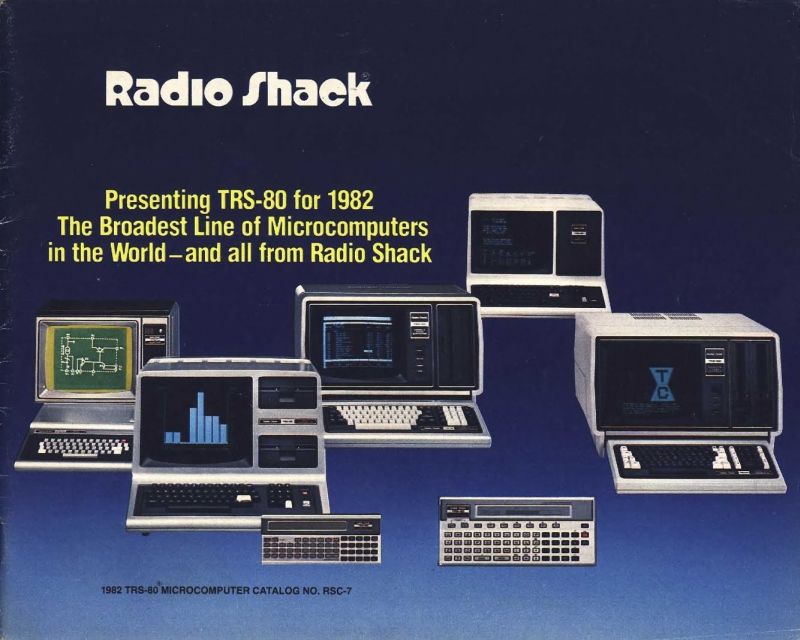
TRS-80 model line (for 1982, anyway)
You see, there is a trinity of devices and systems in the history of computing that just give me chills when I think about them, and along with the Commodore PET and Apple IIe, the TRS-80 is one of them. Although it wasn’t the first true PC I ever used – that would be the PET – it was the first on which I had significant exposure to what a machine could do. It was the machine of choice for a computer summer camp – don’t judge! – that I attended while but a wee lad. Using cassette tape as magnetic storage via an external cassette player often also bought at Radio Shack, we learned about computers and programming and wrote programs in line-number BASIC. They weren’t terribly sophisticated, but even at that young age, I managed to write a text-based adventure game in which you explored a haunted house solving what I thought were pretty well-thought out puzzles: I was most proud of the skeleton who was willing to help you, but only if you retrieved his missing golden-ringed femur which had been stolen by a dog – a golden retriever. I’m STILL proud of that one.
Even though it was colloquially referred to back then as the “Trash-80,” showing that system wars have existed for far longer than anyone would imagine, it was a surprisingly robust machine. Being the pre-GUI era, and even the pre-OS era, like the PET it came only with BASIC pre-loaded; there was no true operating system. An attempt was made to address that with the later release of TRS-DOS, although even that wasn’t a true operating system; it was merely a limited expansion of the capabilities of BASIC. The most efficient thing to do if you wanted to run programs was to buy them on cassette and load them into memory via the play button on a standard cassette player. If you wanted to save a program you wrote, you’d use the record function, but be sure to skip past the leader tape (a mistake I made once and never again).
Oh, did I mention that much of the system code for the TRS-80 was written by Bill Gates? It’s true! In fact, here’s a neat side-by-side of Bill Gates and Microsoft co-founder Paul Allen in 2013, recreating a famous photo originally taken in 1981, in which they are surrounded by, among other things, an Apple, Commodore Pet, and TRS-80! These images were taken from a Forbes article about the event that’s interesting reading.
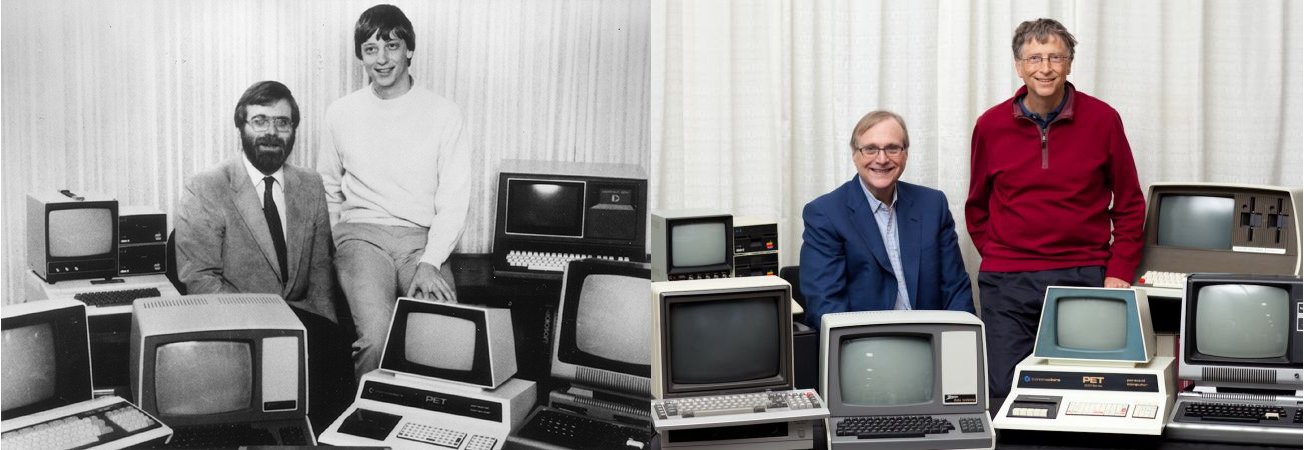
Bill Gates and Paul Allen
Versions of the TRS-80 were released and in operation up until around 1991, which is a pretty good lifespan for a PC line, especially one that was never considered much competition for the other powerhouse lines from Commodore, with the C64 still being the most successful personal computer ever made, or Apple, a company that’s still so successful it just became the first to have a trillion-dollar valuation. Meanwhile Radio Shack, a chain that could at one time claim 95% of the US population lived within three miles of one of its stores, sadly closed down permanently in 2017.
Even so, the time in my life it represents, the sheer force of discovery it provided, the capabilities it displayed, the potential it showed, the experiences it allowed, even now as I get older it provides an incredible rush of nostalgia and reminds me of the excitement I felt for technology as it was a new and exciting thing in the consumer space. I don’t feel it so much these days, but at least there’s something that provides such a reminder.
I am also happy to announce that there is a fully-functioning Windows-based TRS-80 emulator, Sharp-80. It works amazingly well and shows exactly what kind of interfaces and accessibility we had to work with back then. Be warned: It’s fun to use and of course I’ve spent a long time with it reminiscing about the bad old days, but it’s also not for the faint of heart, and if you’ve been raised in the coddled, cushioned world of GUIs, you’ll be in for a shock. A wonderful, text-based shock.
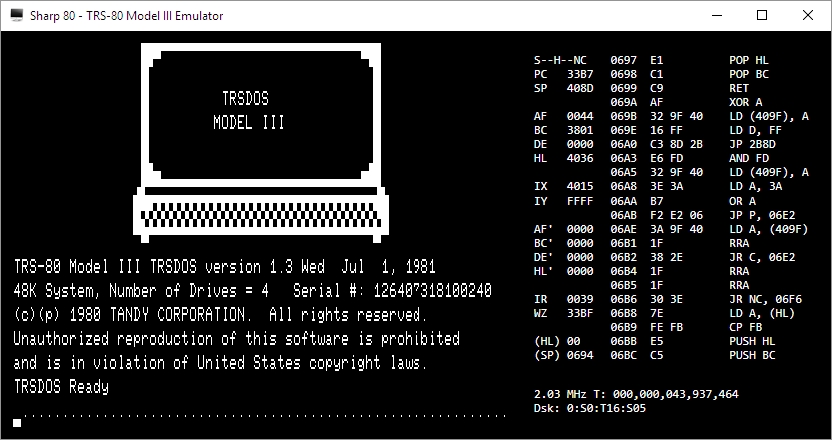
Sharp-80 emulator
Happy birthday TRS-80, and thanks for everything. I’ll always remember.
DigiTech RP360 XP: The best effects pedal I’ve ever used

I don’t often have the opportunity to talk about music gear on this site, so today is doubly exciting as I not only get to do that, but I get to present what is easily the best effects pedal I have ever used – and I’ve used a lot – the DigiTech RP360 XP.
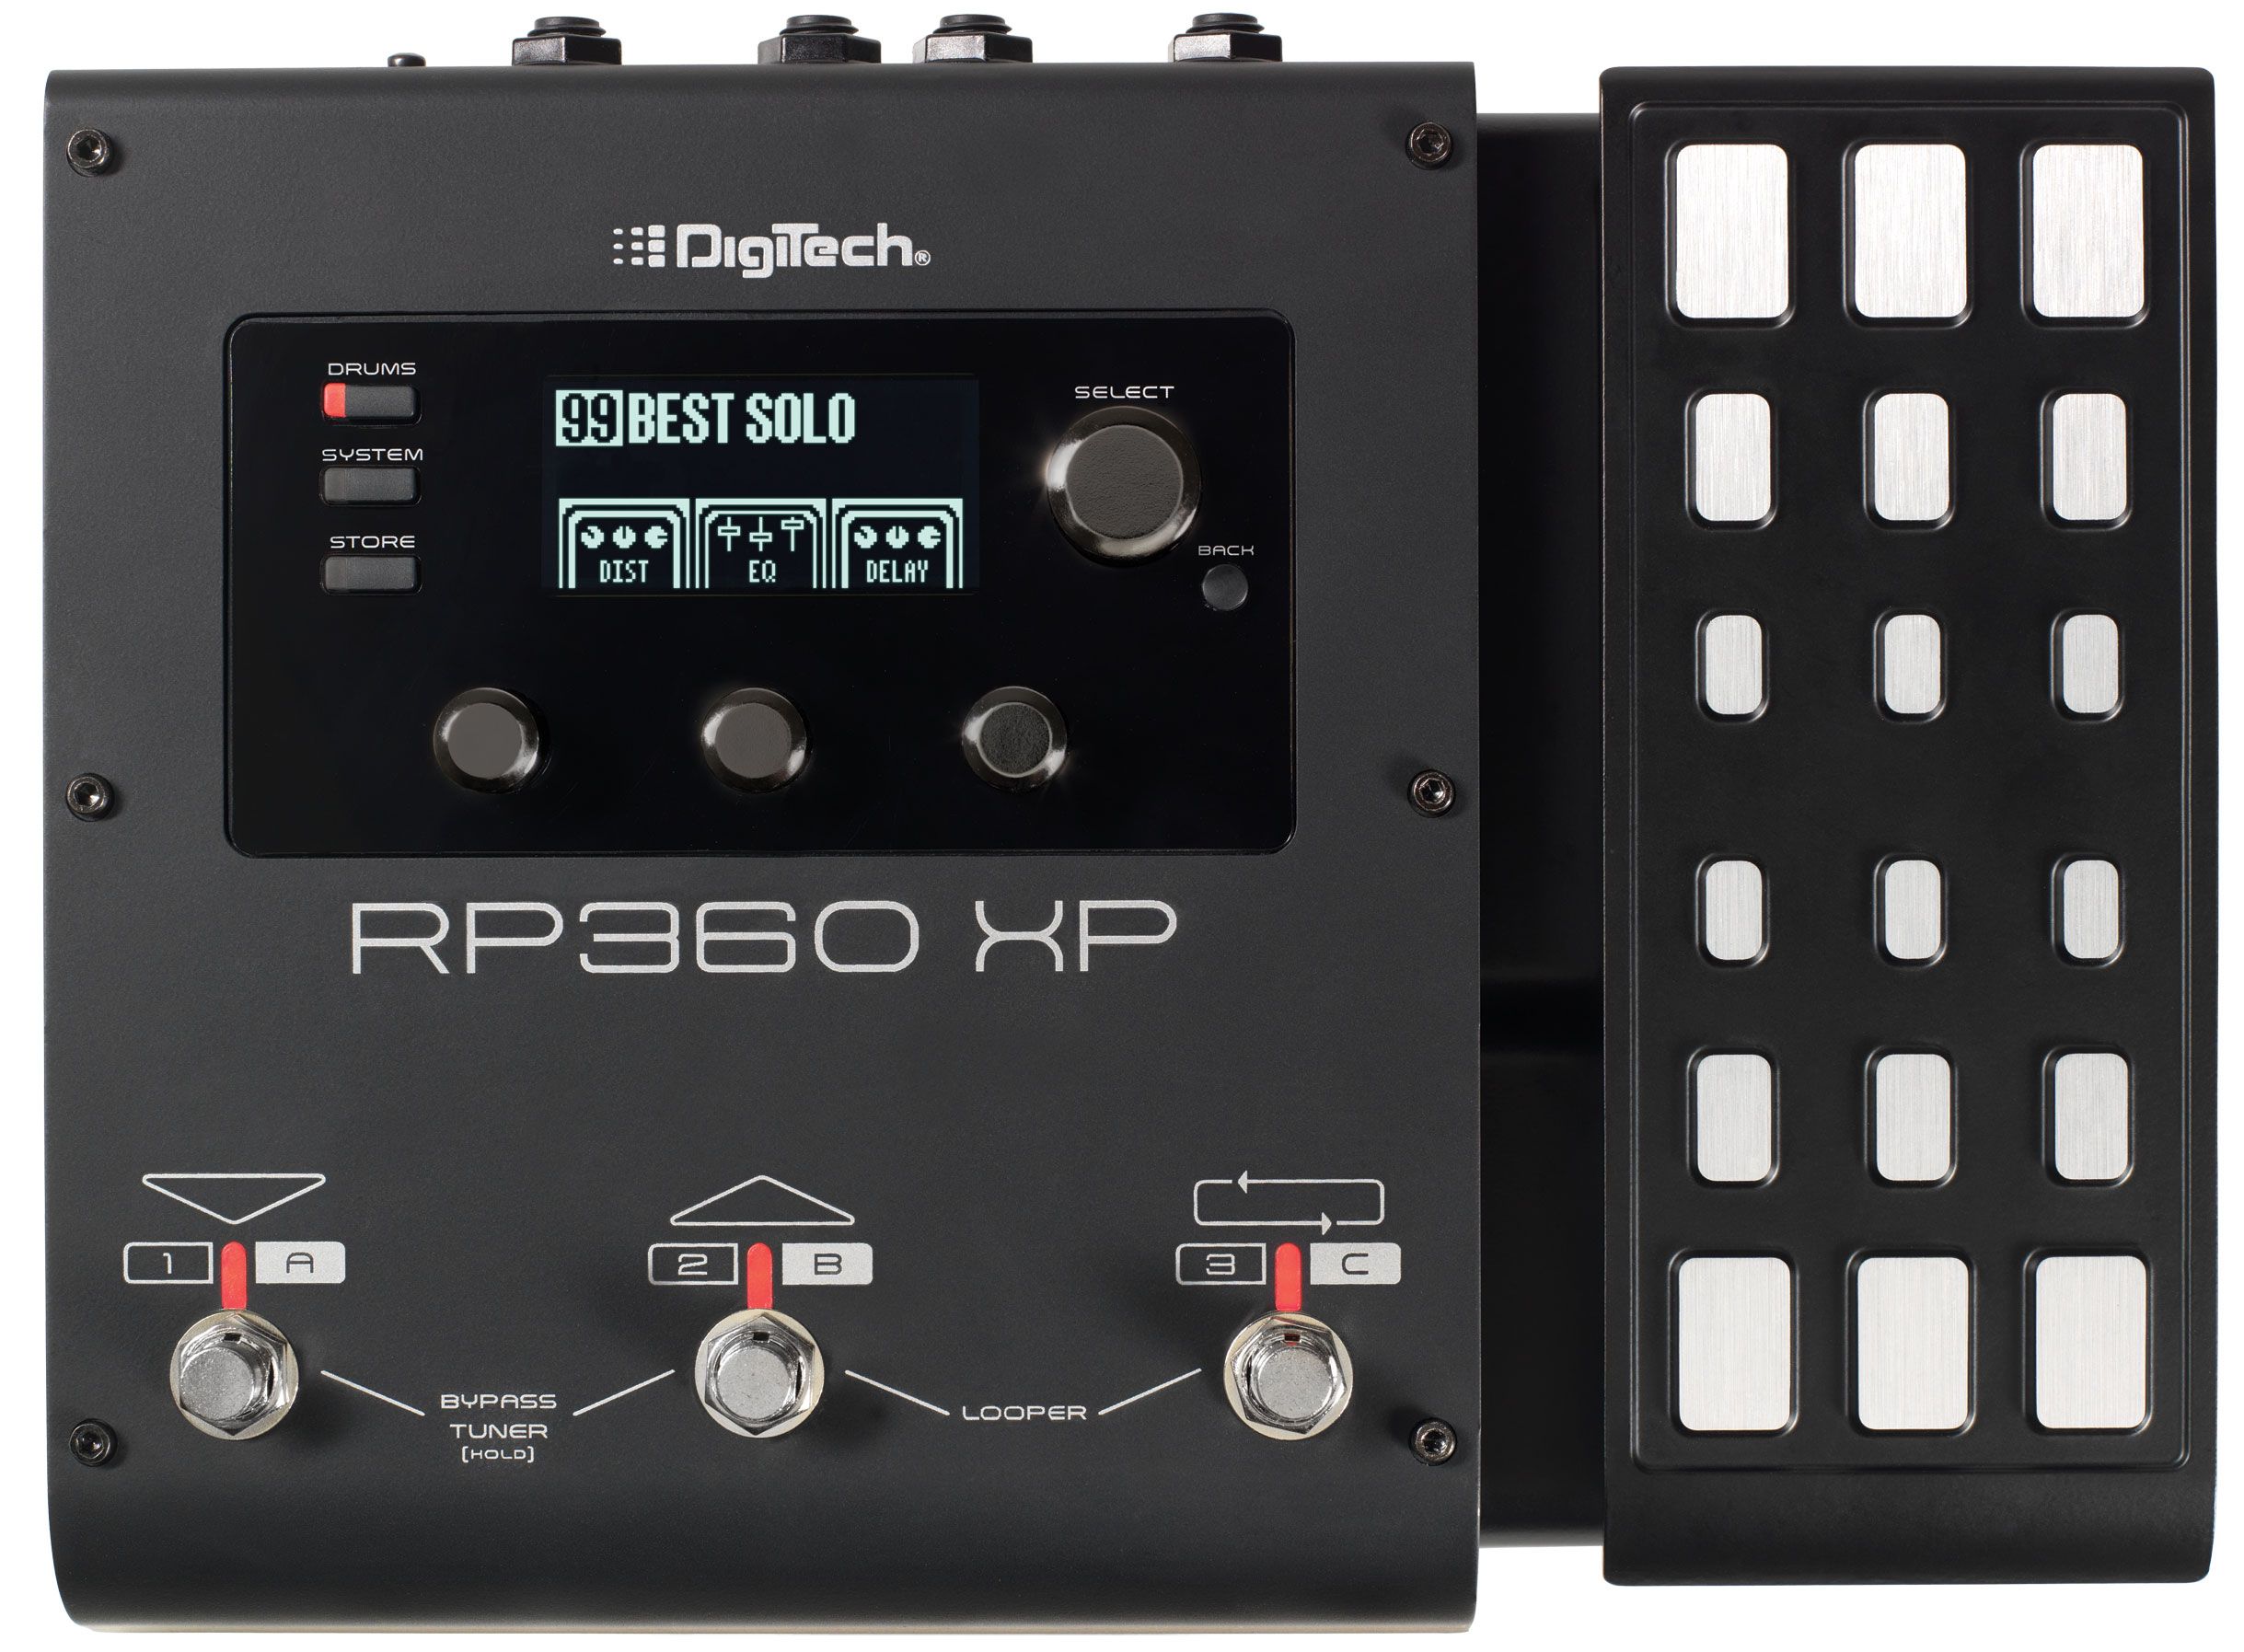
DigiTech RP360 XP
The pedal has so much going on, and it’s all implemented so perfectly, it could be difficult to figure out a place to start, so I’ll start with what it is: the pedal is what’s known as a multi-effects processor; it’s like having a bunch of effects pedals in one. There are 99 individual effects you can choose from, things like distortion and flange and delay and chorus and all the other types of effects you can have and buy individual pedals for, but these are all preset into the RP360 itself. Not only that, for the true tone savant, it comes with powerful software that lets you create your own effects via virtual pedals which I’ll talk about later on. One of it’s biggest advantages is that it plugs directly into your PC, bypassing the need for an amplifier. To say it’s convenient is the understatement of the century.
The pedal has many other functionalities which work beautifully as well. First off, there is a chromatic tuner (if you love going down rabbit holes, compare chromatic tuners to the superior, both in function and price, strobe tuners). There is also a drum machine that, surprisingly, works better than any other I have ever used, even those built into Digital Audio Workstations (DAWs), with the only handicap being they can’t fill out at the end of a song, meaning play a fill at the very end of the song rather than just cut off the beat, something DAW-based drum kits will do. The thing I have mostly appreciated about the built in drums is that they are very straight-forward beats, nothing fancy like jazz beats or break beats or that nonsense, just good, rockin’ beats. Of course, it also has a looper, which allows you to play a musical sequence then loop it back so you can play over it, making you a one man band; if you’ve ever seen those people who play at little fairs or sidewalks or cafes, and it’s just one person but they sound like a whole band, they’re using a type of looper – you can actually get pedals that just do that.
Then, there is the pedal within the pedal, as you can see on the right hand side of the device, and which is why this model has the ‘XP’ on the end. Digitech also makes a pedal-less version simply named the RP360, but it’s worth spending the extra $50 and getting the expression pedal (so called because it allows you to alter the impact of an effect in a continuous manner, such as volume or effect intensity). I love that expression pedal; just using it as a volume control is liberating. On the other hand, if you want to use it for wah or other tonal adjustments, you do you. It’s very versatile just in and of itself and really expands the range of what the whole thing can do. I can’t imagine having the RP360 without it; it’s definitely worth the slight overhead.
Something else to keep in mind about these pedals is that unlike plugging your axe into an amp, you plug your guitar into the pedal and the pedal into your PC. This can be more serpentine than it sounds. For example, in my setup, I plug my guitar into the pedal, then plug the pedal into a Focusrite Scarlett Solo seen below – that serves as the interface between the instrument / pedal and the PC.
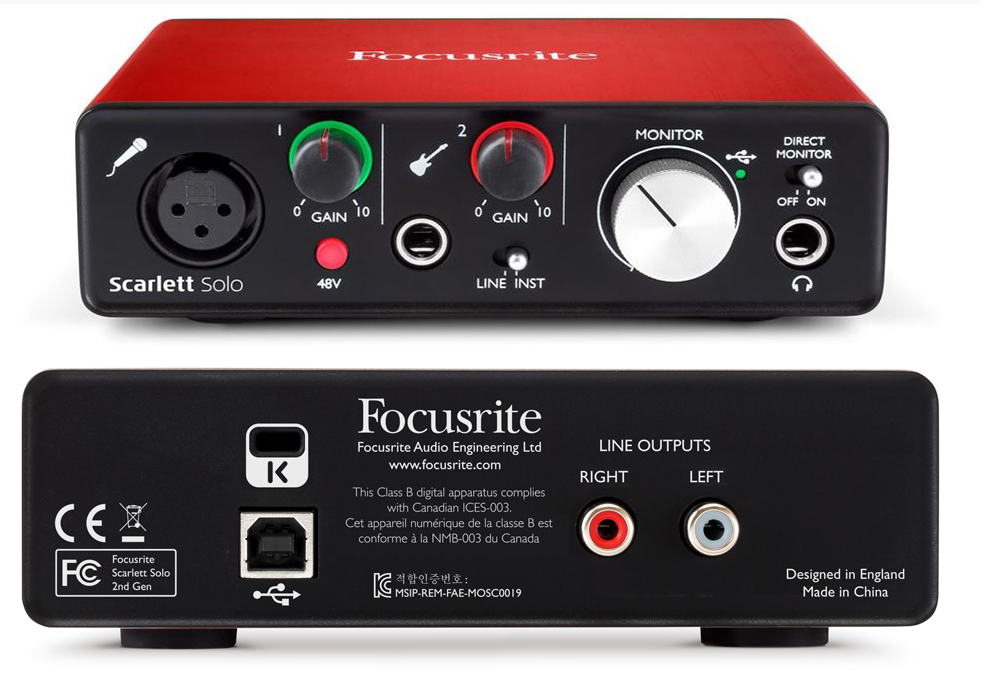
Focusrite Scarlett Solo
This isn’t a post about the Scarlett Solo, so I won’t go into too much detail other than to say you can see there isn’t a lot going on in back; I connected the right and left outputs to a set of Mackie studio monitors and plugged the USB into an open port on my PC – very easy. The front of the thing is where I plug in the pedal using the jack under the little guitar icon (and I only use custom Spectraflex cables – if you’re going to do it, do it right!). Curiously, I have to set the monitor switch to instrument, not line, in order to get proper output levels; I haven’t yet figured out why that is although I’ve been working on it. I also have a separate Blue Yeti microphone I use, so the XLR input there on the left goes unused, at least for now. Here’s the current setup I’m running at home, with an Oculus Rift thrown in for good measure – you can see the DigiTech on the floor, and the Scarlett Solo on the desk. The cable running fro the pedal and into nothing on the floor is what plugs into the guitar. All that’s left now is the cable management.

The setup
You don’t need to do it this way, you can simply run the pedal itself straight into your PC. That being said, the beauty of this whole setup is the amount of fine control it provides over all aspects of the sound. If I’m playing along to a track while recording, or a music file, or even to YouTube, I can set all the levels independently. I can adjust overall volume using the large dial on the right of the Scarlett while adjusting the levels of the instrument itself using the smaller gain knob, but you have to be careful with those: cranking up the gain can introduce distortion, and while gain is often purposefully used for that, unwanted distortion will destroy your carefully crafted tone. That’s why the light around the smaller dial will flash red if the gain is too high, and flash green if you’re within acceptable range. Of course, there are a myriad other ways to adjust sound through software specific methods such as Windows or app specific audio controls, like the volume within a YouTube video or audio application.
So back to the DigiTech. As mentioned earlier, it has 99 preset sounds built in, with flashy names such as White Limo, La Grange, and my personal favorite effect, DualPetaluma – it’s a nice, fuzzy yet subtle overdrive. Some of the names, such as DC/AC, SabbathVoid, Slayed and Gilmour, are obvious, blatant nods to the type of tone they provide. Here’s the list of all preset tones from the manual:

RP360 XP Tones
As also mentioned earlier, DigiTech has made available software called ‘Nexus’ that gives you the ability to set your own sounds effects and tweak them to your heart’s content by using virtual pedal boards. This brings up two very important points that need to be made: First, if you ever watch a professional guitar player, they will have a pedalboard on stage that they use to change the sound of their guitar depending on which pedals are active and which aren’t, and how those pedals are configured. I have a few pedals in my office, if you can believe it, although there is a vast variety of pedals, effects, and manufacturers who supply them. I’ve included a couple of pictures below; the first is one I just found on the web somewhere, and it shows a tiny sample of the variety available, although those are mainly footswitches, meaning you step on a switch to activate them, whereas footpedals seen in the second picture from my office are more traditional (and colloquially known as) stompboxes, where you step on a pedal to activate the effect. Of course, stepping on the pedal just activates a switch anyway – see how it all comes together?

So many footswitches
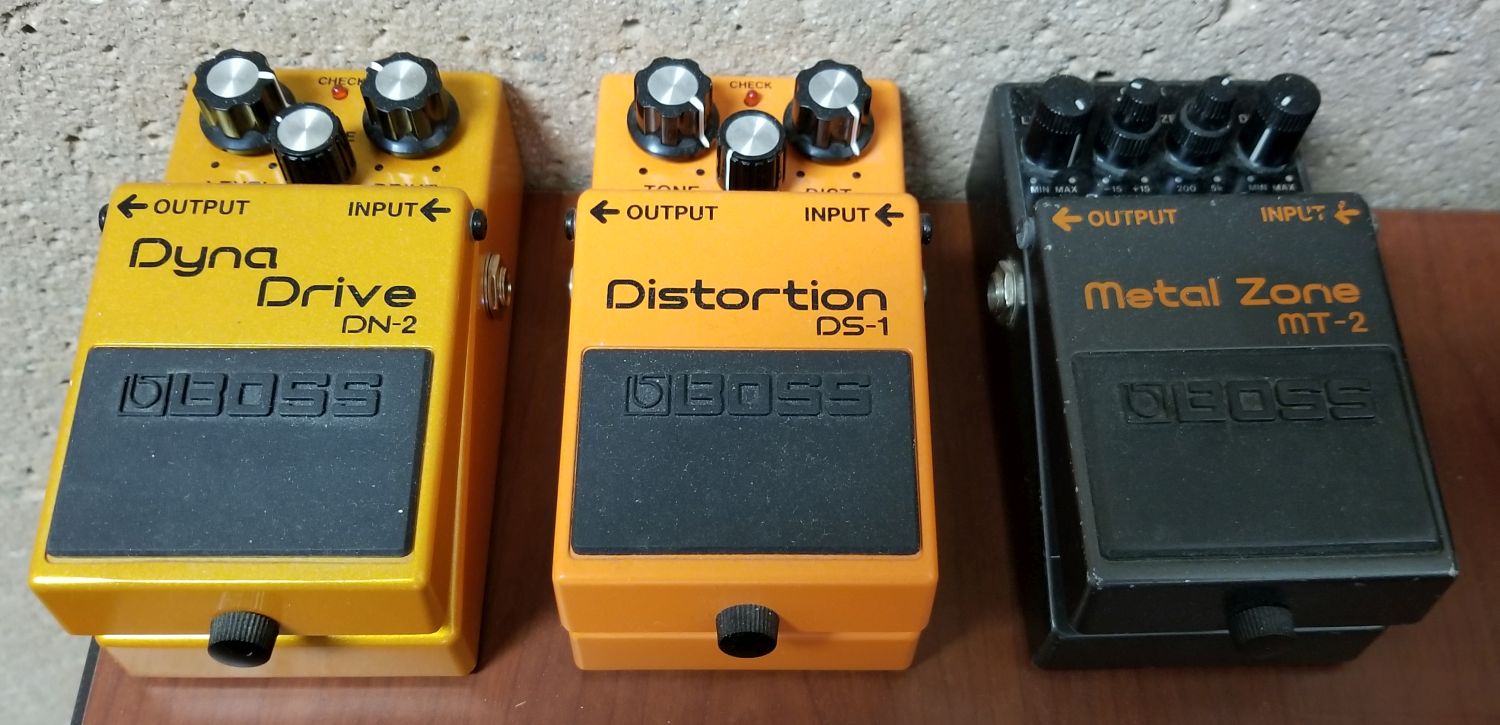
You weren’t an 80s metalhead if you didn’t have a few BOSS pedals
It’s important to mention footswitches and footpedals because the RP360 replaces all of them with a single unit, but it also includes a bunch of individual, virtual pedals that you can tweak to your heart’s content using the aforementioned Nexus software. The other thing to know about guitar players specifically is that we chase tone eternally, always searching for the perfect sound. It’s like the Holy grail; it’s never meant to be found, the truth is in the chase itself, and good thing, too, because perfect tone has never been achieved by anyone that I’m aware of, and we are all still chasing it.
That’s important because Nexus feeds that addiction. You can string all sorts of virtual pedals together, tweak the settings of each one, and play with tone until the end of time. There are many open slots in which you can store your own creations and make them available from the pedal itself, calling forth the glory of your tonal creations with a simple step on the switch.

Nexus software
As you can see, you can set up a virtual pedal board with an infinite number of pedal combinations and setting for each. Again, when performing live, even for big shows in stadiums or arenas, guitarists will have actual pedal boards that don’t look too different from what you see here, and even the order of how the pedals are daisy-chained can have a big impact on sound with later pedals processing earlier pedals’ sound. But the DigiTech comes to the rescue and puts them all in one, although order still matters. I’d also like to give them credit for so carefully avoiding a copyright issue – these are all modeled after real pedals, and some are pretty close. For example, if you look at the far left, you’l see what they call the ‘Cry Wah,’ when there is an actual line of pedals called the Cry Baby wah, so they’re threading the needle here in some cases.
You can also choose the type of amp the thing models, as different amps often have different sounds (Marshall or Fender for straight up rock walls, Vox, known for the British sound of the 60s, similar to Orange, a versatile amp used for decades which also happens to be my personal favorite brand, and many others). All amps have unique, identifying visual designs and you can see that in the head / cabinet setup at the top of the Nexus window they mimic the visual design of actual amps but not the name, just as they did with the pedals. Very nicely done.
Anyway, you can see how someone could just endlessly tweak from now until the end of time, making slight adjustments in their endless pursuit of the perfect tone. This is also where the user would set the impact of the expression pedal; here it’s set to adjust the volume, which is also my main use for it, although it can additionally be used to set the wah effect and impact. LFO is Low Frequency Oscillator which lets you have an effect, well, oscillate in and out, or ‘breathe,’ as musicians say. I’ve never had the need to use that, so I can’t speak to it here.
The last thing I want to mention about the software is that because the pedal, at least in my case, is not connected directly to the PC, the software doesn’t have any effect. I could run a direct USB connection from the pedal directly to the PC to load the sounds and get firmware updates, but the way my own personal set up is being run, I would have to run an additional USB from the pedal to the PC. Just something to keep in mind.
Finally, I use a free software DAW, or Digital Audio Workstation, called CakeWalk for recording, which is a separate post to itself. I’m currently recording a song called ‘Howl,’ and here’s a screenshot of the DAW in the middle of that process. You can see I’ve already laid down rhythm guitar, lead guitar, drums straight from the pedal, and am getting ready to add vocals, which usually come last. The ‘wolf’ tracks are sound effects which I’ll merge into a single track later.
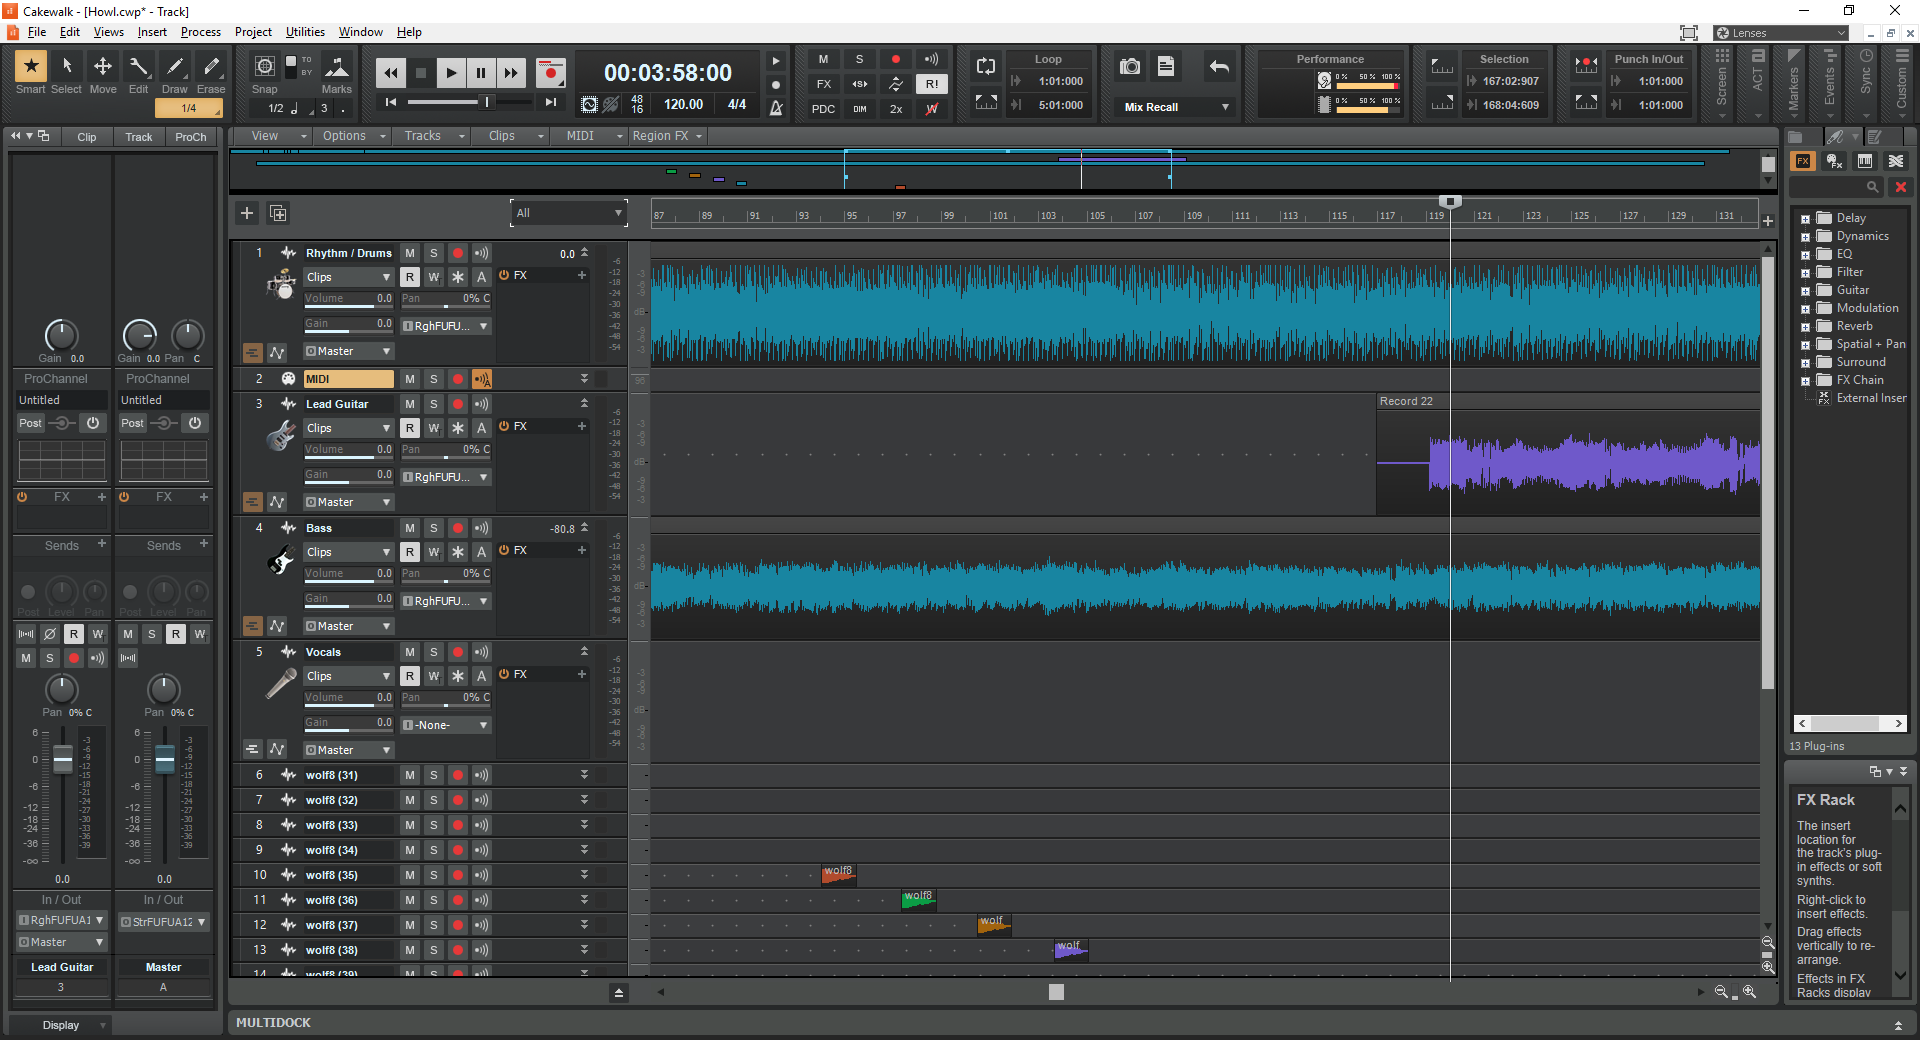
Cakewalk
Using the pedal, whatever I play gets recorded straight in, and since I use a separate mic, and the pedal has built-in drums (whose tracks can be a nightmare to separate from any pedal-routed guitar tracks), and it can be used with bass or anything else, I can record whole songs on my own, without having to go into a studio. While I have lots – LOTS – of studio experience, being able to record at home is so nice. I can send tracks I’ve recorded around to others, or they can be sent to me, and so when the principal songwriter of the band I play with writes a new song, we can each record our own parts then mix the whole thing down, or one person can record his part, then send the track to the next person who adds his track, and so on until the song is complete. Really easy and doesn’t require everyone in the same place at the same time for the ever-increasing expense of studio time. On a side note, if you’re interested, you can hear a sample of our stuff, with me on bass, here (pop), here (surf), and here (hard rock).
So let’s give it a listen, see how it sounds, see how it works, and if you’re looking to expand your sound, consolidate your pedals, do some recording, I can’t recommended this pedal enough. It’s not just the best pedal I’ve ever used, it’s one of the best anything I’ve ever used.
360 images with the Gear 360
That title makes roundabout sense. I’m witty today!
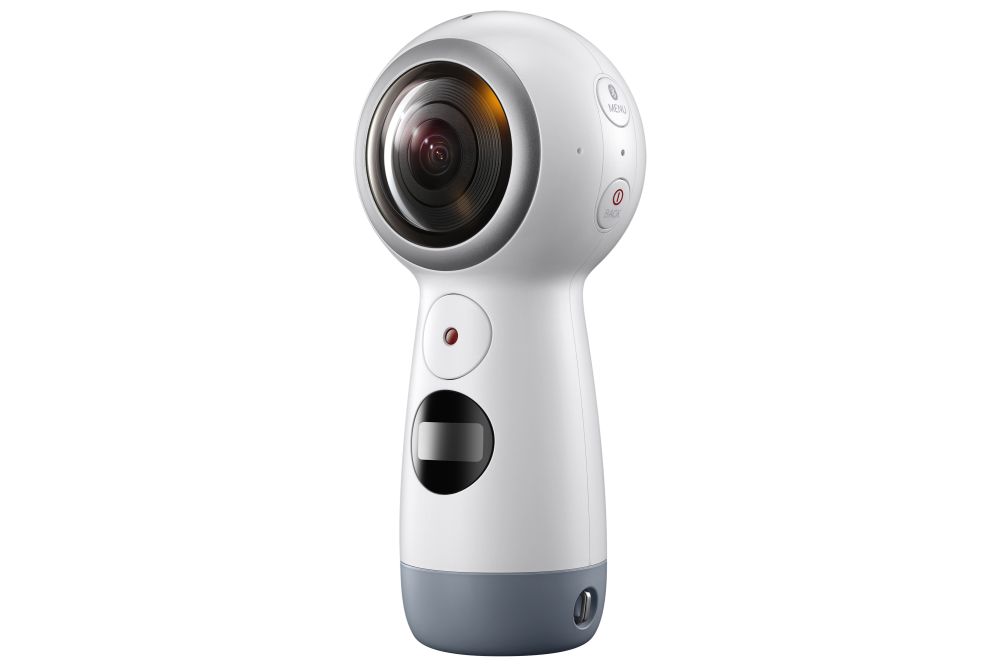
I’ve always wanted to try out the Gear 360, a camera that can take 360-degree images and movies that can not only be viewed on your phone, but – for lack of a better and more grammatically-correct phrase – ‘spun around in.’ I recently had a credit applied to my Samsung account that made the normally $200ish camera $99, and I couldn’t pass it up. Just to be clear, we are talking about the newer version, which looks like a ball on top of a little post, not the first version which looks like a golf ball on a tripod.
After returning the first one because it was clearly a used item, the new one finally arrived. I was eager to try it out but had to charge it first, which took some time. The camera itself has a rounded top with cameras on both sides of the golf-ball shaped and sized head. There is a small screen on the camera that provides various bits of information, such as battery level, resolution setting, and so on. There is a power button on the side and record button on the front (The camera is symmetrical, so I’m calling the side with the screen the front, and the side with the power button the back; completely arbitrary). A second button on the side will pair it with your phone, and the Bluetooth pairing needs to happen before it will send images to your phone, obviously. You can also store images on an SD card for download later. As for compatible phones, either Samsung or iPhone; I have a Galaxy, and I have heard it doesn’t work so well with others but I can’t confirm that.
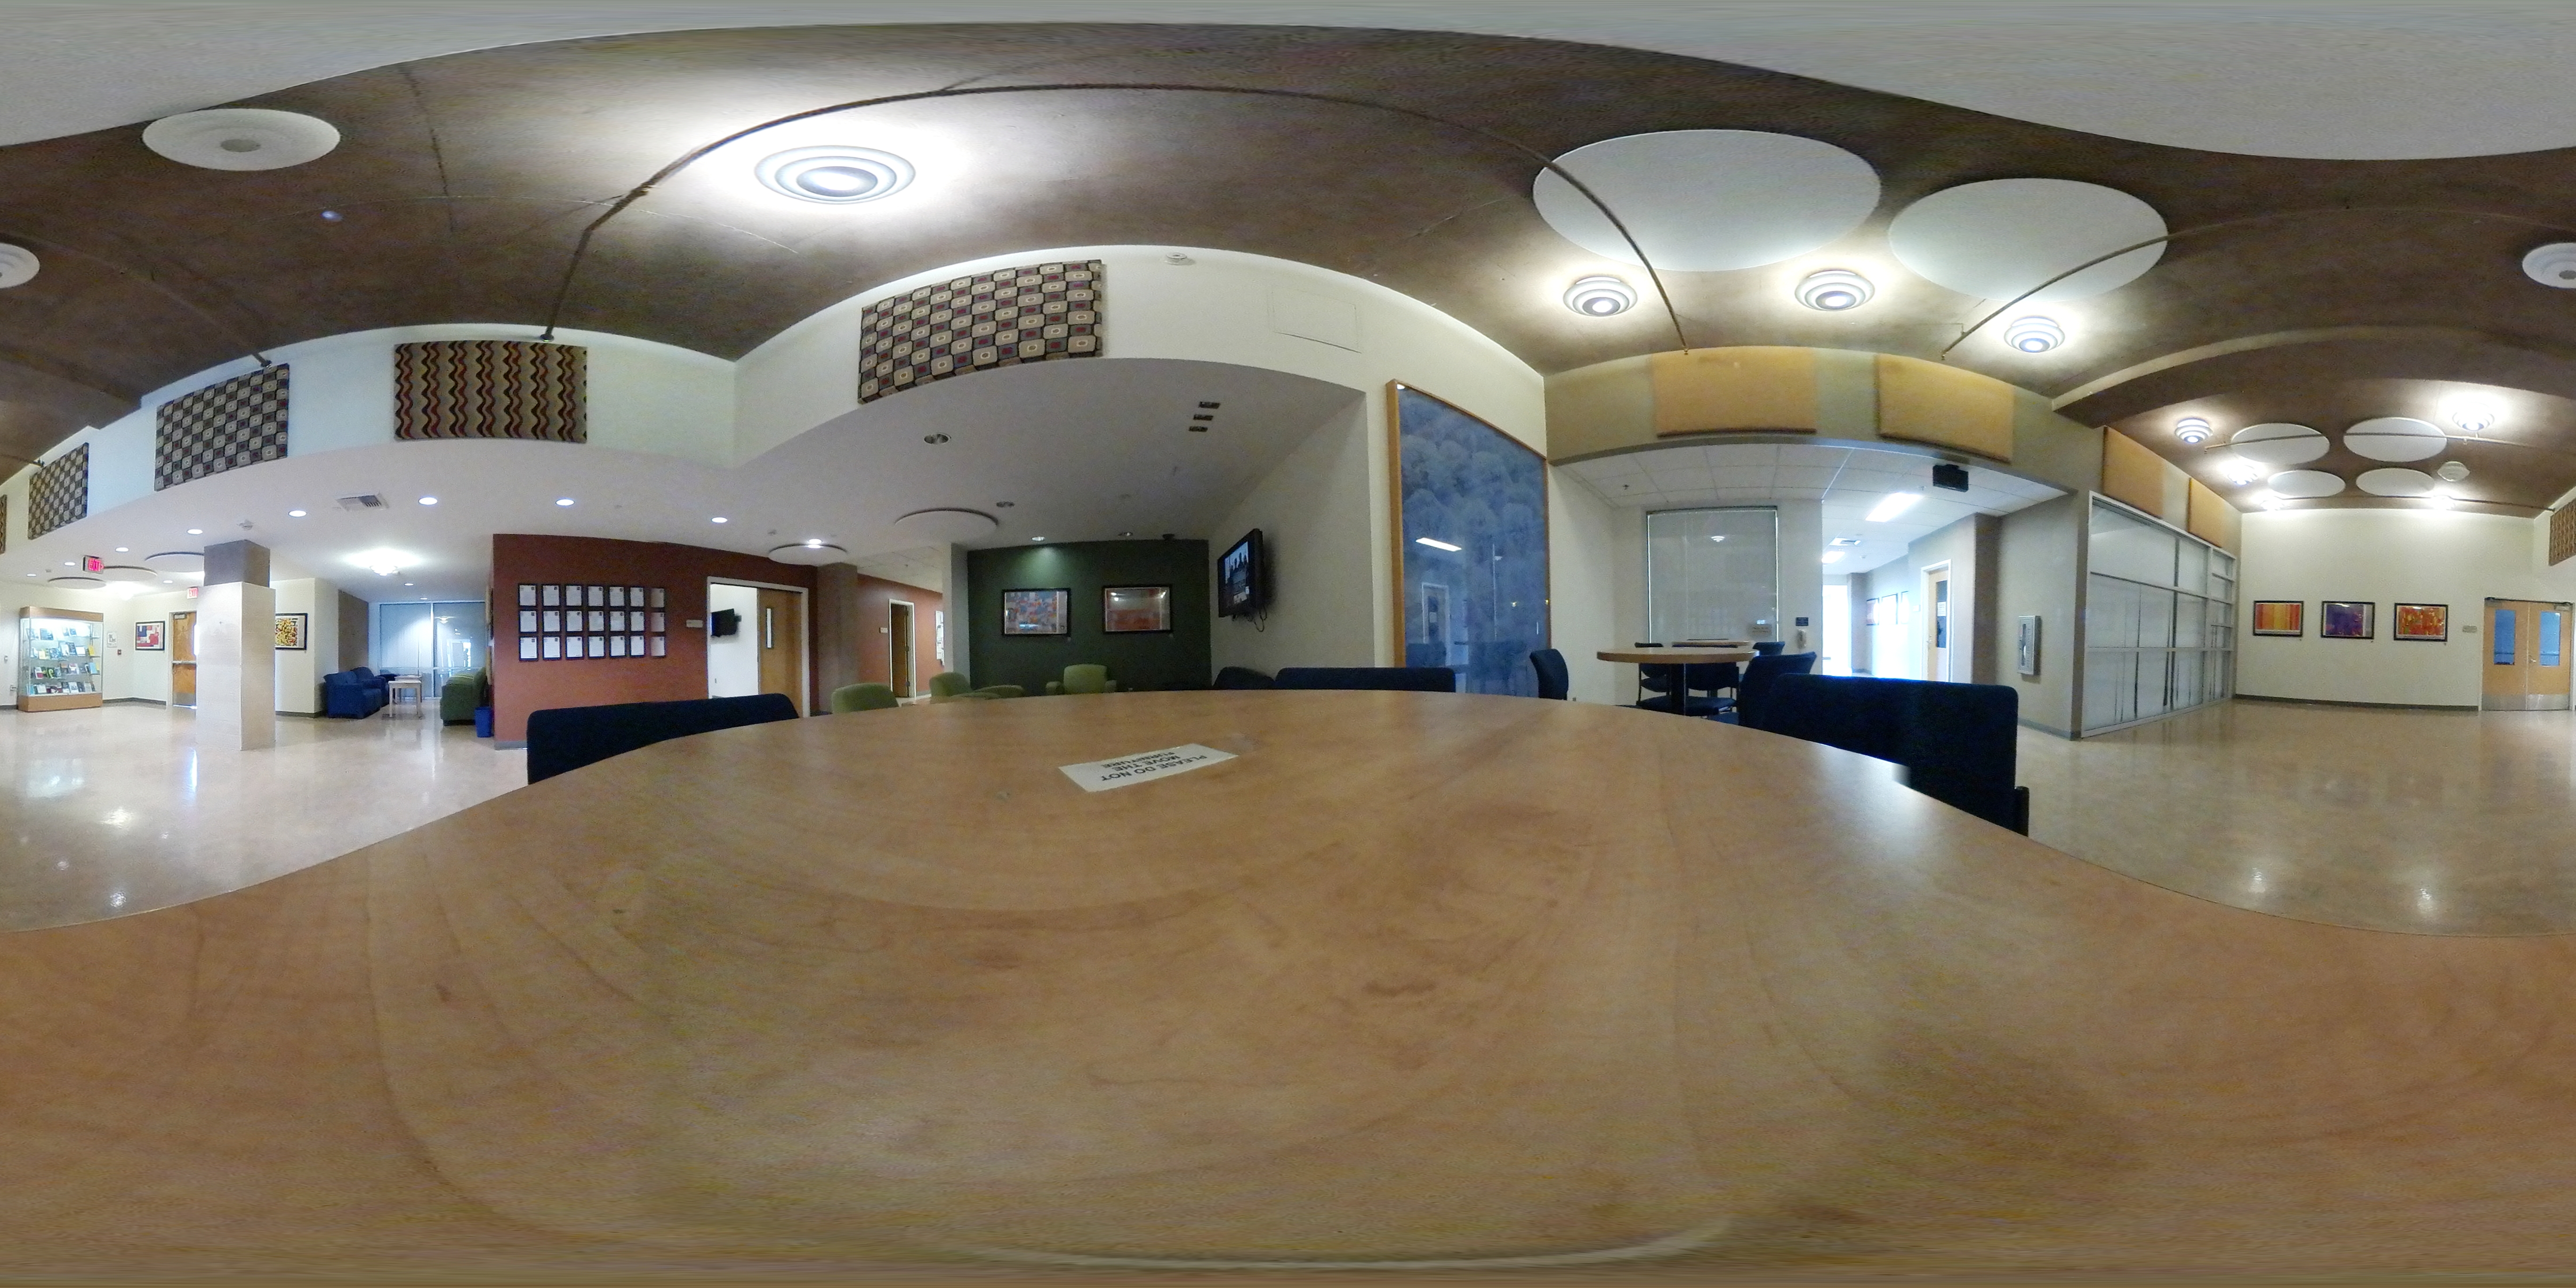
I started with a shot of my office, hoping to see great things, however even though the 360 touts itself as a 4K-capable camera, the results were anything but that, and moving on to some shots of the campus didn’t change anything. Before I show some examples, I should also mention that there is really no way to view them other than on your phone, or by using very specific websites. I can’t just upload them here and expect them to work, I have to have a dedicated WordPress plugin to get them to show properly. In Microsoft’s OneDrive, the picture shows as a flat image that appears clearly warped, while in Google Photos it’s recognized as a 360 image and displayed as such (Direct link to Google photo sample here, you’ll have to click on the little circular arrow in the upper right-hand corner to switch to 360-degree view). OneDrive version is below.

OneDrive representation of a 360-degree photo
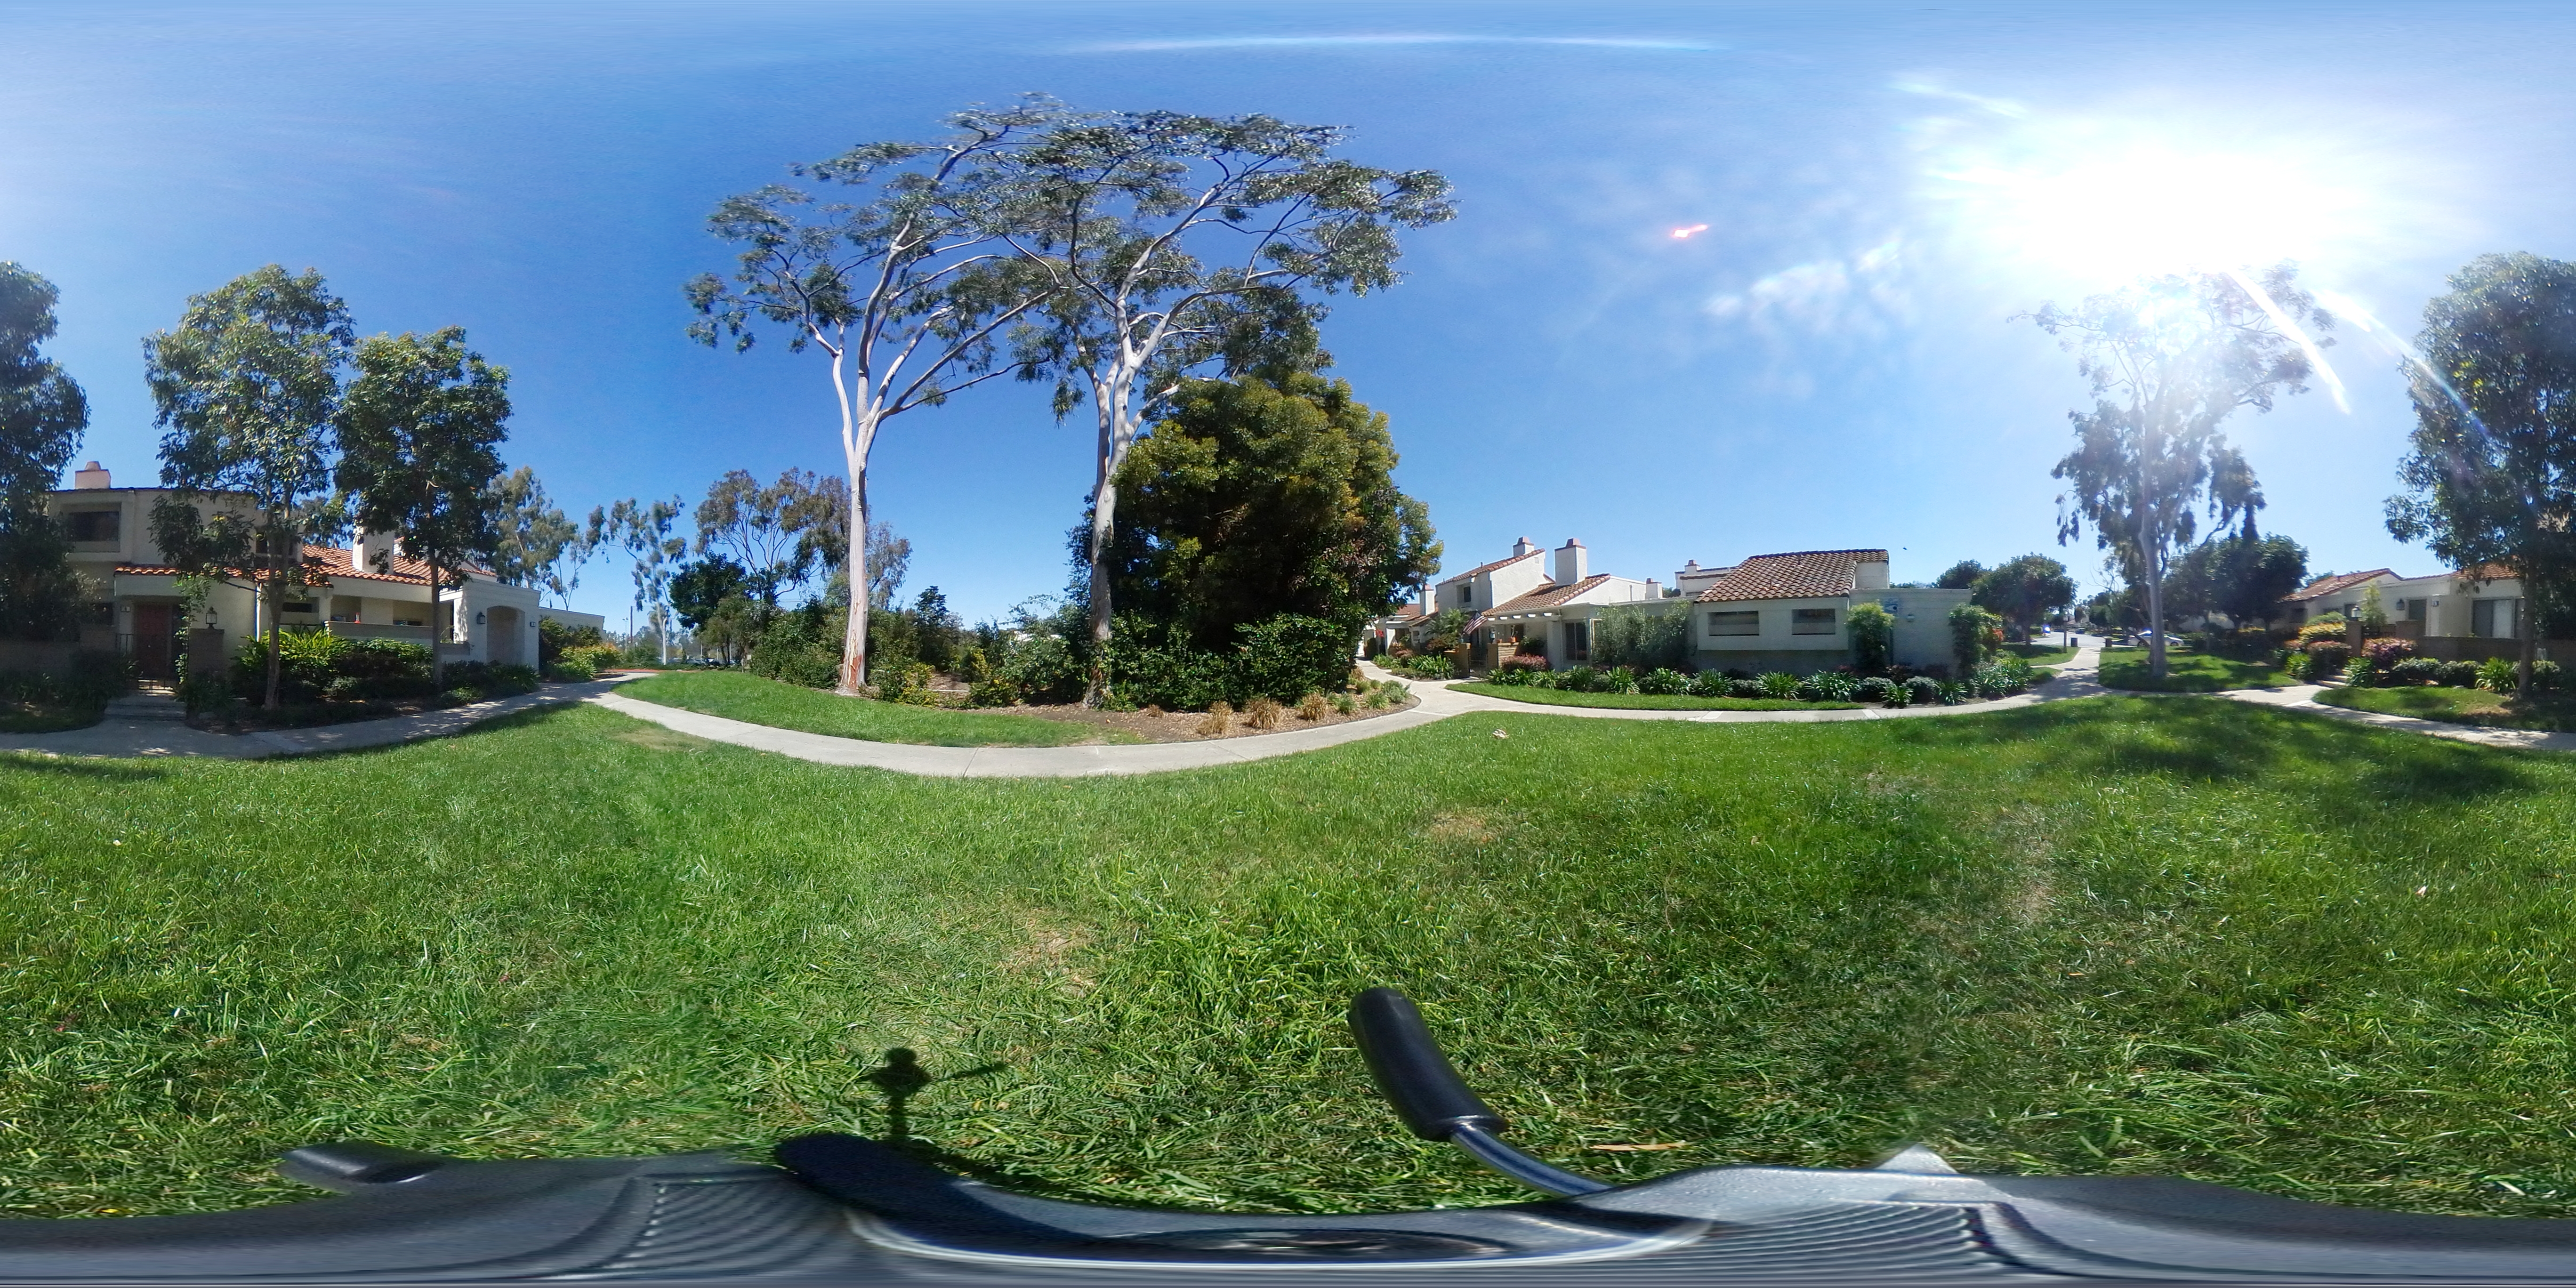
The pictures are easy to take, and you can do so remotely via the app or from the camera itself. In fact, in the Google version of the above image, if you look closely down the line of the brown trashcan the camera is sitting on, you can see me behind the lattice taking the picture. There are other settings you can adjust as well, and although the pixel count of the images is huge, 5742 x 2736, the quality just isn’t there.
From a distance images look good, and when viewing on a phone they’re definitely passable, but upon closer inspection details are washed out and fuzzy, with lack of detail prevalent throughout. Contrast is poor and edges lose focus. Colors can be good, but are often faded or diluted. Note, for example, the purple trees in front of the building: The color is washed out, as is most of the image, and the detail is terrible.
Overall the image conveys what it represents, but it could be so much better. I adjusted many of the settings but was unable to increase the quality of the settings in any meaningful way. Strangely, the newer version of the Gear 360 actually has a lower resolution camera than the original model, and significantly so: the original had 15 megapixel cameras while the newer model, the one I’m testing, has 8.5 megapixel cameras. That’s a reduction of almost half.
I also haven’t yet had the opportunity to test the video, and I will post updates when I do. Speaking of the significantly lowered resolution in the cameras, it takes proper 4K videos (4096 x 2140 at 24fps, which is the theater standard for 4K), while its predecessor took what is known as UHD video (3840 x 1920 at 30fps, which is the broadcast standard for ‘4K,’ but is not true 4K).
It also has a lower capacity battery as opposed to the first generation Gear 360, 1160mAh v. 1350mAh (milliamp hours), however without knowing the specific power draw of the device I can’t calculate how many hours that translates into. The standard is mAh / draw = total hours of power. I’d guess around an hour, although in my tests on campus and around the house I had plenty of battery life left even after shooting a bunch of pictures, transferring them, and so on.
So, it’s good but definitely not great. I don’t like the downgrade in so many of the specs from the first generation of the device; it’s like when the clock would tick backwards in school before the bell finally rang for recess. I know something good is coming, but the Gear 360 is at once a step forward and a step back. If they can improve the quality of the images for viewing at a larger scale, then they could really have something here. And it’s not like there isn’t competition: The next most popular would likely be the Ricoh Theta, which, from what I’ve read, bests the Gear 360 in almost all aspects, but I have no hands-on experience with it.
I’m also using this post to test the plugin for 360 images, and I’m putting all the ones I took below (you’ll have to click to open them up) – let’s see how it does!
Update: How strange. In order to embed the 360-degree images, I installed a plug-in called WP Photo Sphere that works by inserting a shortcode of the form “sphere 1234” in square brackets. In a test post that has nothing but that shortcodes, it worked perfectly. In this post, they don’t work at all, at least on my machine. I have no idea why, I’ve been investigating for almost a week but I will keep looking into it. It’s a nifty feature when it works.
Update 2: Apparently all I had to do was make the page live. When published, everything worked fine. I did nothing, but I will take all the credit for it. Sweet, sweet credit.
Intel processors revealed to have major flaw, only addressable by OS updates

UPDATE: I’ve been trying to find out more, but Intel is now claiming it has a fix for the vulnerabilities affecting its chips that it will be rolling out by the end of next week. Details are slim, and I will hold off final judgment of course, but I’ll be surprised if it’s completely effective; these microcode patches can be tricky – it’s not a straight firmware update as it impacts the fundamental operation of the CPU. Additionally, it appears the fixes only address the last five year’s worth of processors. Better than nothing if it works.
Original post follows:
This is bad. It has been announced that Intel processors going back approximately ten years have a major flaw in how they separate the system and software. The details have not been released, but the general idea of the problem is already understood for the most part. To give a very high-level overview of what is going on and the impact of how it needs to be addressed, there is a component of every operating system known as a kernel, that separates the hardware from the software. When a program needs to open a port or save a file to disk or access a printer, or utilize hardware in any other way, it hands off that request to the kernel using what’s known as a system call, and the kernel completes the request (user mode to system mode). The catch is, the kernel is hidden from the program, even distributed in various memory locations to further hide it so that it can’t be exploited by malicious actors; it has to be loaded at system boot, however, in order for programs to use it.
Intel processors, though, use a kind of predictive processing, similar to client side prediction in games, in which a guess is made as to what will most likely happen next. In the case of Intel processors, they try to guess what code will be run next and load it up in the queue, however they apparently do this without any security procedures. The kernel is kept separate because it can contain confidential information such as passwords (which is why you can’t even get your own passwords back and there is no way to recover them if lost), however if the CPU provides no security check when loading up predictive code, it could, theoretically, run code that would ordinarily be blocked, which could then give savvy attackers access to low-level system processes and data.
But wait, there’s more bad news! Because this can’t be fixed with a firmware update or anything similar, OSs have to be written to address the problem. Linux, Windows, and OSX will all require updates that relocate the kernel in memory. Normally, it’s available to each program in their own process, but that will no longer be the case, and having to go back and forth between user mode and system mode in this manner will incur a possibly-significant performance hit on a PC after these updates, estimated by some to be as high as 30 percent.
Again, the details aren’t yet fully known, and the impact isn’t either, but if proven true it could be the worst design flaw I have ever seen. I’ll update when more is known.
Converting vintage toys into their modern tech equivalents
I’m not comfortable referring to toys I played with as a kid as vintage, but they are, and what this person does with them is quite inventive. His Nom de Plume is Circuitbeard, and among other things, he converts vintage toys into modern ones, while modifying as little of the original item as possible.
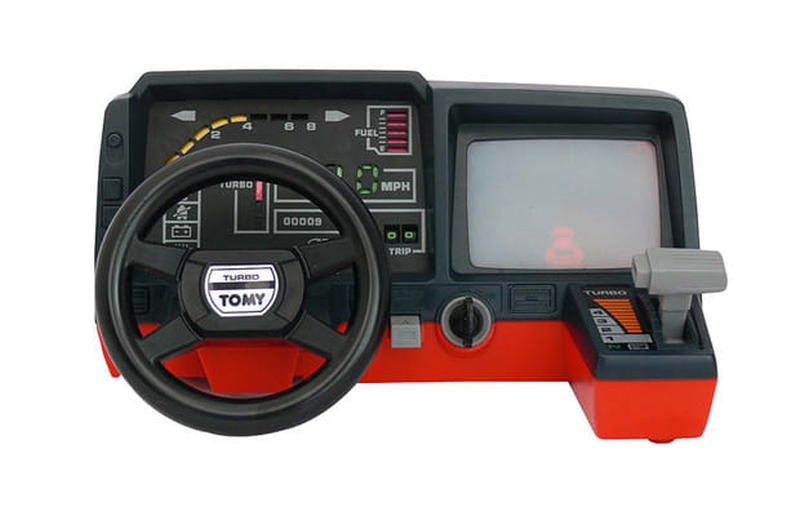
The one that prompted me to write this post is his updating of a classic mechanical driving game – in this case a Tomy Turnin’ Turbo Dashboard game – to instead be a fully functioning, self-contained, OutRun arcade game.
Before we get to that, the original Tomy game was quite an accomplishment in itself. Released around 1983, everything about it was mechanical, from the revs to the fuel gauge to the fake-but-passable digital speedometer. The driving is secondary, really, since there isn’t much to it other than keeping the car in the center of the road via your manual steering and not veering to the side nor crash into the exact same car that kept appearing since the road is really just a looping image. Even if you did, nothing much happened, and remember this isn’t a video game, it’s all mechanical.
It’s a hard thing to explain, so here’s a video that shows how the original looked:
The electronic magician Circuitbeard, on the other hand, took this device and turned it into the game it always wanted to be. Just like Pinnochio always wanting to be a real boy, this game always wanted to play OutRun. The details of how he did it, which are long and impressive, including custom printed PCBs, a custom, laser-cut dashboard, and LEDs that actually represent what’s going on in the game, can be read over at his blog post and I very strongly encourage you to do so. Not simply to experience the monumental creative and technical feat he accomplished, but to see the other vintage toys he has converted. It’s all very masterful, and fascinating.
I’m sure what everyone wants to know is how did it turn out (but don’t skip the details. Seriously!). Here is the video of the final result, and to add to the above paragraph it involved some custom libraries, bespoke 3D-printed parts, multiple controllers; it is not hyperbole to say it may be one of the most brilliant electronics projects I’ve ever seen. He has others, by the way, which are equally as magnificent.
Here’s the video of the final result, and don’t be deceived into thinking this was a simple project. Read his post!
Amazing LED backsplash tiles

Now here is something beyond nifty. A company called All Things LED (Be aware: The site is very slow, probably because it’s from Canada, eh) is apparently in the process of developing LED backsplash tiles that can show animations as they they were a pseudo movie screen. Before I get in to more detail, take a look at this video and be amazed:
According to their FAQ page, they did not expect their invention to become as popular as it did, and therefore they don’t have a lot of specifics regarding mounting, availability, installation, etc. They do say it will run $150 per square foot, so be prepared to pay out the sap hole. Additionally, I had read on their site that they have a bespoke controller to control the animations, similar to what is used to control Christmas light animations, and that you can upload your own animations as well, however very curiously both pages that had that information now lead to 404s. I wonder why, perhaps it has something to do with being overwhelmed by the response.
Anyway, I love this kind of stuff, the animations are remarkable, when i designed my kitchen I wanted something very warm and subtle so this probably would not have been terribly appropriate, but I wouldn’t have been able to resist, I’m sure. The snowflakes, the underwater video, the skull motif, at one point they’re even showing a hockey game, of course. I could probably do without the fire, though, that’s something my kitchen can do without. Very neat overall.