Tag Archives: PLEX
Just like old times: Running console emulators and PLEX on the virtual flat screen TV in Oculus Home
A couple of months ago, Oculus introduced a few flat-panel TVs (and a desktop monitor) into Oculus Home. That would have been fine in and of itself, however these TVs can have ‘panels’ embedded into them. Panels are essentially windows from your desktop, so if you had Word or Plex or chat or even a game session open, you could have it appear in a TV or monitor in your virtual home.
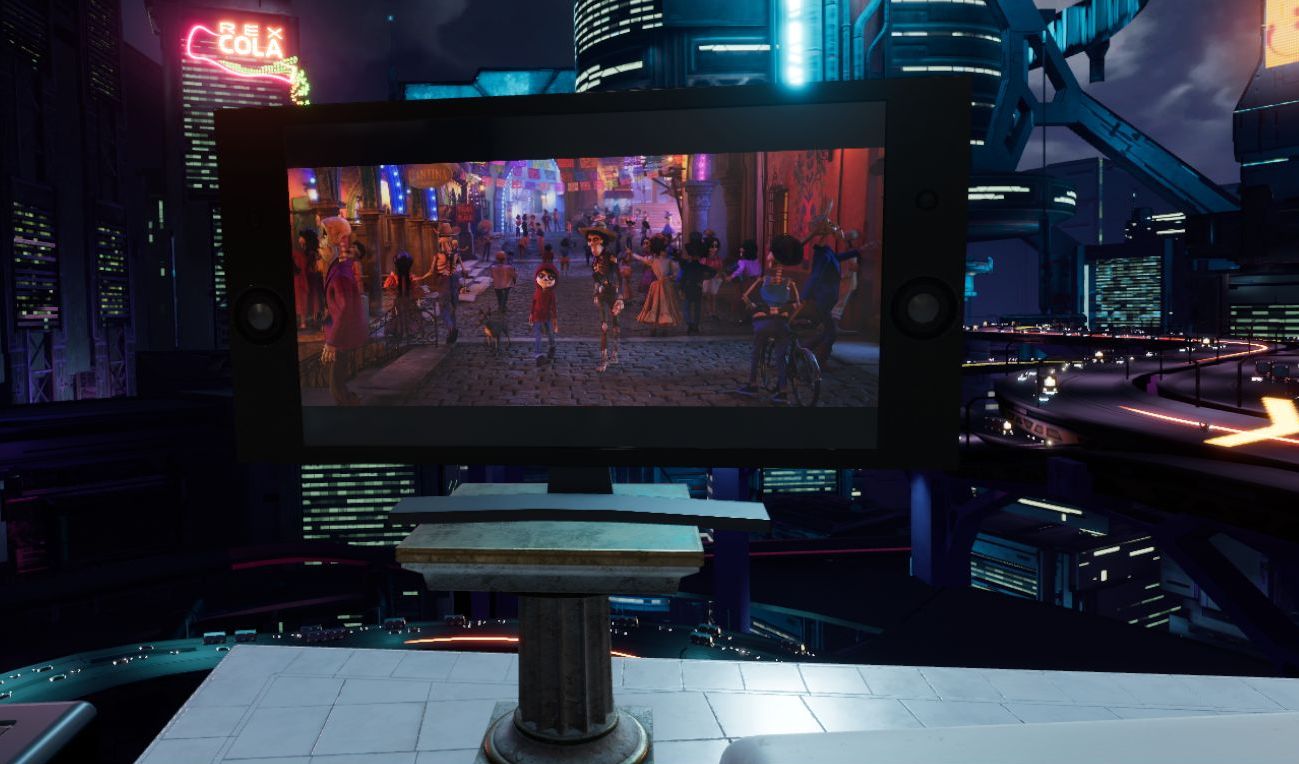
Naturally, my first instinct was to fire up one of my retro-console emulators and see if I could have it run by projecting it through one of the TVs in the virtual space. It’s almost a meta thing: Playing a classic console on a flat-screen TV in a virtual environment via VR. If it worked, since Oculus allows you to place as many of these as you wish, I could set up the custom gaming room of my dreams. I am happy to report it worked perfectly, and I am in the process of designing that gameroom right now! I’m thinking futuristic city as the backdrop, but we’ll see.
PLEX, which is movie-playing and streaming software for your personal media collection, also ran beautifully with no lag, and I’ll talk a little about that towards the end.
Before I get to the results, let’s talk about emulators. Emulators trick your system into thinking they’re the console they’re emulating, and I mean that they really trick it. Whatever shortcomings the console itself had, so will the emulator (and possibly a few more, but we’ll get to that). If a bug appeared in a game, or the console just quite wasn’t fast enough to push a game, that will be replicated during emulation. Atari 2600 emulators will even show racing the beam errors, in which the next line of video won’t be drawn if the emulator is still carrying out logic operations. In the following image, which shows The Empire Strikes Back for the Atari 2600 running in the Stella emulator (Stella was the code name for the console during development), if you look closely you’ll see black lines down the left hand side of the image: Those are racing the beam errors, even though it’s not a CRT and not even a console! The point is, when you’re emulating, the systems is the console.
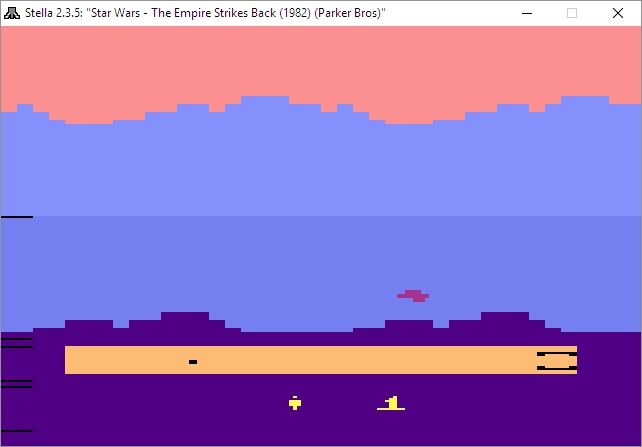
Racing the Beam errors in the Stella emulator
Not only that, the games are actually the games, not some reprogrammed nonsense. An ISO, for example, is an exact bit-level copy of digital media, so someone will put the original game disc into their PC’s optical drive, or sometimes they’ll use the console itself with special connections, and use special software to turn that disc or cart into a file. Other times, the ROM chip itself will have to be ripped using a ROM (EEPROM) burner.
The point is, with an emulator, you’re getting the actual console experience with the actual games and all their flaws or lack thereof, not some hokey recreation. It also means some games may not work all that well, or at all, but that’s rare.
Generally, emulators are not terribly difficult to set up and get running. Each has its own quirks, but once you start experimenting you’ll be hooked, not to mention surprised at (generally) how well they run.
I use many emulators, and I’ll give you a crash course on setting them up. All you really need to know is that you need to specify a folder that contains your games, and you can call the folder anything you want: Whenever I set up a folder I’ll call it either ‘Games’ ‘ROMs’ or ‘ISOs,’ but you can use anything. Speaking of the games, those files can come in several forms: Some emulators allow for zip files in the games folder, others will require an .iso, .bin, or possibly other, specific file such as .gcn which is for the Nintendo GameCube. Some can use whatever you throw at them. Additionally, for the later consoles, you’ll need a BIOS file in your games folder as well, and they can generally be found with a low-effort web search, as can the games themselves.
Here’s an example of how the directories work, and these are almost always assigned during setup, although you can certainly set it through the options as well. For clarification, I run mine from a network drive, which is nice because I can save a game and then pick it up again from any PC in the house, or on the planet. Speaking of game saves, the emulators take care of setting up memory cards for saving games as well, however you can also create ‘Save States’ at any point in a game regardless of how its save structure is set up. So if you have to leave or otherwise shut down the emulator but haven’t reached a checkpoint, you create a save state, then load that instead of the save from within the game itself. You’re essentially saving the state of the emulator, not the game.
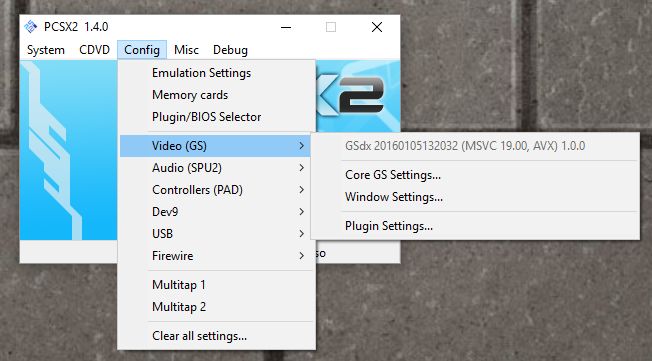
Here’s an example of setting up the games directory: In the image below, in image ‘1’ in the upper left, you can see I have an ‘Emulators’ folder, and after opening that, in image ‘2,’ top right, I am selecting the PCSX2 folder, which is a PlayStation2 emulator. Then, in image ‘3,’ lower left, I have created a folder called ‘Games’ where I keep all game files, and finally the last image shows the .iso and .bin files that represent that games I have for that emulator. On the other hand, my Gamecube / Wii emulator, Dolphin, has a folder called ISOs where I keep all my games, even though not all of them are actually .isos.
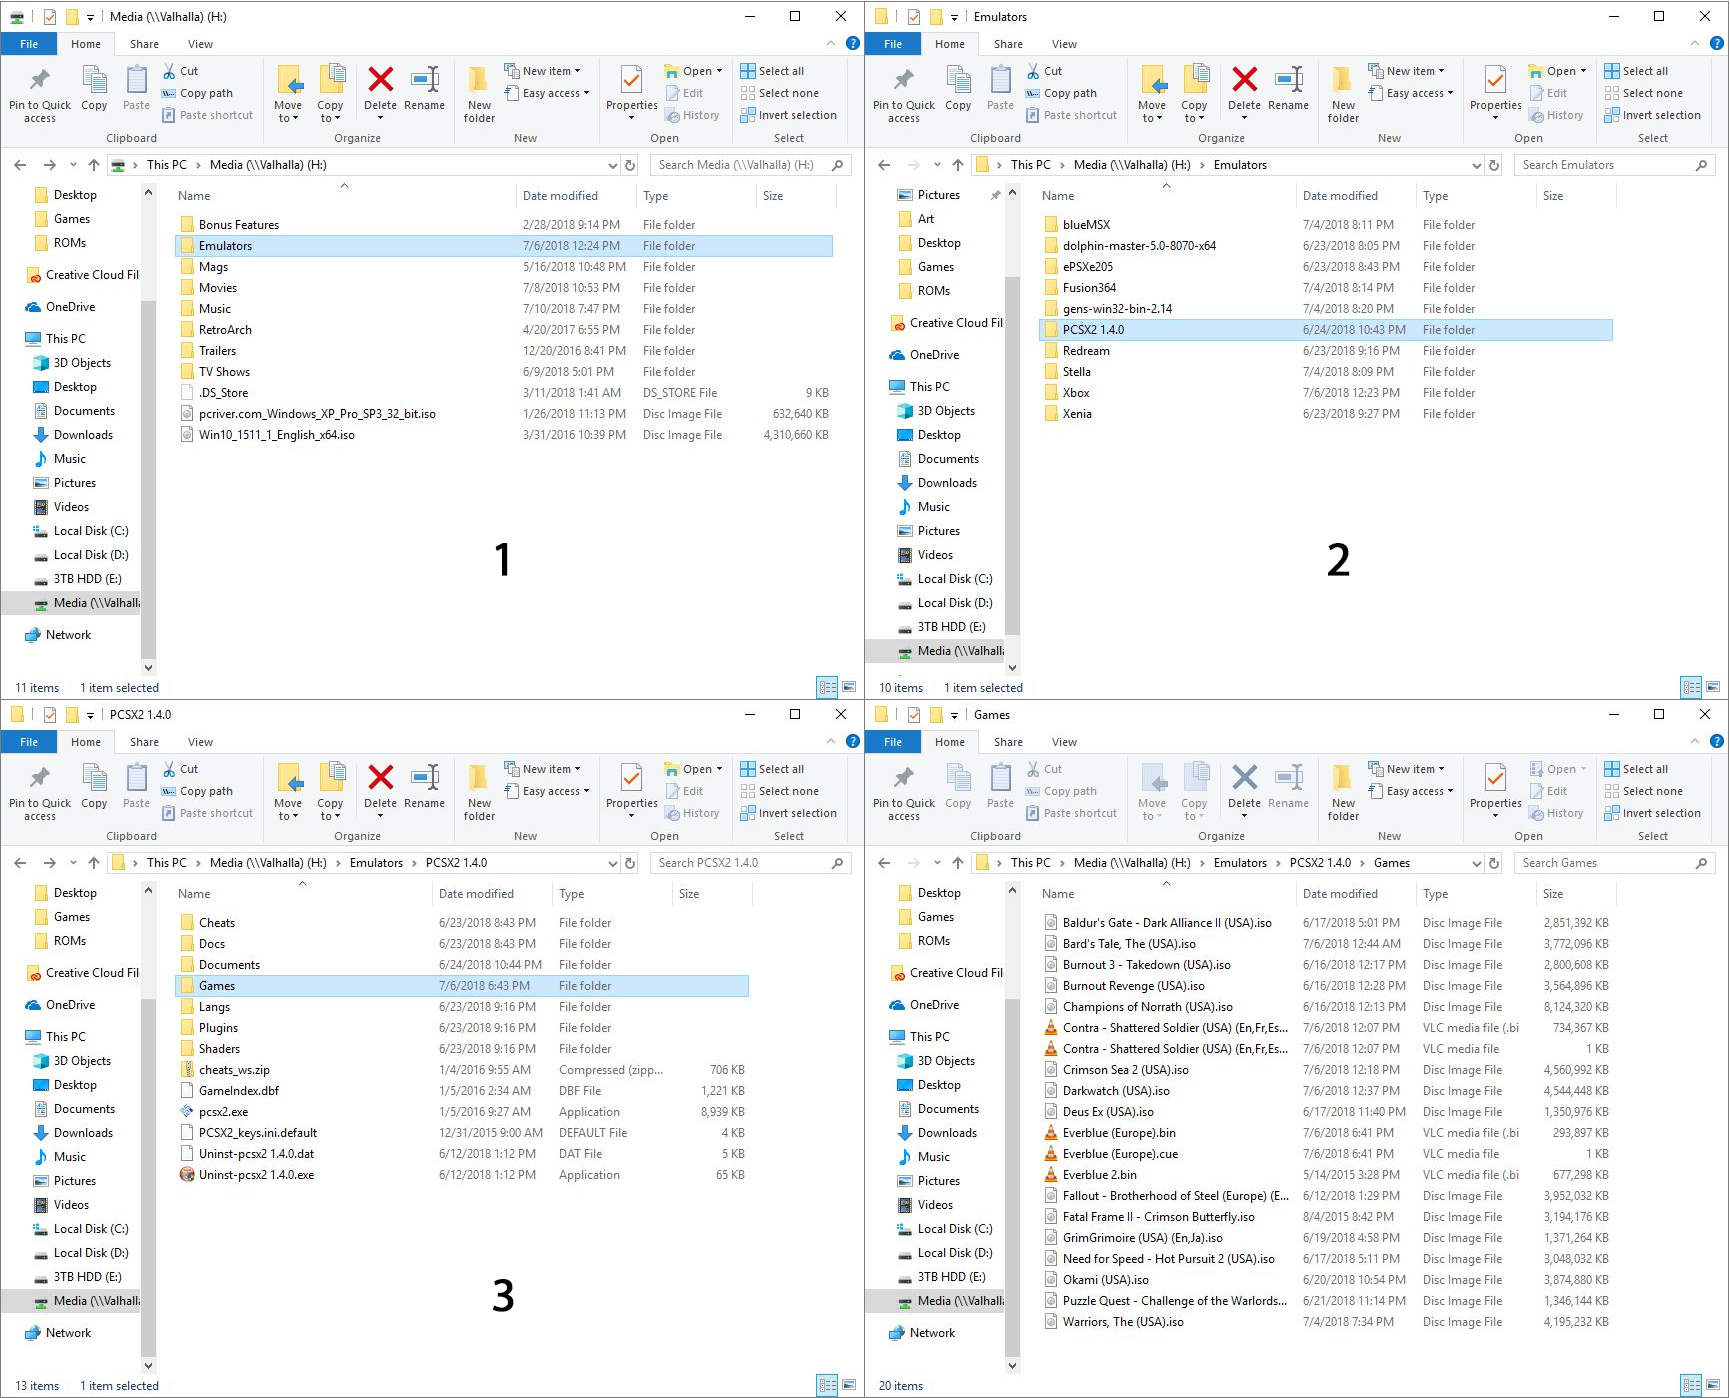
Directory structure for the PCSX2 emulator
The next big thing is that I have an XBox One controller connected to my PC, and any controller you use has to be configured. The initial controller setup, although straightforward, can be moderately time-consuming, but you should only have to do it once. For most emulators, you’ll need to go through and indicate which button on the controller does what, and you do that by clicking on each function in the emulator, then pressing the button / pulling the trigger that you’d like to assign. Below are images of the PCSX2 controller configuration screen, and underneath that the Dolphin controller configuration screen, and you have to click on each function then press / pull the corresponding control on the controller itself. Once that’s done, controls should be all set. Ultimately, it’s a really nice way of doing it because you can set the controllers any weird, wacky way you’d like.

PCSX2 Controller Configuration dialog

Dolphin Controller Setup
The only other major issue you are likely to run into is the graphical settings. Older consoles weren’t designed with 4K TVs in mind, many never even considered widescreen! Although most games will work fine, each emulator will have its own peculiarities when it comes to this, and they all offer EXTENSIVE graphics customization. PCSX2, for example, allows you to use OpenGL, Direct3D9 or Direct3D11, and it’s fascinating how a game won’t run under DX9, but will run perfectly under DX11, or vice versa, and I have seen many variations on that. I also, for that particular emulator, set resolution to at least 2x native; then it will run surprisingly well even on a widescreen 4K TV. And of course, it allows you to customize graphics for the emulator in general, as well as specific tweaks for the renderer you choose.
PCSX2 configuration menu

PCSX2 renderer selection and tweaking
When it comes to actually selecting a game, some emulators are more user-friendly than others. Prettier, I guess I should say. PCSX2 only offers up a straight file selection window, while Dolphin and ReDream, a Dreamcast emulator, provide lovely selection menus. Being an HCI person I prefer that, but the PCSX2 barebones method works just as well.
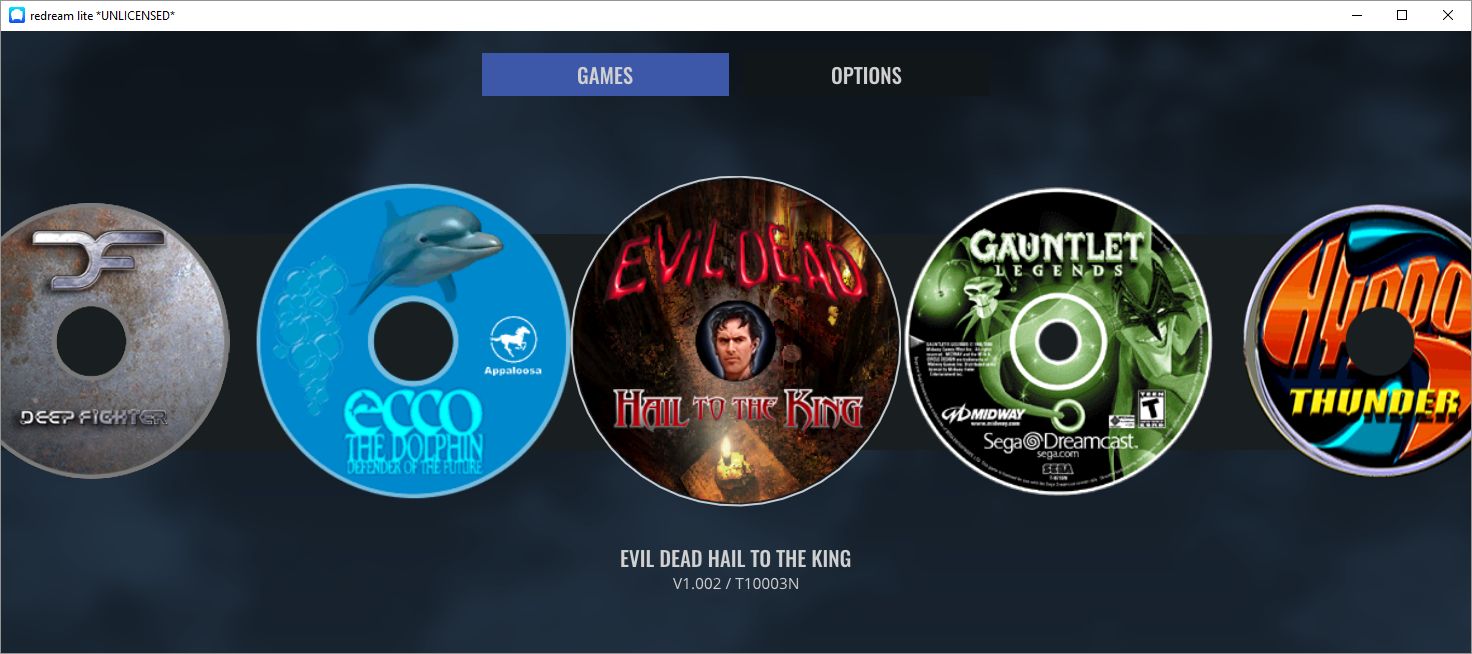
ReDream game browser

Dolphin game browser
So now that we have the details out of the way, what about running them on the TVs in Oculus home? I’m glad to report it works perfectly! There is, however, one big caveat: You can choose to embed the emulator window that’s displaying the game, however the window won’t be listed as a panel if it’s fullscreen, so you’d have to window the emulator on the desktop, then embed the window, then maximize it on the desktop. The better choice is to fullscreen the emulator window then embed the desktop itself. If you do that, it will work perfectly, with no lag (either visual or input), no jitter, no performance hit. For PLEX and even for a couple of emulators, if they’re fullscreen, Oculus Home won’t recognize them anyway so you’ll have to embed the desktop no matter what: It’s just a better all-around option.

Panel selection
It also works for running MAME through the arcade cabinet, as seen below:
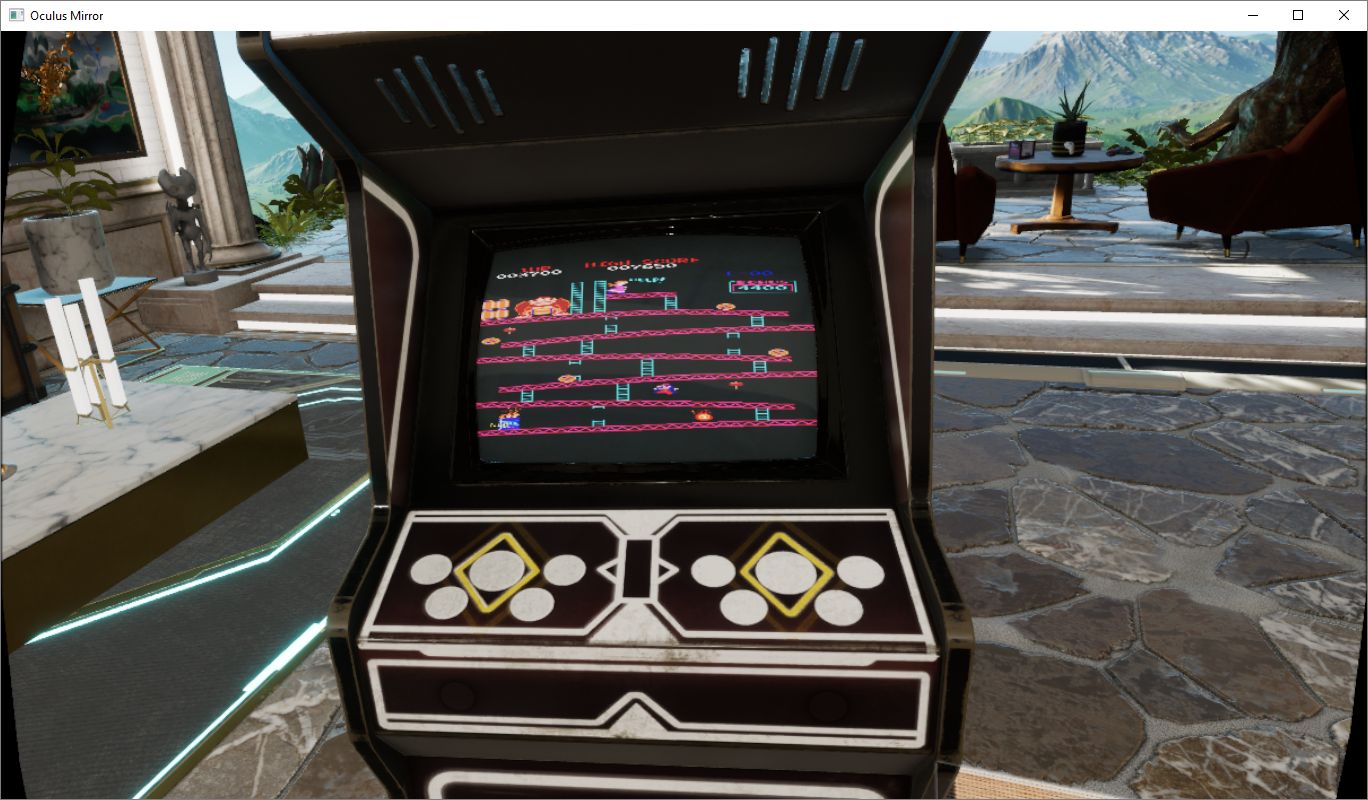
Running MAME in the arcade cabinet
If you’re interested in running PLEX, I have a separate video series on ripping videos and setting up PLEX (part 1 (Ripping), part 2 (PLEX)), and while it’s also not difficult, it’s beyond the scope of this post. Even so, the process of embedding is the same, especially since, as mentioned earlier, PLEX doesn’t show up in the panel selection menu anyhow.
Here’s the video showing four different emulators running on the Virtual TV in Oculus Home, as well as PLEX running a streaming rip of Coco from a network drive, and there is also a wall-mounted TV option along with a computer monitor. It all worked incredibly well, much better than expected.
Set up your own personal streaming video library

(This post will be sticky for a few days, so new posts will appear underneath it)
Based on some feedback I received both in class and via email, I decided I would write a post that walked through the steps of ripping and naming files and configuring clients. After taking around fifty screenshots and writing a whole lot, I realized it would be much easier for me to record some videos, and hopefully much easier for you as I could cram a lot of information into a hands-on demonstration that would provide visual context. .
Therefore, over the weekend I recorded three videos, each covering a particular aspect of setting up a media library, and I have embedded them below. I will also post them to their permanent spot on our brand new Videos page. Each is about 20 minutes long, and they’re easily digestible (I hope). The first covers riping and properly naming your media, the second covers using PLEX Server to set up streaming, and the third covers using XBMC as a dedicated media manager.
As I mention in the first video, the process isn’t necessarily complex, but there are steps involved and considerations that have to be made. Once you’ve you’ve gone through the initial setup, however, adding media is relatively easy.

A different view of XBMC than what you’ll see in the video
More about creating your personal video library

On Friday I demonstrated the service I use to maintain a personal Netflix of sorts, PLEX. I got a couple of questions about it, and there were questions in class, so while this won’t be a post on the complete process of ripping then storing the video files, I will offer some clarifications and the tools I use to have it all up and running.
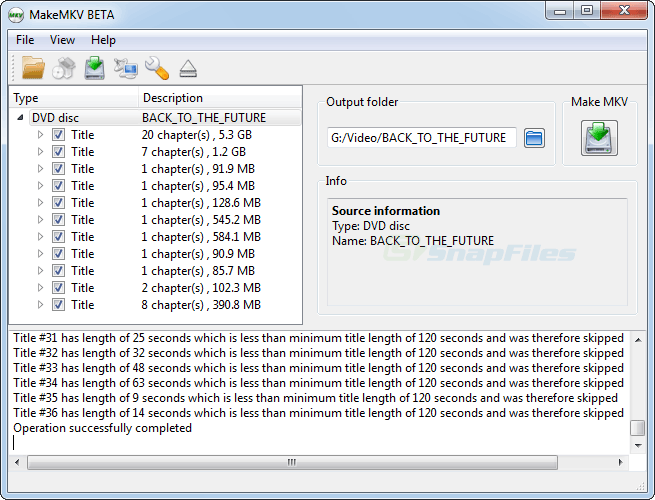
First, the tool I use to rip the videos is called MakeMKV. It rips some pretty big videos so storage will be an issue, and it rips them into the MKV format so your file will have a .MKV extension. It doesn’t preserve menus, only gives you a single file, and it can be somewhat overwhelming once the initial rip is complete. I also like MakeMKV because Blu-Ray is a proprietary format, so any time you buy a Blu-Ray or a Blu-Ray drive or anything Blu-Ray, Sony gets a cut. Therefore, a free Blu-Ray ripper is not something you’ll find laying around online. MakeMKV will eventually tell you you need to buy or register the product, but you can enter the beta key on this page and it will continue to work. I’ll talk a little about ripping, but there’s an excellent walkthrough here.
So about the ripping; once you put the disc in the drive, it does an initial scan and then you hit the big disc-drive button and it finds all the video content on the disc. I found this image online (it’s not mine) but this shows what the end result of a disc scan looks like, in this case Back to the Future.