
Category Archives: Software
Support for Windows 7 ends today
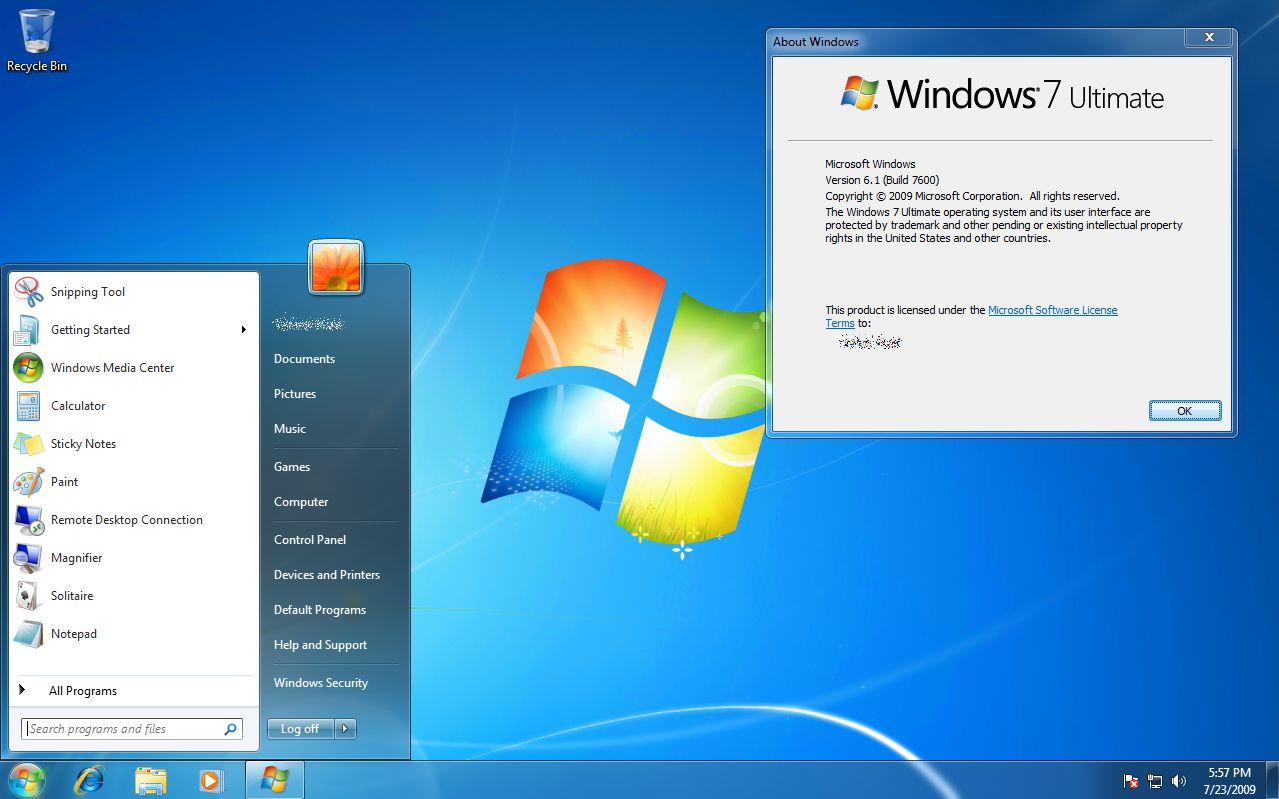
It is a sad day, as Microsoft is officially ending updates and security patches for Windows 7, the popular OS still being used by a large majority of PCs. Windows 7’s popularity stems in part from the large-scale rejection of Windows Vista (which I never had a problem with, personally), itself an apparent upgrade from Windows XP, which was also widely hailed and widely used.
This will cause some problems for people, small businesses and even large corporations that still heavily rely on the OS, as they will no longer be able to secure the platform after today. The fact that Microsoft is willing to provide continuing security updates for $25 per machine to start is not an effective IT strategy for a business, plus you can use Microsoft’s own upgrade tool to upgrade your machine for free. While we all loved Windows 7, it really is time to move on.
While sad, it’s also understandable, as companies must evaluate where they should delegate resources, especially when they have so many previous versions of Windows. On the other hand, considering the user base is still so strong, almost 33 percent right under Windows 10’s 47 percent, one might think they would still consider it an important horse in the stable, but people aren’t going to upgrade if you don’t give them good reason. Plus, I don’t see any major new versions of Windows (Windows 11? 14?) being released anytime soon, now that Microsoft is moving past CEO Satya Nadella’s ‘Mobile-First, Cloud-First” strategy into “Everything AI,” which still embodies some of the previous mantra.
Microsoft has, in my opinion, made great strides lately in terms of opening their platforms, becoming more accessible, and playing nice with other companies. Plus, you could always run Windows 7, or any other Windows version, in a virtual machine and never have to forget the glory days of the last great operating system.
Plus, you know it will end up available like this or this someday anyway.
The Lawnmower Man, and Vintage CGI

Inspired by a couple of Reddit forums to which I am subscribed, VintagePixelArt and VintageCGI, and being a fan of all things historical as it pertains to technology, I uploaded to the latter a brief scene from the 1992 CGI-fest movie The Lawnmower Man,’ supposedly about a guy who killed people using a lawnmower. Based on a book of the same name by Stephen King, King sued to have his name removed from the movie as it bore – barring one minor scene – absolutely no connection to the book. Rather, the movie was used as a vehicle to show off what the state of CGI, or Computer Generated Imagery, was at the time. The 30-second plotline is Dr. Angelo, a scientist funded by a shadowy company, is researching whether or not Virtual Reality can be used to enhance the human cognitive capabilities, or even unlock potential powers. He recruits Jobe, who helps around the grounds at local church and suffers from cognitive disabilities, and straps him into a complicated VR setup that turns Jobe into a god who ends up not acting very godlike.
The movie was fun, but the real purpose of the thing was to show off what the state of the art was in terms of CGI at the time, and also present what was at that time a still-unknown technology: Virtual Reality. Here is the clip I uploaded; I just clipped the scene out of the movie file:
In 1992 when the movie was released, commercial-grade computer generated imagery was created primarily on Silicon Graphics workstations, which at the time were the powerhouse machines of the day. Now, we have laptops with more computing power, but back then SGI workstations were the top of the line pro setup, and everyone from movie studios to science labs to government agencies wanted them for their ability to do everything we take for granted today: Simulations, animations, visual manipulation, prediction, etc.
They didn’t necessarily use special processors or OSs, in fact many of them ran on Intel processors and Windows NT, although other versions ran on UNIX. The difference was their proprietary hardware architecture, and compared to what commercial PCs had at the time, the SGIs were far more powerful. $4,000 would get you their low-end model: a Pentium II-powered box with 128MB of RAM. You read that right. This is a Linux box SGI, the O2:
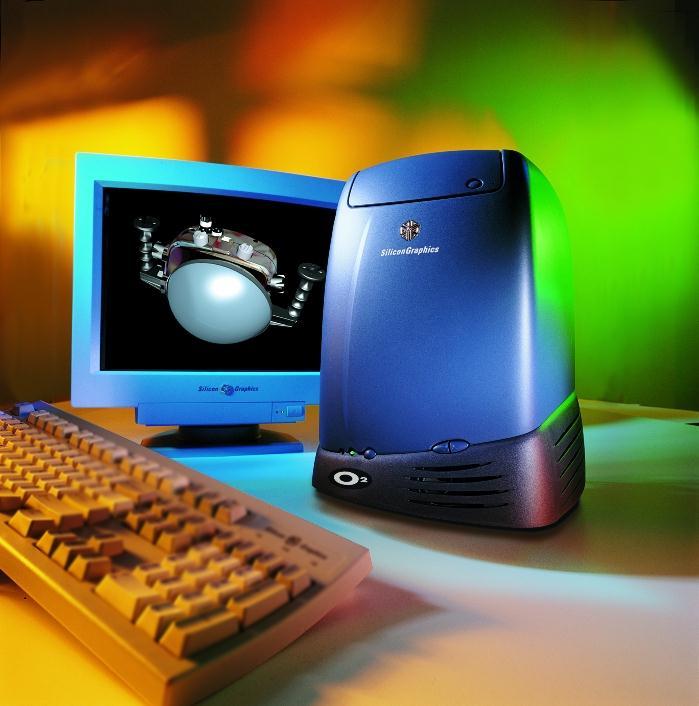
SGI O2
Appropriately, the former SGI building in Santa Clara now holds the Computer History Museum.
Movies were used as vessels to show off incredible, and sometimes not so incredible, computer imagery quite often. The absolute king of the hill in this area is the original TRON (1982), which not only used CGI but many other tricks as well, and gave us a glimpse of what life might be like inside a machine when computers and technology were still largely undiscovered country but arcade machines had already left an indelible mark. A perfect example of TRON’s influence is in the famous light cycle scene.\
The first ever use of CGI in a movie was all the way back in 1976’s Futureworld. This movie used a scene of a CGI hand that had originally been developed by Ed Catmull, a computer scientist at – wait for it – teh University of Utah (see below) who went on to create Pixar! Here’s the scene from Futureworld.
Computer capabilities in terms of imagery, visualization and rendering has been the fascination of many for a long time. One image has even gained celebrity status: The Utah Teapot. (Side note: I usually prefer not linking to Wikipedia, however the University of Utah’s own Utah Teapot page links there!).
The Utah Teapot, created in 1975 based on the need for a perfect shape, has since become the introduction to computer graphics, and has been featured extensively in other computer animated environments, with my personal favorite of course being its appearance in the animated sequence from The Simpsons’ Treehouse of Horror episode, titled Homer(3), in which Homer gets sucked into the horrific THIRD DIMENSION. You can see the teapot at 2:21 when Homer realizes he is ‘so bulgy.’ There are many other neat references in the scene. This scene was based on an episode of The Twilight Zone, a prophetic show in and of itself, called ‘Little Girl Lost,’ in which a girl is transported to the fourth dimension from the third.
Because we didn’t have immediate access to the capabilities of technology back then, especially computer animation, seeing it was a revelation. This was capitalized on by a series of (originally) DVDs, later laserdiscs, titled ‘The Mind’s Eye (1990).’ The followups were Beyond the Mind’s Eye (1992), Gate to the Mind’s Eye (1994), and Odyssey Into the Mind’s Eye (1996). Each was about an hour long and contained a series of CGI vignettes set to music. These vignettes were created by graphics firms, advertising firms, and others, and often scenes created by different companies were woven together and set to music to tell a story.
I first saw a scene from The Mind’s Eye being displayed on a giant display TV in front of a store (I don’t even remember which store!) in Security Square Mall in 1990, and I was mesmerized. I should have been amazed by the TV, but it was the visuals on it that really blew me away. It’s not my favorite scene in the series, but it holds a special place in my heart for introducing me to the series and for telling a touching story to boot, about a bird and a fish that destiny has deemed will be together. A hopeful allegory for today. Here it is:
I can’t find any information about who actually created this animation, so if you know, please pass it on! You can also watch the entire movie on The Internet Archive.
My favorite scene from the Series is found on the Second release, Beyond the Mind’s Eye. This one is called ‘Too Far’ and contains multiple scenes from various artists, including what might be my favorite animated character ever, the once famous Clark. There’s a lot going on in this segment, and it’s a masterpiece of CGI of the time.
Now here’s where it all ties together: The CGI created for the Lawnmower Man was also included in scenes from Beyond the Mind’s Eye. Not only that, the movie’s CGI was created by Angel Studios, which would later become part of billion-dollar video game powerhouse Rockstar San Diego. See how it all comes together?
In the years that followed, machines like the Amiga and of course Macs and PCs overcame the need for dedicated workstations, although the term persists. And now easy access to all sorts of graphical capabilities is at our fingertips, with engines being able to calculate what we can see and what we can’t and render accordingly, or cast rays of light based on reflection and refraction, or apply textures to surfaces, and so on. But that’s what makes these creations so much more impressive; using the tools of the time, they still were able to create such magical animations.
Samsung tweets out malware warning regarding its TVs, but deletes it soon after
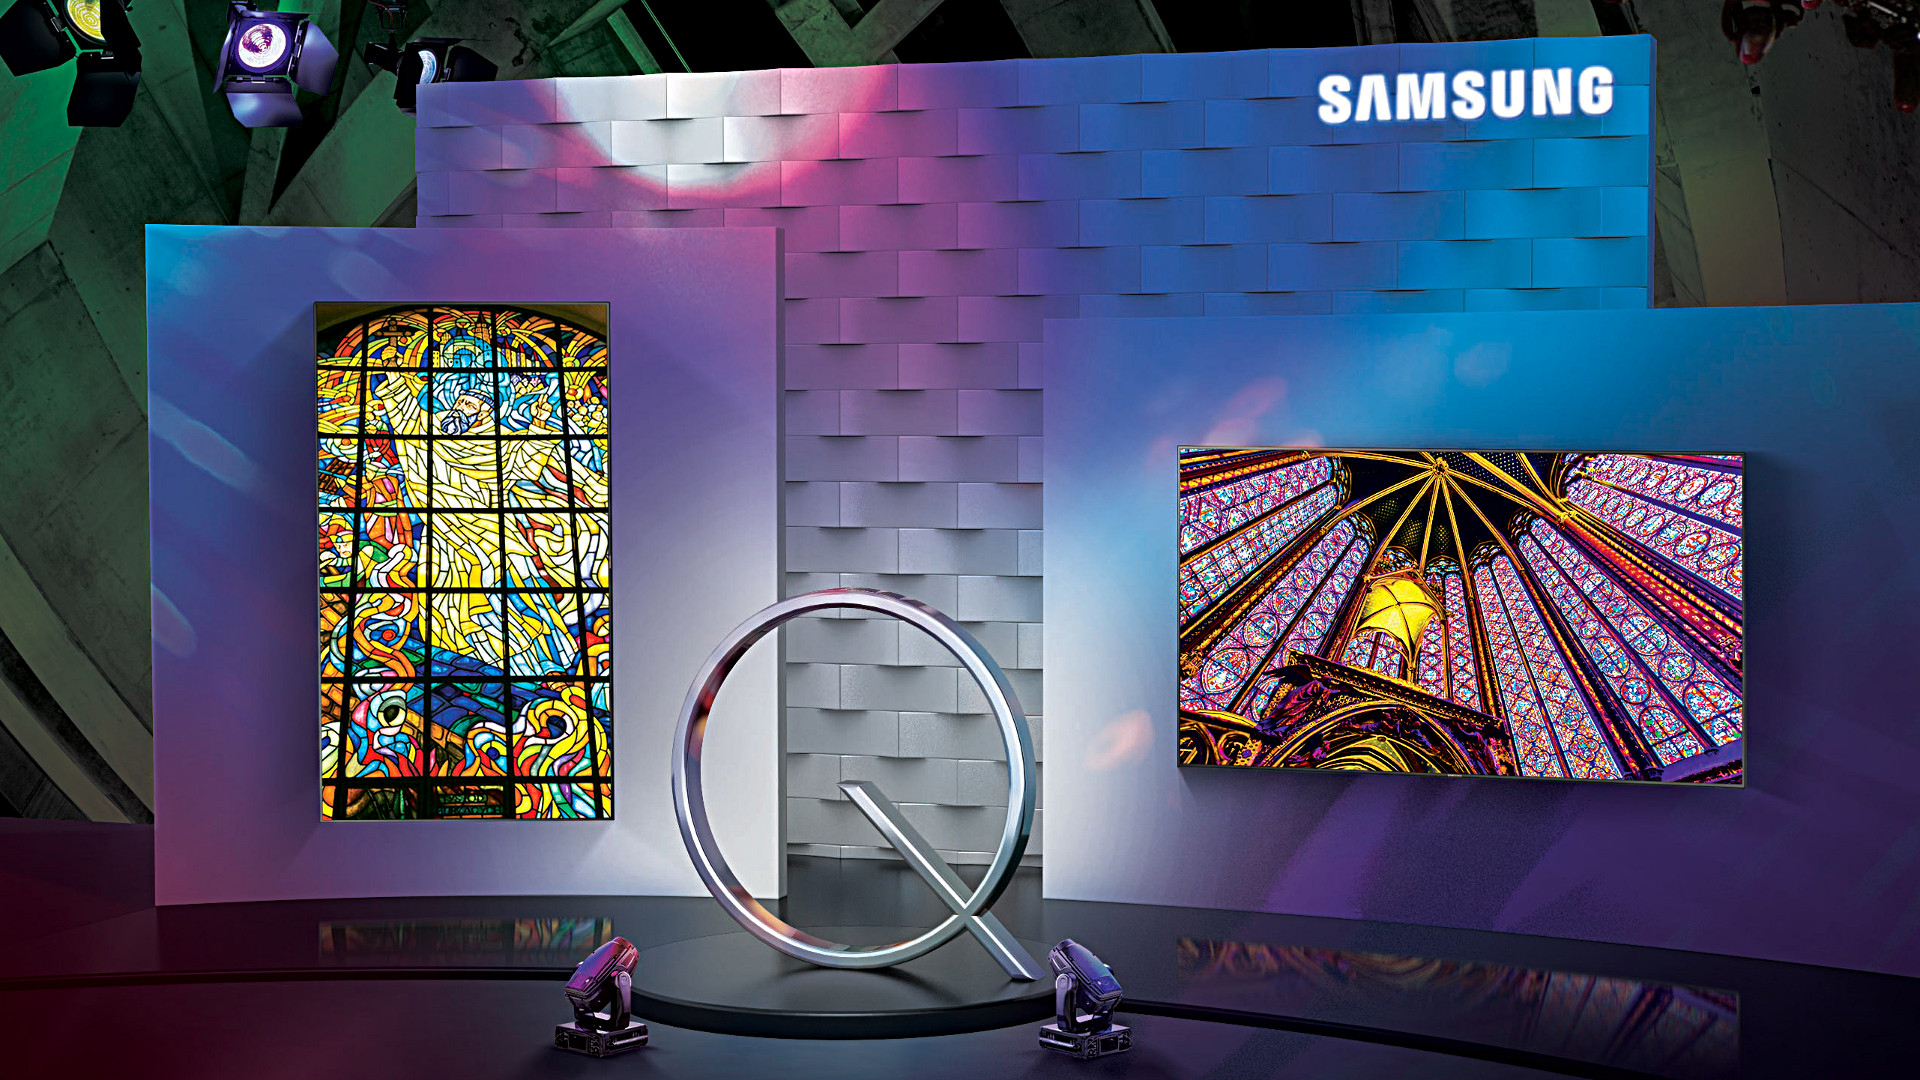
There are two issues here that are of equal importance: First, every single digital device is susceptible to some form of malware or unauthorized access; there is no such thing as a one-hundred percent safe digital device. That being said, some are more susceptible than others. Second, I don’t feel that Samsung deleting the tweet that recommended users scan their QLED TVs indicates anything nefarious; adding another confusing and complex acronym like QLED, which is an incomplete acronym anyway as the ‘Q’ stands for ‘Quantum Dot,’ is much more concerning. While it isn’t the focus of this post, I should add that Quantum Dot technology itself is pretty nifty, as it ostensibly eliminates the need for a backlight and is one step away from the capabilities of OLED, or Organic Light-Emitting Diode, which is one of my favorite technologies when properly applied. You want a paper-thin TV with an image so clear you will fall to your knees and weep? OLED is the way to go; it actually eliminates the backlight since the pixels themselves emit their own light.
That’s an 8K(!) QLED in the header image, but also please remember that if your source video wasn’t filmed in 4K or 8K, it won’t magically appear beautiful on such a TV.
Anyway, back on topic: Samsung claims the reason behind the tweet was simply to inform customers that the option is there and they may want to do the scan once in a while, and I think that’s good advice; I applaud them for that. They later claimed it was deleted because although it was just an advisory tweet, it may raise unnecessary alarms in their customers so they had second thoughts. In a sensationalist world, that also makes sense to me.
The fact is, there is very little malware out there that affects TVs, and those who create destructive software want it to have the biggest impact possible, so writing malware for TVs, even with the installed base Samsung enjoys, isn’t a productive use of the cybercriminal’s time. Additionally, because the TVs run on Samsung’s pseudo-proprietary, lightweight and mostly open-source TizenOS, which is also used in some of its other devices such as smart watches, to provide updatable built-in protection would be trivial.
On top of that, it takes SIXTEEN button presses on a remote to get to the actual malware scan function on a Samsung TV, and the belief is very few people would go through that trouble. They don’t even do that on their PCs when it’s just a few clicks away! That’s anecdotal, by the way: Strangely, I couldn’t find any statistics on how often people actually scan, but if informal surveys in some of my classes are any indication, they don’t do it a whole lot.
But who knows? Maybe TV attacks will become the new undiscovered country for malware authors. Frankly, it doesn’t hurt to scan occasionally, and updating the OS should be standard practice. In Samsung’s case, the best course of action would be to push updates to the TVs on their own, and have them update automatically. If you’d like practical advice and information on security from all aspects, from current federal alerts to info about how to protect your PC and other devices at home, the Computer and Infrastructure Security Administration’s website has tons of it, and putting security into practice is a good idea.
Be safe.
Determine what application is preventing your USB drive from ejecting [Win 10]

Boy, I haven’t posted in a while; it has been very, VERY busy here. As penance, I will make up for that with a post that addresses a common problem that afflicts us all: How to determine what application is preventing your USB drive from properly ejecting.
You know the deal: You try to eject your USB drive properly (which you should; otherwise a voltage change or write operation could damage data or the drive), only to have Windows give you the following dreaded dialog:
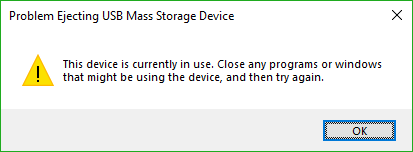
Uh Oh
The problem is, this dialog tell you absolutely nothing, other than something is using your USB drive. What are you supposed to do about this? Randomly shut down applications until it ejects properly? Save everything and reboot? What if the problem is not an open app, but a background process? How can you actually find out what app is causing this conflict.
Turns out, it’s not too difficult.
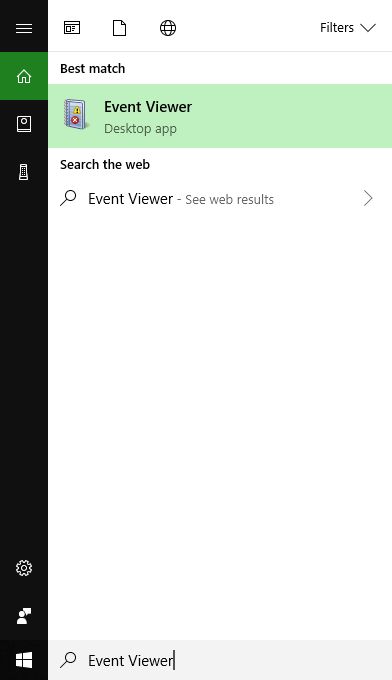
The first thing you want to do is open the Event Viewer, which allows you to see everything that is happening in your system, including recent alerts and what caused them. If you search from the start menu, it’s the only result you’ll see.
Click on the that, and the main Event Viewer interface will appear.
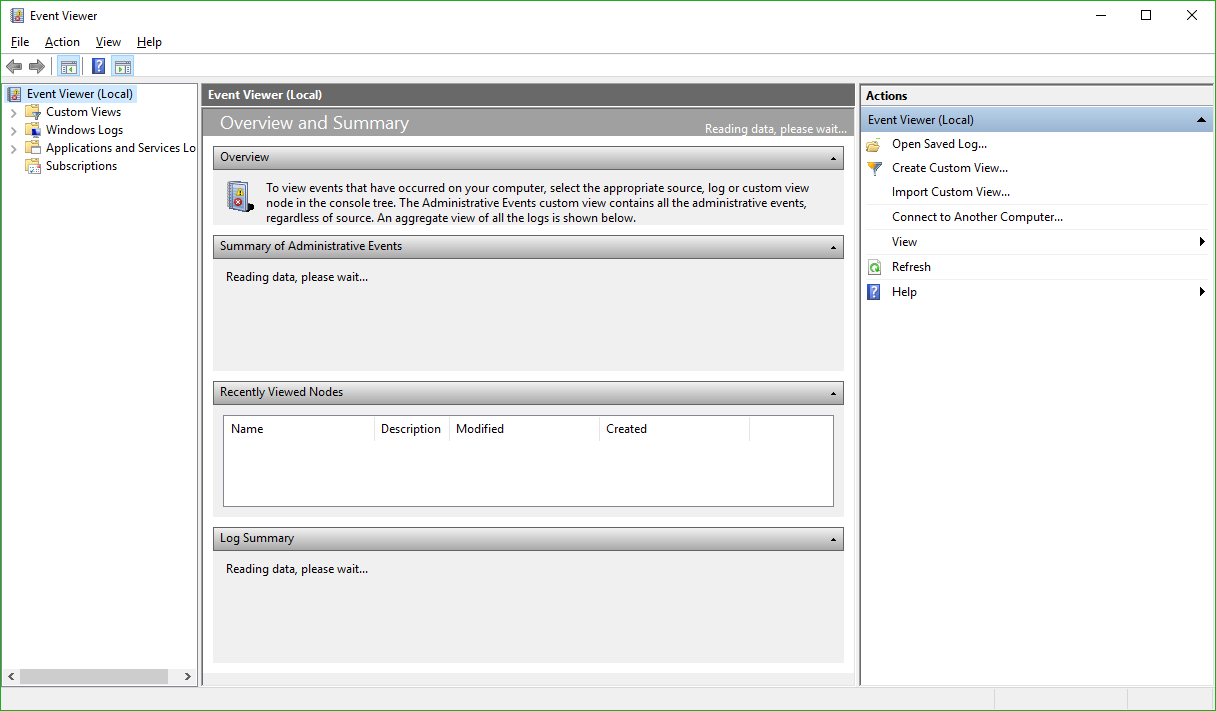
Main Event Viewer Interface
There are a lot of options, and a lot you can do from here. In fact, Event Viewer is a very powerful tool that it doesn’t hurt to become familiar with. For our purposes however, we will need to expand the ‘Windows Logs’ menu on the left hand side, then choose the ‘System’ log underneath that as non-ejecting is a system event.
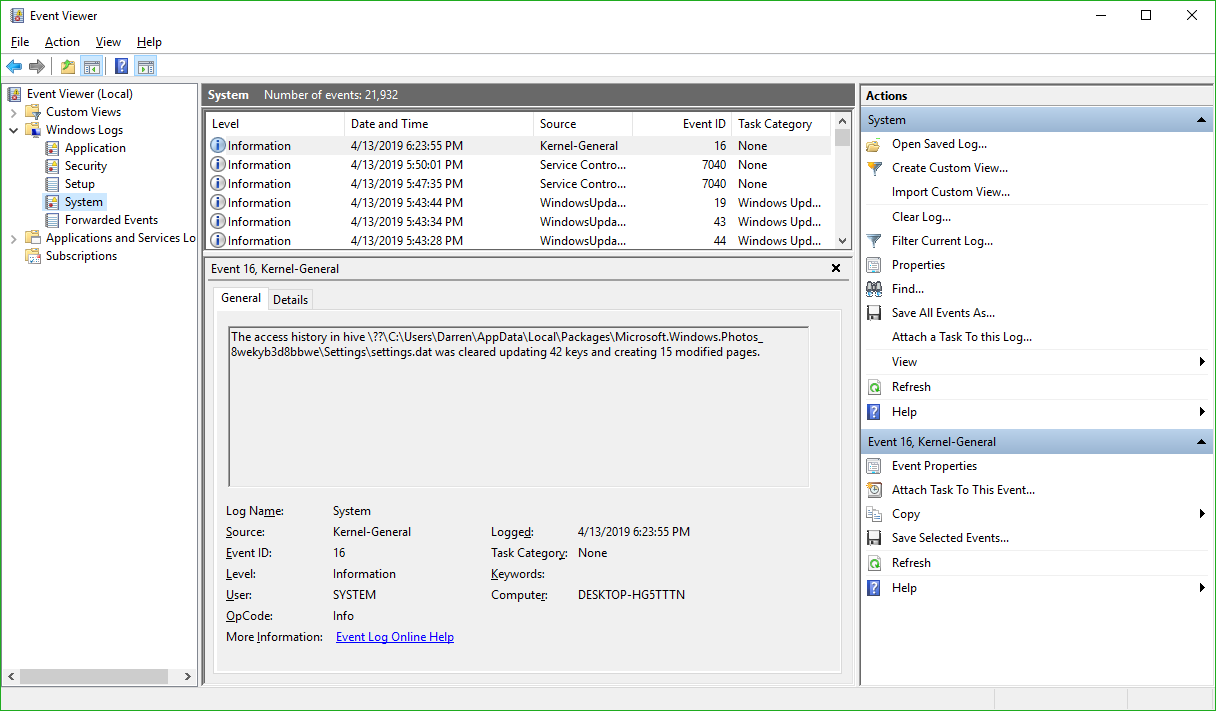
System Log in Event Viewer
You’ll notice the fourth column in the main window is ‘Event ID.’ We need to see events that have an Event ID of 225. If you examine this log immediately after your USB drive fails to eject, you’ll see what you need to see right at the top of the list. However in the image above we don’t have that, so we have to filter the results to only show us events classified as 225.
In the right hand panel of the window, you can see the option to ‘Filter Current Log’ as the fifth entry down. Select that, and the filter window appears:
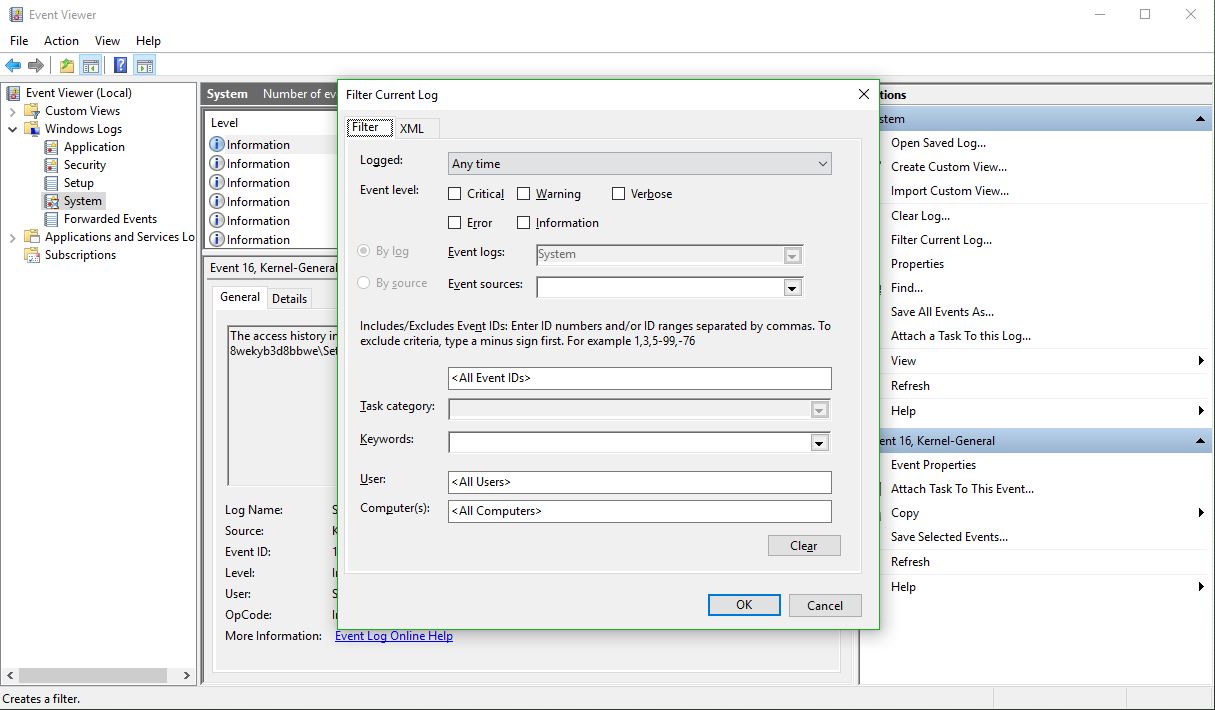
Filter Current Log dialog
There’s a lot you can do here as well, however all you need to do to determine the offending app is enter ‘225’ in the box that currently says <All Event IDs> then click [OK]. Once you do that, you’ll see every 225, or non-eject, event.

All events tagged 225
The top one is the most recent one that happened, and highlighting it will, under the general tab in the lower window, tell you exactly which program or process prevented the USB drive from ejecting. In this case, if you look at the full path you can see it is the ‘adobe_licutil.exe’ process, there at the end. Once you know that, it’s a simple process of the well-known [Ctrl]+[Alt]+[Esc] to bring up the task manager and shut the task down from there.

Task Manager
However, If it is still difficult to determine the specific process from the task manager because of a naming inconsistency, which has happened here, event viewer was also kind enough to provide us the Process ID, or PID, in this case 12592. In this case, if you want to be extra-double-sure, you can use Microsoft’s Process Explorer, a separate download, to identify the process by its PID instead of name, and shut it down from there.
Here’s an example of my Process Explorer, although out of habit I closed the task before taking the screenshot! But you can see the PID column and from there you can definitively ID the offending process.
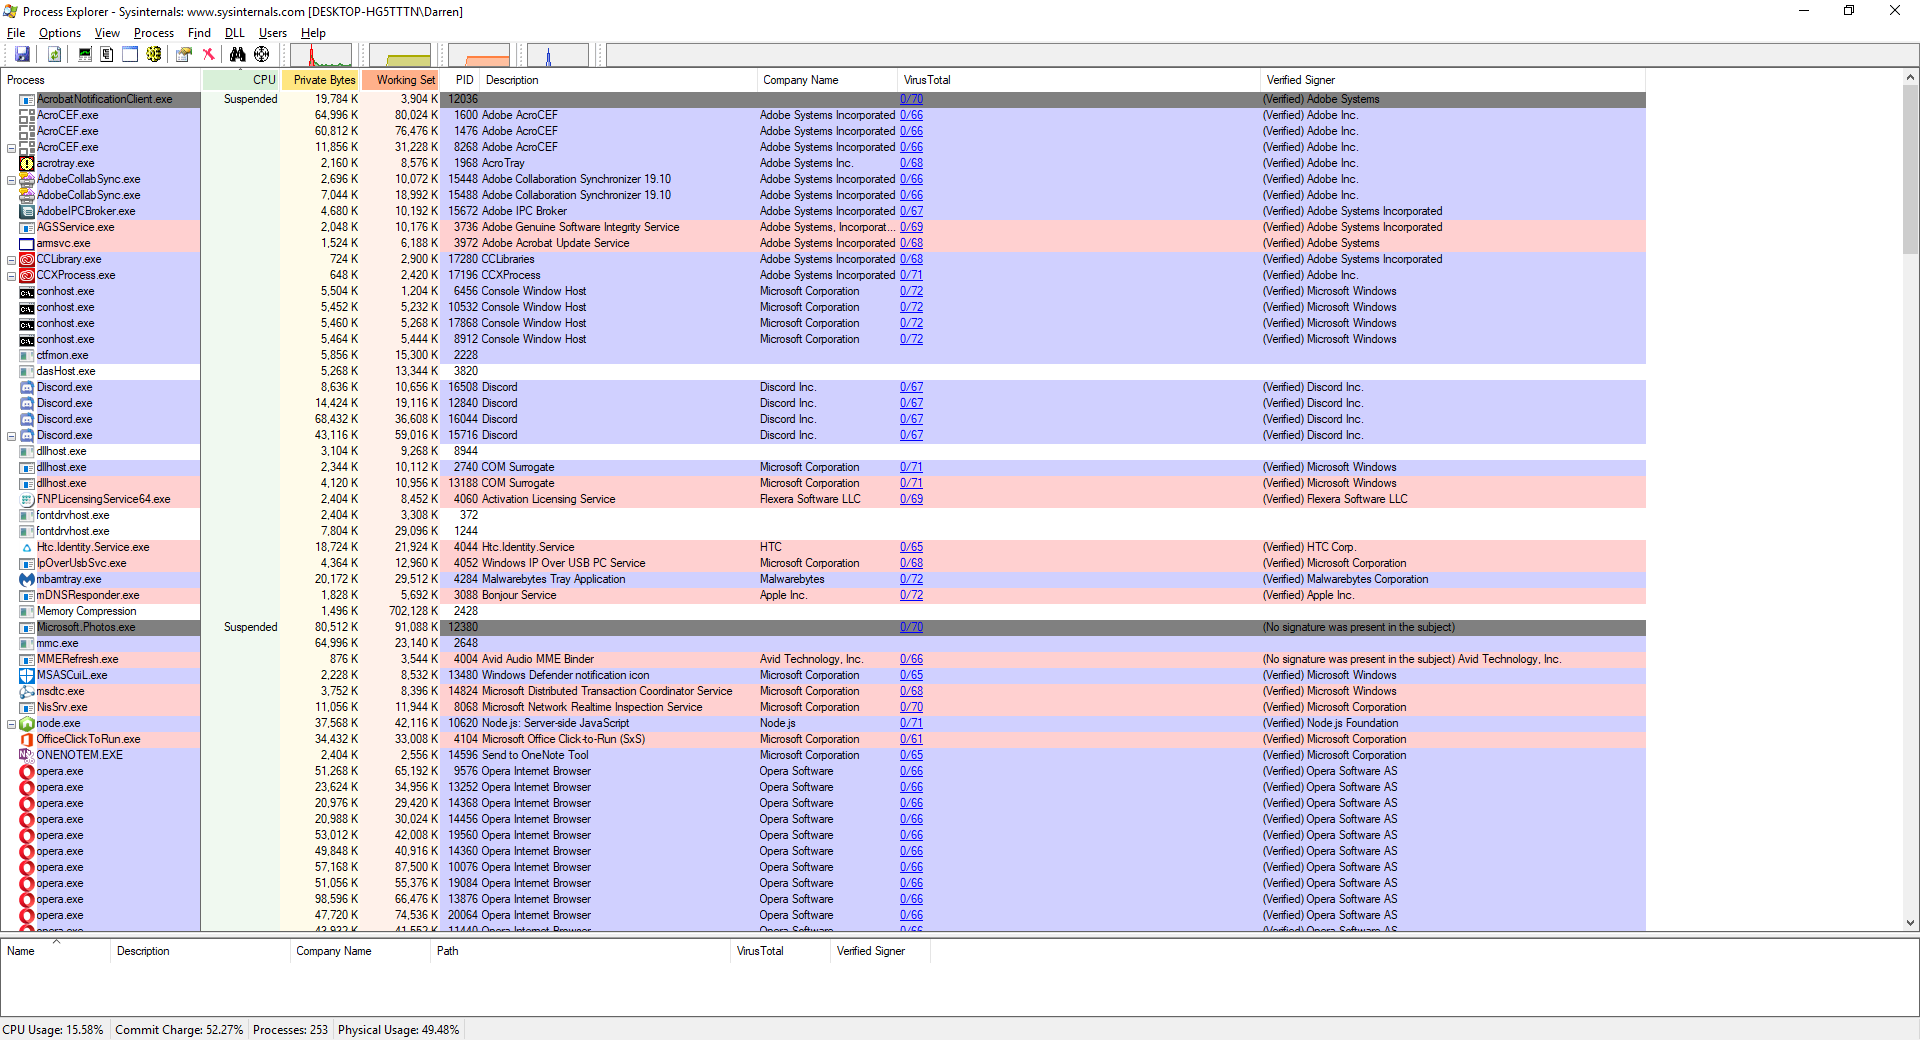
Process Explorer
Remember, having to go to the extreme of Process Explorer is rarely required, and simply identifying the process and shutting it down from Task Manager is usually all it takes.
Importing 3D models into Oculus Home from Sketchfab
A couple of weeks ago, I posted a video about importing items from Sketchfab, a site that hosts 3D models people have created, into Oculus Home. I meant to put up a companion post to that video, but as sometimes happens I was busy, and so the post didn’t go up as quickly as I’d hoped. Luckily, I recently had a five-hour flight from the east coast with many delays due to weather, and was able to start writing it up, and now that I’m back home there’s some time (but not much) to power through and finish. If you just want to see the video, it’s at the end of this post and linked earlier in this paragraph.
For those not familiar, Oculus Home is a personal space, sort of like an apartment, that appears when you first boot up the Oculus Rift headset. For a long while, Oculus has provided a wide range of additional items you could use to decorate your space, everything from furniture to suits of armor to completely new environments such as a gothamesque city or outer space. Even with all of that, one of the main requests users had over at the Rift Suggestion Portal was to be able to create their own objects and import them into their virtual living space. Here’s a crappy picture of an earlier version of my Home, taken off YouTube from this article’s companion video.
Oculus Home
(Side note: In the video I discuss the texture loading issues and choppy performance, however a Dash update released a week later fixed it all. No more issues!)
About a month ago, Oculus delivered. You can now import items created in some of the virtual modeling programs available on the platform such as Medium, as well as from website Sketchfab, and it is the latter that really opens up the possibilities. Because people can upload models created using any tool, there is a wide variety available, although be warned that as is the case with anything else, when the public can upload their own creations there are some that are of the NSFW variety. Also, some models must be bought, but there are many free ones as well.
Another nice thing about Sketchfab is that you can manipulate the objects in your browser before downloading, so you can get a very good idea how they will look in your 3D environments. It also holds developers to a standard to not cut corners on, say, the backs of things (which modelers will sometimes do if they know the object will be placed against a wall, for example – in fact, games simply don’t render what can’t be seen at both the object and world level!) and develop the whole thing completely. As with anything, quality varies, although I was, for the most part, very pleased with what the site offered. Also be aware that not all models are available for download, such as the notable ‘Old Truck and Gas Pumps‘ and ‘The Pumpkin House‘ seen in the screenshot below, but most smaller, decoration-style models are.

Some Sketchfab models
Importing models is not an overly complicated process, however there is an issue with scaling. Many objects you will import will be far too big to fit in the space, and will need to be scaled down. Because Oculus does not allow for scaling within Home itself, a third party tool is needed to do the scaling and there’s no way to determine whether the object is properly scaled other than to import it and test it in the space. If it’s too big or too small, you’ll have to go through the process again. My hope is that Oculus will soon allow for scaling within the Home environment itself. Until then, we have to do it the hard way.
So, we will first find the object we wish to import, scale it, then import it.
In the video, I imported what looks like a file cabinet that would be found in post-apocalyptia (remember Three-Dog?) or a building from the zombie apocalypse. It adds a nice yet subtle, creepy flair.
I found the model by doing a search for free downloads, but you can find the specific one in the video by searching for “Rusty Metal Cabinet” or simply click here. I should mention that if you decide to do the search and see what else is available, ‘Cabinet’ is misspelled for this particular model on Sketchfab, but you’ll find it anyway.
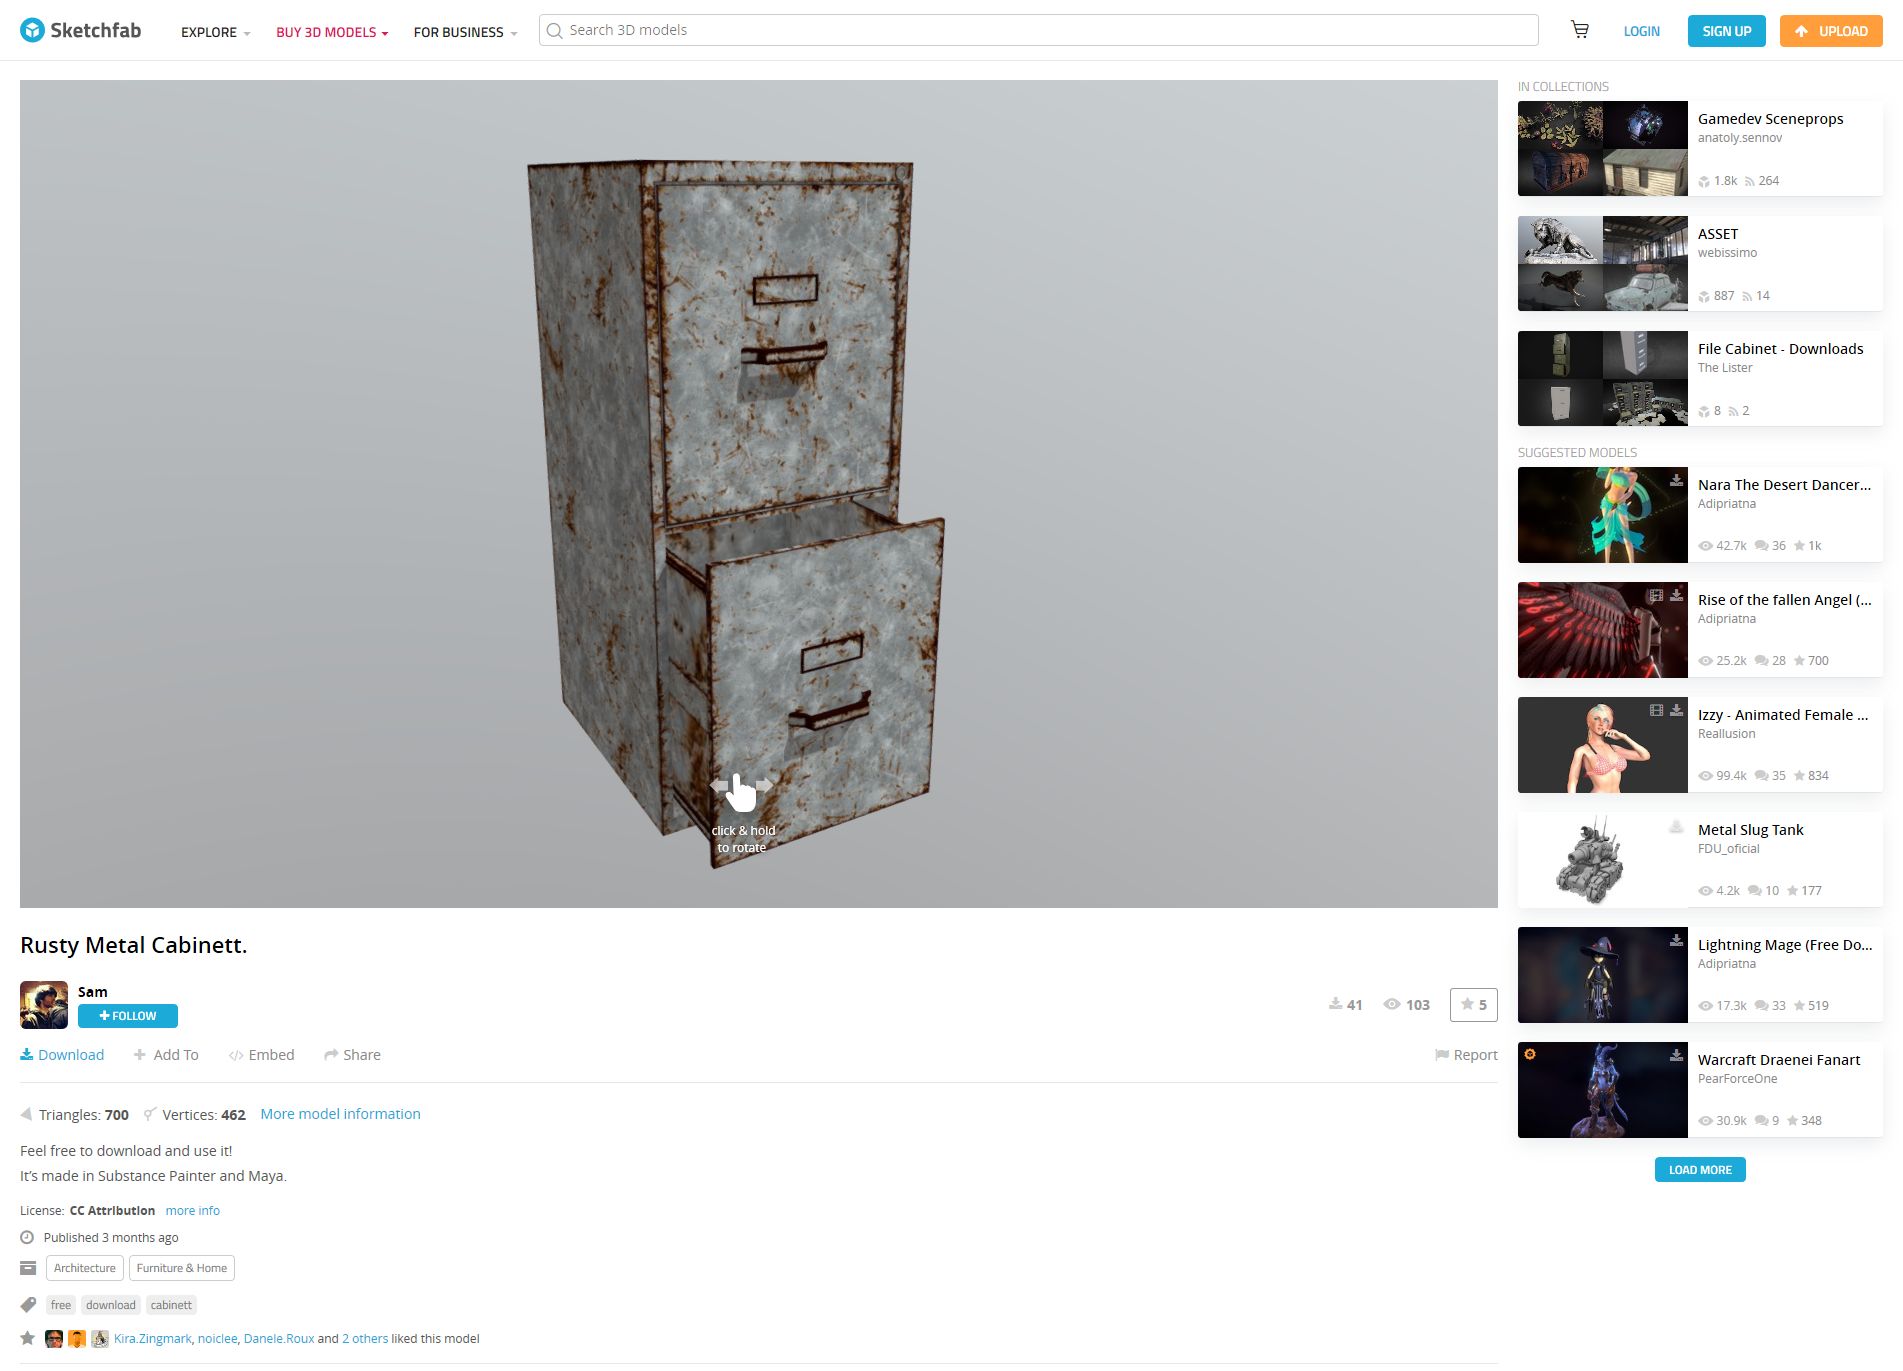
Rusty Metal Cabinet on Sketchfab
Once you have found it, you can rotate it and view it from all angles right in your browser, and when you are ready to make it yours just click on the blue ‘Download’ link under the author’s name, right under the model itself.
Downloading is the big catch here: When the download dialog appears, you want to be sure to download the ‘Autoconverted format.’ That glTF format is an open-source method for the interchange of 3D models for use in applications other than those in which they were initially created. What that means is, the format can be exported to the format we need for importing into Oculus Home, while the ‘Original Format’ will be for the tool used to create the model itself, whether Blender or 3DSMax, or whatever, and that’s not what we want.

Be sure to download the ‘Autoconverted format” option
Once downloaded, export the zipped file so you have the folder with associated files inside it. I use 7-zip, which for me is the easiest, provides the most control and options, and integrates nicely into the context menu. Their website, however, leaves much to be desired. However you extract it, once you have the resulting folder, open it up so you can see the ‘Textures’ folder, along with ‘Scene.bin’ and ‘Scene.gltf.’ Then, bring up https://glb-packer.glitch.me/ and drag all three of those onto the page: The folder, and the two Scene files. You don’t have to do anything else, it will automatically convert then download a file called ‘glb.out’ that has all you need. Because it generates an .out file, we know it’s a binary compaction of the original files and folders into a single file.
It couldn’t be easier. Seriously, this is the whole page, and if converting to GLB there’s nothing to do!

GLB packer. This is it.
Of course, that easy step shouldn’t lull you into a false sense of complacency, because now it gets cumbersome. You should have, in your Documents folder, an Oculus Home folder, then an ‘_Import’ folder, and you can make the _Import folder if it’s not there, but don’t forget the underscore! Rename your ‘glb.out’ folder to something that makes sense, for example in the video I renamed it to ‘RustyMetalCabinet,’ and drag it into the ‘_Import’ folder.
For now, that’s it! Go into home, check in the ‘My Imports’ tab of your inventory, and you will see it there just as you named it. Bring it into home, and…it will likely be way, WAY too big. And that means it’s scaling time, which is easily the most tedious part of the process; all you can do is scale it, hope it’s right, then re-import it back into Home. If it still isn’t the right size, you’ll need to do it again. Come on Oculus, let us scale in Home!
Anyway, to scale the object, you’ll need to bring up the threejs.org/editor site, drag your .out file onto it, then scale by clicking and sliding your mouse over the ‘Scale; numbers on the right-hand side, as you can see in the video and image below, then selecting ‘Export .GLB’ from the file menu. The problem is, there’s no real way to know how the thing scales regarding your particular Home: It could be too big, too small, all you can do is re-import it and check it, then do the scaling over again if it doesn’t fit. For example, I ended making a teensy file cabinet before I got the size right. I kept it anyway, though; it was neat, in it’s way.
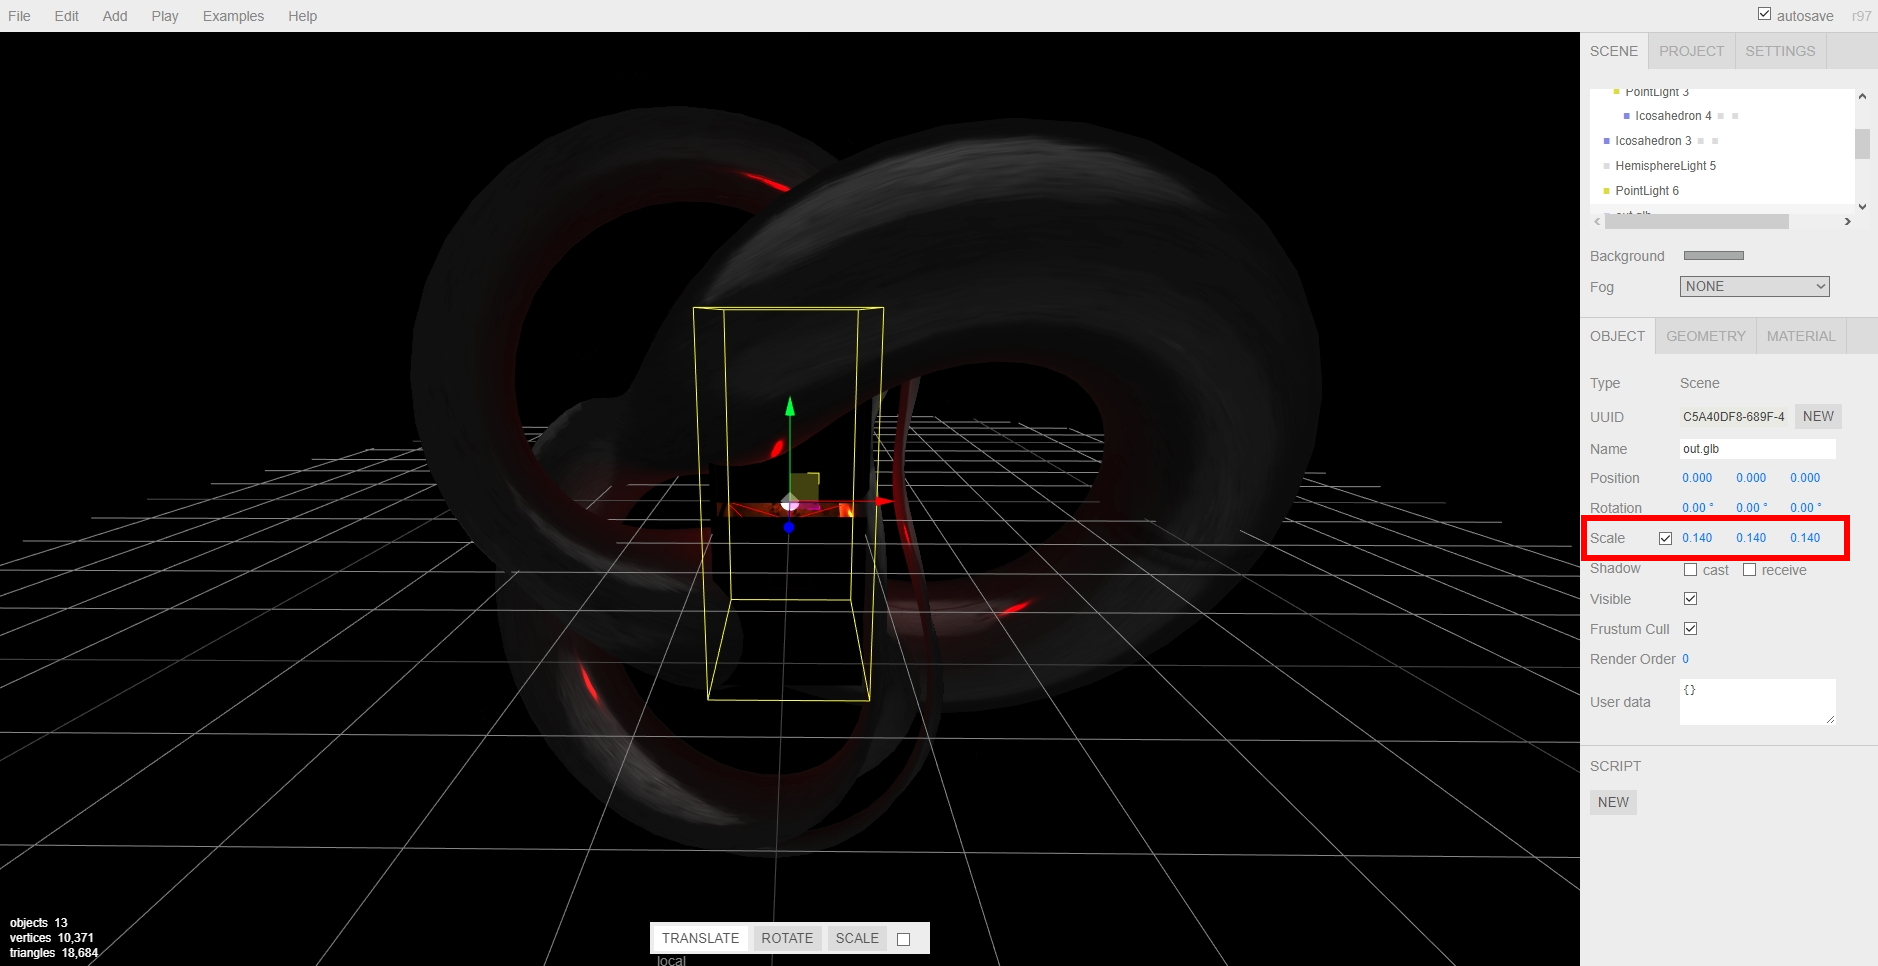
Adjusting scale in the threejs editor
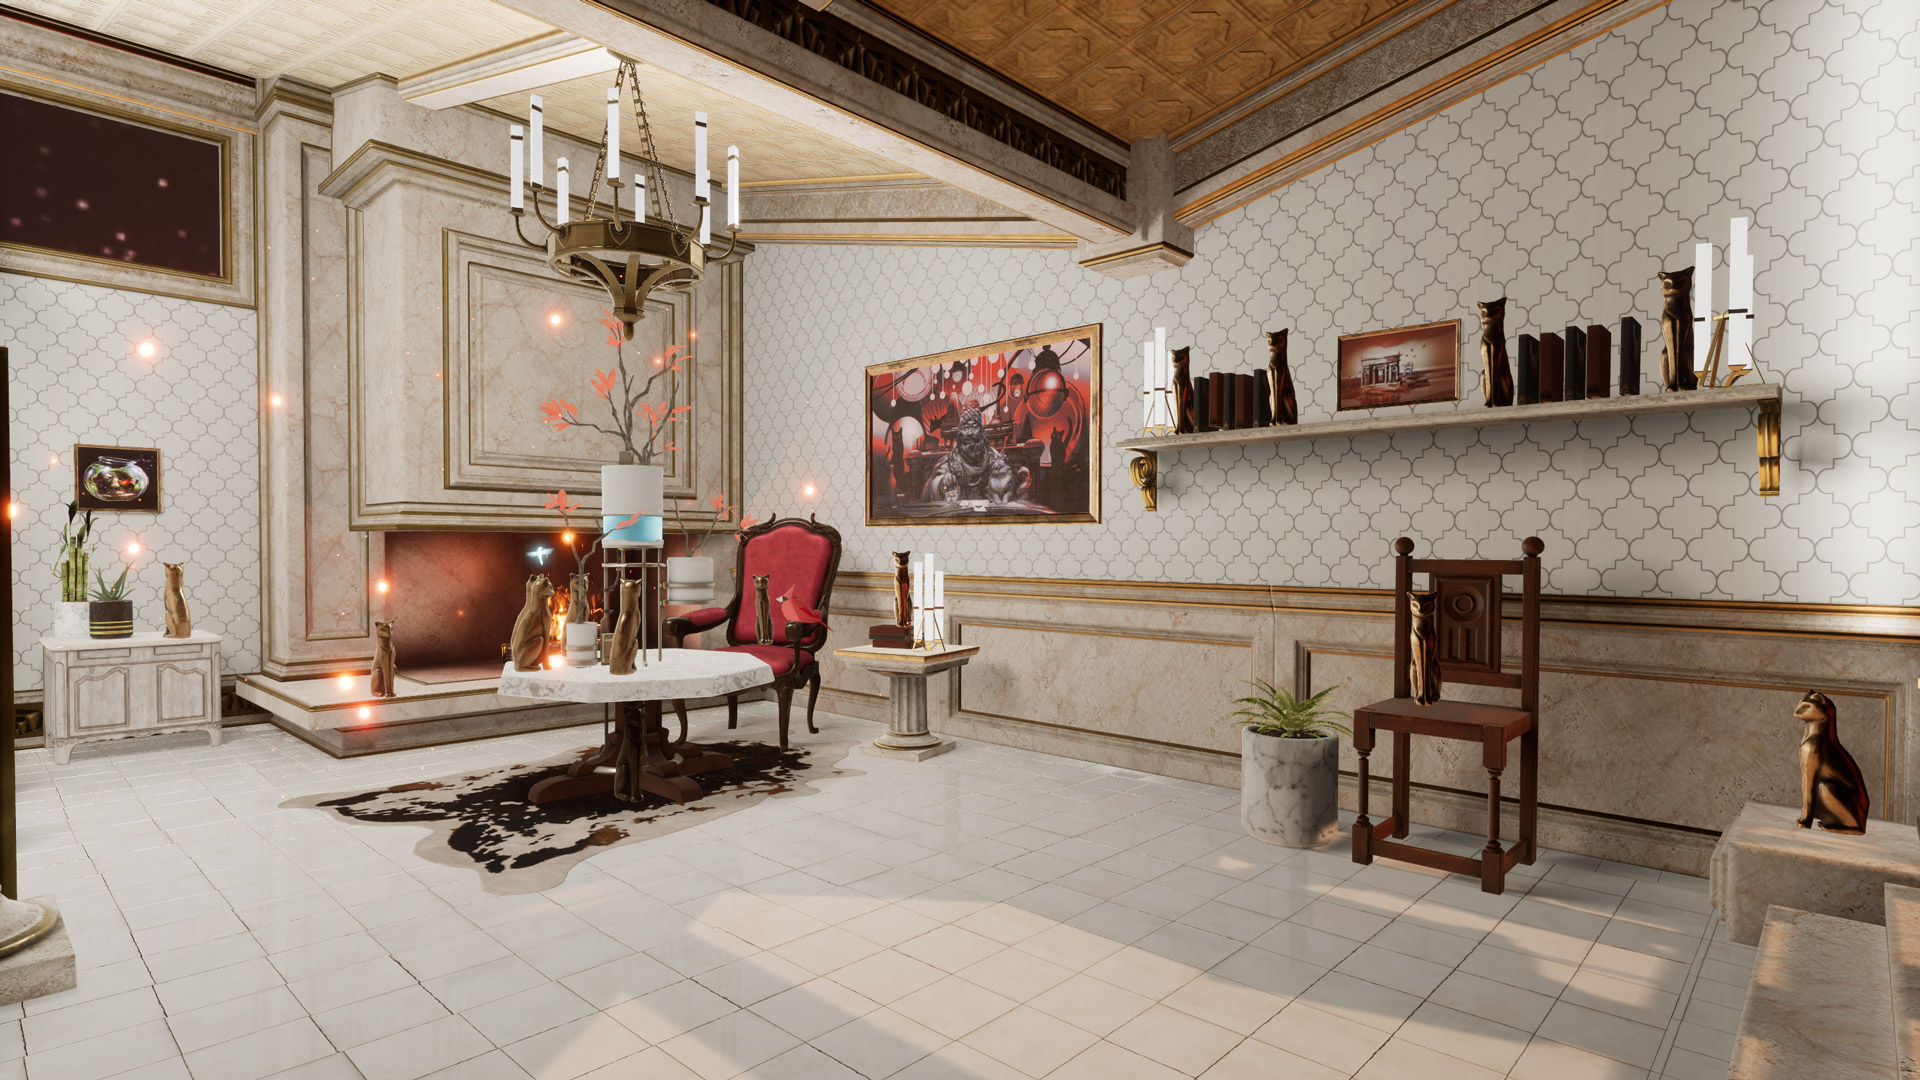
Then, once you have found your scale, you’re all set! Another neat thing about doing this is that when imported models load into your home on startup, the do this futuristic materialization, like they’re being 3D-printed by light, into existence. It’s a really nifty effect.
So there you go! Have fun, there is a huge number of models to choose from, the recent Oculus update has fixed most of the performance issues, so the possibilities are almost endless! If we can just get scaling, perhaps even direct import, the icing will be on the cake, but until then, it’s still pretty fun.
Here’s the video:
A win for digital preservation

As many of you know, I am a big fan of older software and systems, even maintaining a small collection of vintage computer systems and software. Indeed, it is the software that is important, as hardware without software is just hardware, nothing more. Every piece of hardware needs a killer app to run on it, or people don’t buy the hardware in the first place. It’s why game consoles need to have a robust software lineup available at launch, or else risk being left behind for the entire generation.
Thing is, preserving physical copies of software is easy, procedurally, anyway. You have the physical software, and you digitize it while preserving the physical copy itself, and it could be a permanent record. of course, there are issues with maintaining the software in a runnable state, both for the digital version (are there suitable emulators available?) and clearly for the physical version, which is subject to all kinds of risks including environmental and technical. There is the issue of bit rot, an ill-defined term which generally refers to either a physical medium being unusable because as technology advances, the hardware used to read it becomes obsolete, or the general lack of performance of a physical medium overall due to the aforementioned environmental or other factors.
Even with physical copies, issues of the grey-area legality of emulators is always front-and-center, with the real focus being on ROMs. Nintendo recently shut down long-time and much-loved ROM site EmuParadise simply by threatening legal action. Curious, considering EmuParadise has been around so long, but now Nintendo wants to start monetizing its older IPs, and EP might put a bee in that bonnet. Also, ‘shut down’ isn’t entirely true: they didn’t shut it down but the site no longer hosts ROMs, and even though there is still a lot of information, the actual games being lost is a big problem. I have to go further out of my way to find ROMs, even for games whose companies, platforms, sadly even developers are long gone.

EmuParadise – “This Game is Unavailable”
So why does this all come up now? Because we are in an age now where much of the software, data, and information we have is in digital form, not the physical form of old, and this leads to huge problems for historians and archivists such as myself. If something is only available digitally, when the storefront or host on which it is available goes down, how will we maintain an archived copy for future generations to see and experience? I have a Steam library with, at the time of this writing, over 300 titles that are all digital. there is no physical copy. So, just for argument’s sake, let’s say Steam closes shop. What happens to all those games? those VR titles? That one DAW? Will they just vanish into the ether? Steam claims if they ever shut down, we’ll be able to download them all, DRM free. But will we? As the best answer in that earlier link states, Steam’s EULA that all users are required to accept, states that their games are licensed, not sold. That may seem strange, but it has actually been that way for a long time. Even with physical games, you don’t actually own them and what you can do them outside of simply play them is exceptionally limited.
So how do we preserve these digital-only games? Whether a tiny development house creating an app, or a huge AAA title developed by hundreds of people: if the company shuts down or the people move on or whatever happens, how will we access those games in the future, 10, 20, 50 years from now?
This becomes even more of an issue when we have games with a back-end, or a server-side component. The obvious example is MMOs such as Everquest and World of Warcraft. What happens when their servers shut down and the game can no longer be played? How do we continue to experience it, even if for research or historical purposes? If the server code is gone, having a local copy of the game does us no good. As many MMOs and other online games continue to shut down, the fear is they will simply fade into nothingness, as if they never existed, but their preservation as a part of the history of gaming and computing is important.
Some brave souls have tried running what are called ‘Private Servers,’ which is server code not run, supported, or authorized by the developing company. Again, the most common example are World of Warcraft private servers you can join, which are not running the current code, but earlier versions which people often prefer and which brings up another interesting issue regarding the evolution of these digital worlds: Even if a game is still going strong, as is WoW, how do we accommodate those who prefer an earlier version of the game, in this case known as vanilla, meaning with the original mechanics, structure, narrative, and other gameplay elements that were present on launch but have since been designed far out of the game? Vanilla WoW is not officially offered although that will apparently be changing, but many private servers are immediately shut down via Cease and Desist orders from Blizzard, with one being shut down the day it came online after two years of development. Others manage to hang on for a while.
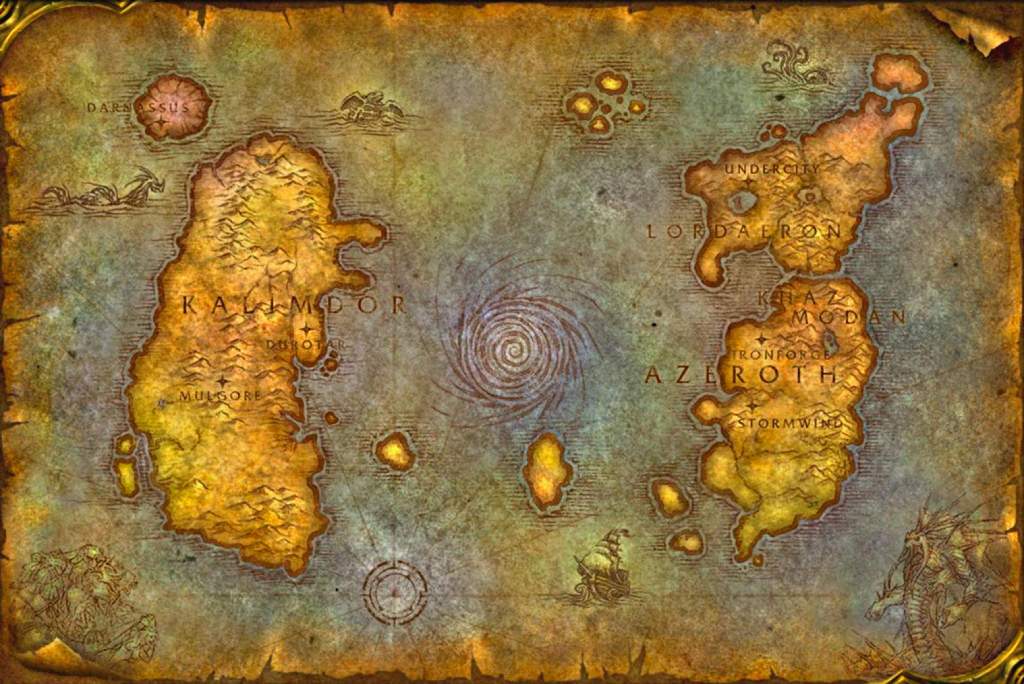
Vanilla WoW map – remember this place?
At the risk of going off on too much of a tangent, the reason I’m talking about this and why it has taken me six paragraphs to get to my point is that there has been a semi-wonderful ruling from the Librarian of Congress that essentially maintains an already-written rule that if a legacy game is simply checking an authentication-server before it will run, it’s legal to crack that game and bypass the check procedure.
Additionally, while that small thing includes the ability to allow legacy server code to run and be made accessible, it specifically can not be done so by private citizens, only a small group of archivists for scholarly / scientific / historic / other related reasons, and most importantly, the server code has to be obtained legally. That may be the biggest hurdle of all, as it is well known some companies sit on games and IP long after their market value has faded, preventing them from being released or even reimagined by the public. I’m hoping this is the beginning of a renewed push for legal support to archive and utilize legacy code and legacy server code to continue to preserve not just software titles of all types, not just games (and the new ruling includes everything), but the interim forms they took throughout the course of their development.
One additional note that surprises me even to this day: There is one online game that while very popular was eventually shut down by its parent company. That game was Toontown Online, and it was developed by Disney, a company well-known for aggressively protecting its IP. So it is especially surprising, that when an enterprising teenager who missed the world they had created decided to run a free private server, even renaming it Toontown Rewritten, Disney let it go! It has been up and running for a good number of years, has seen many improvements, updates and additions other than its terrible log-in client, and runs quite well. Here’s a screenshot of its current state, and as you can see it is still popular.
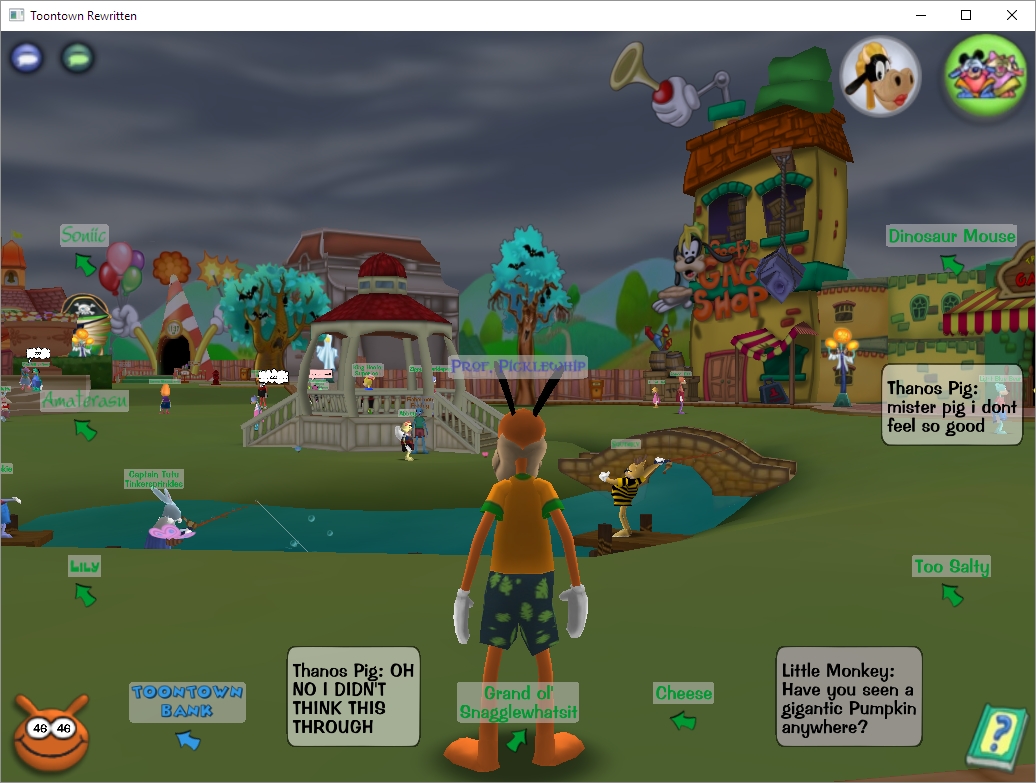
Toontown Rewritten
It still uses Disney-owned names and imagery, and has the unmistakable Disney aesthetic – there’s even a Toontown in Disneyland! If you want to see the proper way to handle this whole issue, once your game is done and abandoned, let an enthusiastic team who is passionate about the project and treats it with respect take over. It makes goodwill for you, a positive experience for them, and ensures your creation will continue to live on.
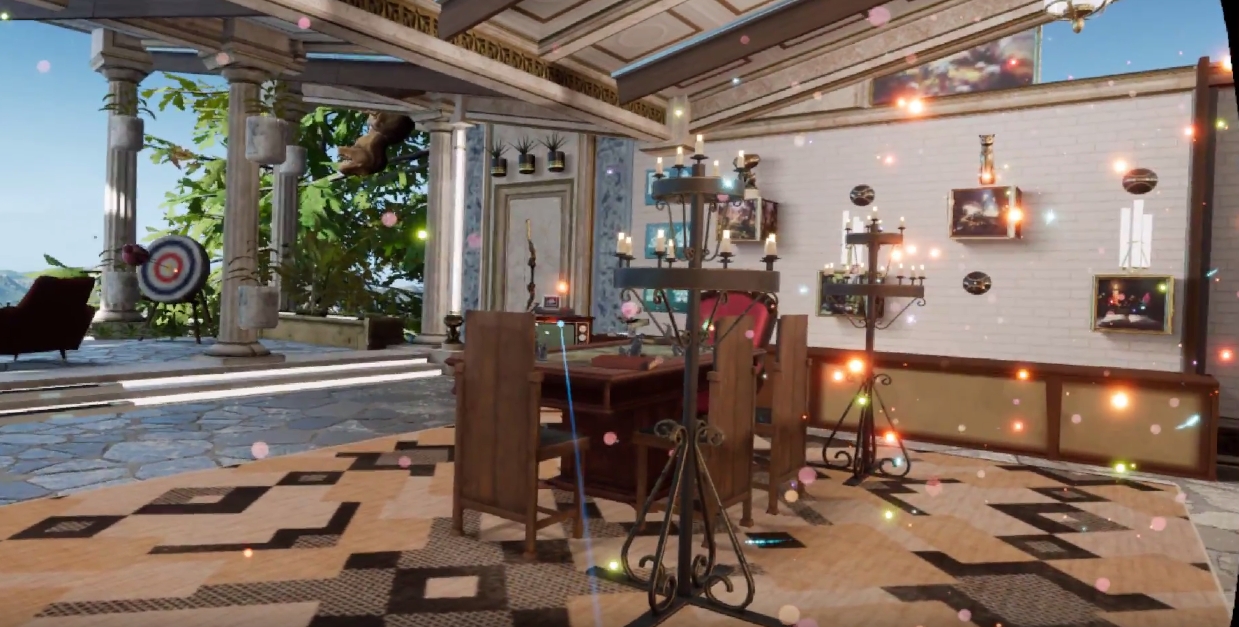
Just like old times: Running console emulators and PLEX on the virtual flat screen TV in Oculus Home
A couple of months ago, Oculus introduced a few flat-panel TVs (and a desktop monitor) into Oculus Home. That would have been fine in and of itself, however these TVs can have ‘panels’ embedded into them. Panels are essentially windows from your desktop, so if you had Word or Plex or chat or even a game session open, you could have it appear in a TV or monitor in your virtual home.
Naturally, my first instinct was to fire up one of my retro-console emulators and see if I could have it run by projecting it through one of the TVs in the virtual space. It’s almost a meta thing: Playing a classic console on a flat-screen TV in a virtual environment via VR. If it worked, since Oculus allows you to place as many of these as you wish, I could set up the custom gaming room of my dreams. I am happy to report it worked perfectly, and I am in the process of designing that gameroom right now! I’m thinking futuristic city as the backdrop, but we’ll see.
PLEX, which is movie-playing and streaming software for your personal media collection, also ran beautifully with no lag, and I’ll talk a little about that towards the end.
Before I get to the results, let’s talk about emulators. Emulators trick your system into thinking they’re the console they’re emulating, and I mean that they really trick it. Whatever shortcomings the console itself had, so will the emulator (and possibly a few more, but we’ll get to that). If a bug appeared in a game, or the console just quite wasn’t fast enough to push a game, that will be replicated during emulation. Atari 2600 emulators will even show racing the beam errors, in which the next line of video won’t be drawn if the emulator is still carrying out logic operations. In the following image, which shows The Empire Strikes Back for the Atari 2600 running in the Stella emulator (Stella was the code name for the console during development), if you look closely you’ll see black lines down the left hand side of the image: Those are racing the beam errors, even though it’s not a CRT and not even a console! The point is, when you’re emulating, the systems is the console.
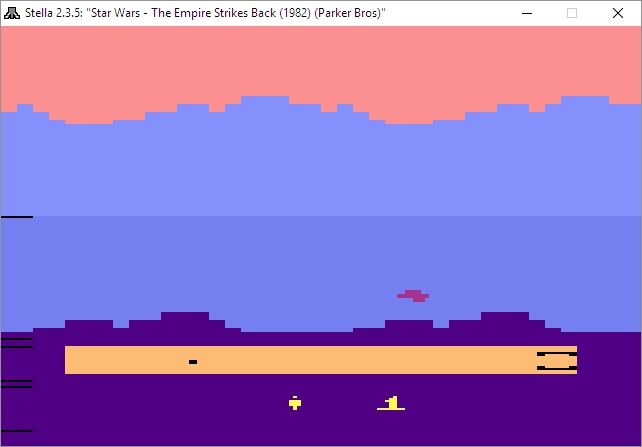
Racing the Beam errors in the Stella emulator
Not only that, the games are actually the games, not some reprogrammed nonsense. An ISO, for example, is an exact bit-level copy of digital media, so someone will put the original game disc into their PC’s optical drive, or sometimes they’ll use the console itself with special connections, and use special software to turn that disc or cart into a file. Other times, the ROM chip itself will have to be ripped using a ROM (EEPROM) burner.
The point is, with an emulator, you’re getting the actual console experience with the actual games and all their flaws or lack thereof, not some hokey recreation. It also means some games may not work all that well, or at all, but that’s rare.
Generally, emulators are not terribly difficult to set up and get running. Each has its own quirks, but once you start experimenting you’ll be hooked, not to mention surprised at (generally) how well they run.
I use many emulators, and I’ll give you a crash course on setting them up. All you really need to know is that you need to specify a folder that contains your games, and you can call the folder anything you want: Whenever I set up a folder I’ll call it either ‘Games’ ‘ROMs’ or ‘ISOs,’ but you can use anything. Speaking of the games, those files can come in several forms: Some emulators allow for zip files in the games folder, others will require an .iso, .bin, or possibly other, specific file such as .gcn which is for the Nintendo GameCube. Some can use whatever you throw at them. Additionally, for the later consoles, you’ll need a BIOS file in your games folder as well, and they can generally be found with a low-effort web search, as can the games themselves.
Here’s an example of how the directories work, and these are almost always assigned during setup, although you can certainly set it through the options as well. For clarification, I run mine from a network drive, which is nice because I can save a game and then pick it up again from any PC in the house, or on the planet. Speaking of game saves, the emulators take care of setting up memory cards for saving games as well, however you can also create ‘Save States’ at any point in a game regardless of how its save structure is set up. So if you have to leave or otherwise shut down the emulator but haven’t reached a checkpoint, you create a save state, then load that instead of the save from within the game itself. You’re essentially saving the state of the emulator, not the game.
Here’s an example of setting up the games directory: In the image below, in image ‘1’ in the upper left, you can see I have an ‘Emulators’ folder, and after opening that, in image ‘2,’ top right, I am selecting the PCSX2 folder, which is a PlayStation2 emulator. Then, in image ‘3,’ lower left, I have created a folder called ‘Games’ where I keep all game files, and finally the last image shows the .iso and .bin files that represent that games I have for that emulator. On the other hand, my Gamecube / Wii emulator, Dolphin, has a folder called ISOs where I keep all my games, even though not all of them are actually .isos.
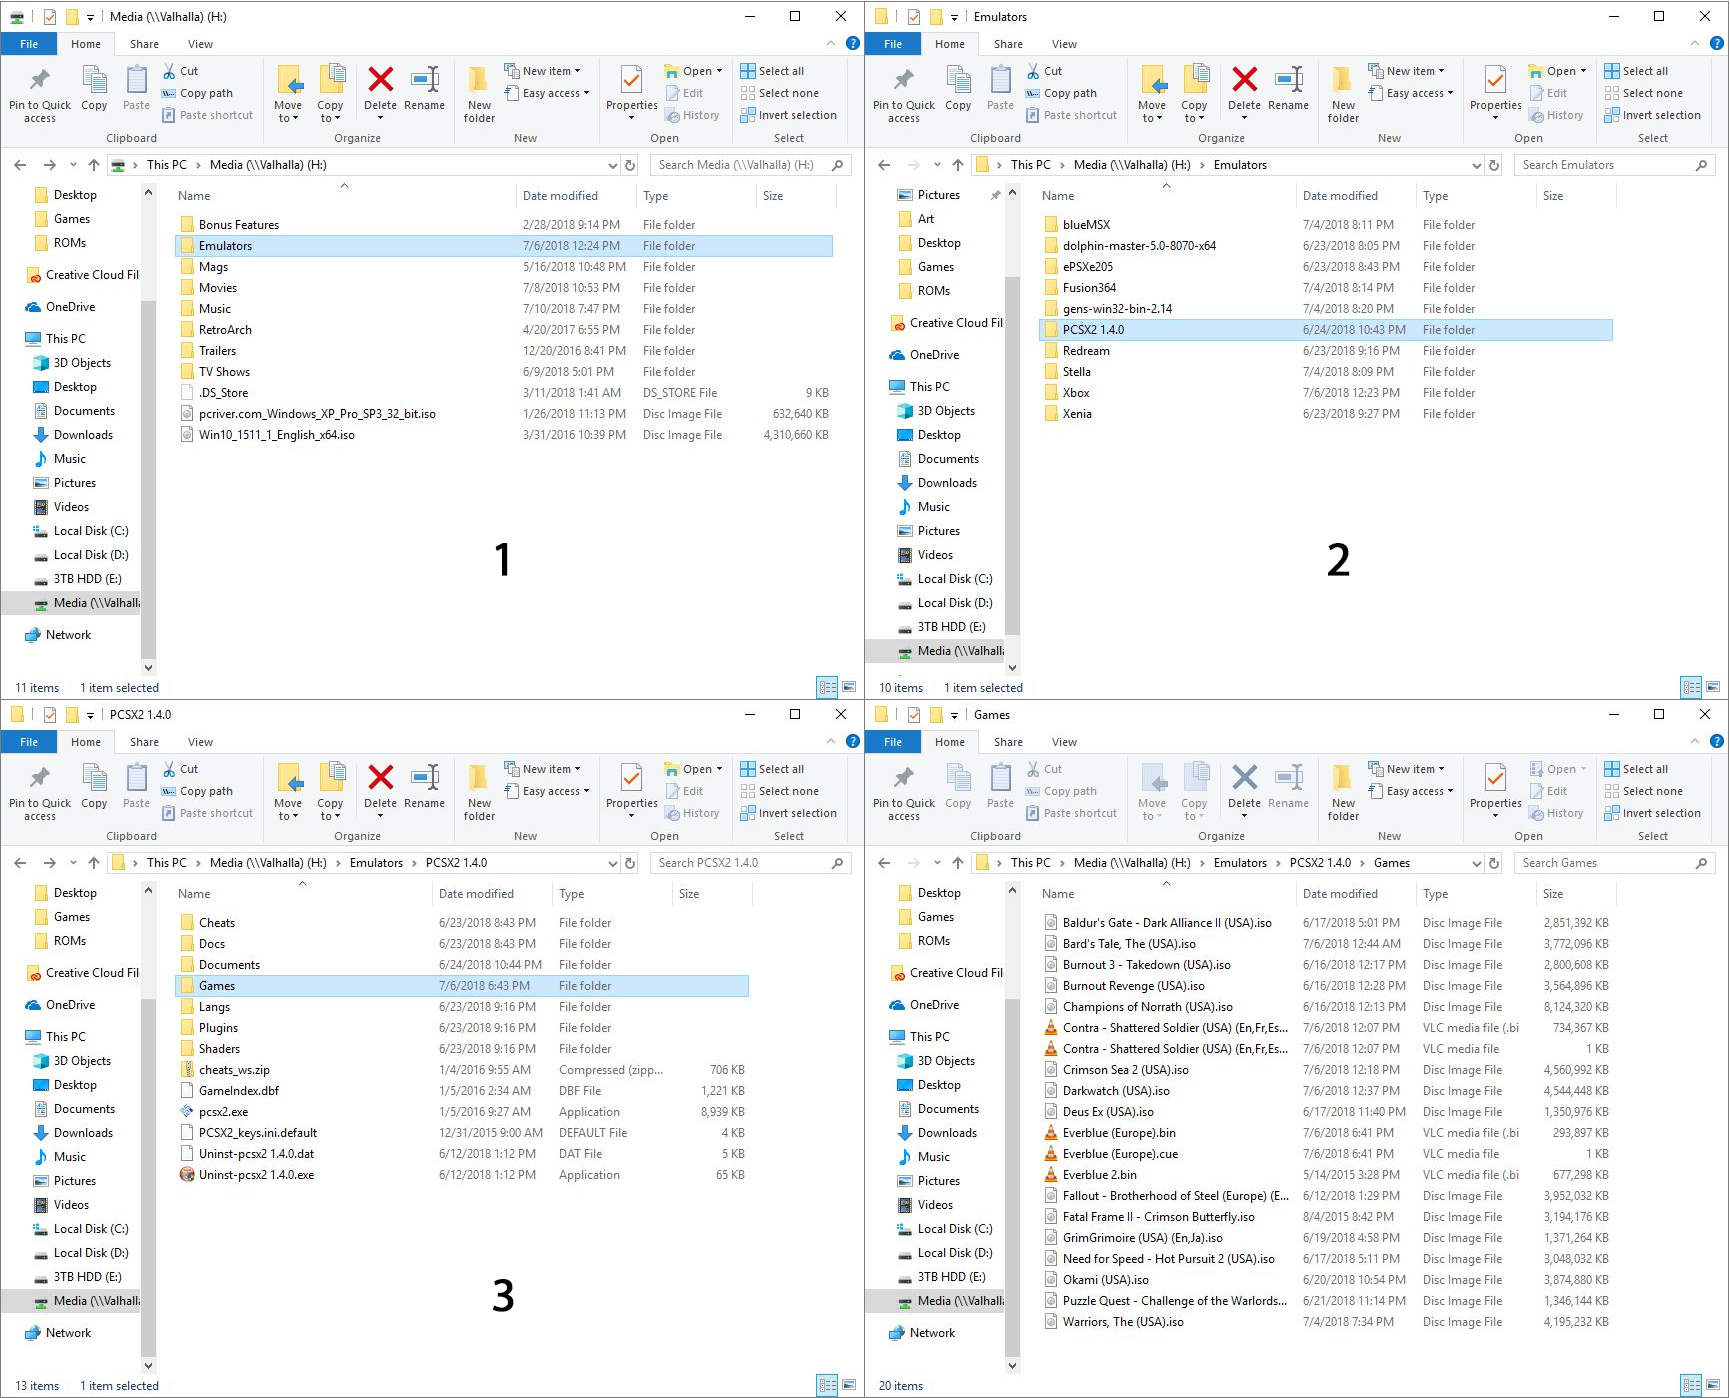
Directory structure for the PCSX2 emulator
The next big thing is that I have an XBox One controller connected to my PC, and any controller you use has to be configured. The initial controller setup, although straightforward, can be moderately time-consuming, but you should only have to do it once. For most emulators, you’ll need to go through and indicate which button on the controller does what, and you do that by clicking on each function in the emulator, then pressing the button / pulling the trigger that you’d like to assign. Below are images of the PCSX2 controller configuration screen, and underneath that the Dolphin controller configuration screen, and you have to click on each function then press / pull the corresponding control on the controller itself. Once that’s done, controls should be all set. Ultimately, it’s a really nice way of doing it because you can set the controllers any weird, wacky way you’d like.

PCSX2 Controller Configuration dialog

Dolphin Controller Setup
The only other major issue you are likely to run into is the graphical settings. Older consoles weren’t designed with 4K TVs in mind, many never even considered widescreen! Although most games will work fine, each emulator will have its own peculiarities when it comes to this, and they all offer EXTENSIVE graphics customization. PCSX2, for example, allows you to use OpenGL, Direct3D9 or Direct3D11, and it’s fascinating how a game won’t run under DX9, but will run perfectly under DX11, or vice versa, and I have seen many variations on that. I also, for that particular emulator, set resolution to at least 2x native; then it will run surprisingly well even on a widescreen 4K TV. And of course, it allows you to customize graphics for the emulator in general, as well as specific tweaks for the renderer you choose.
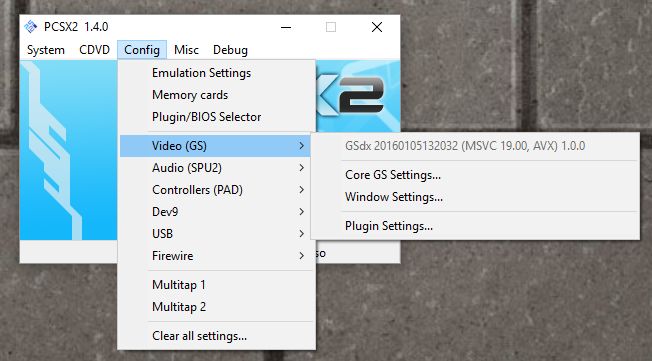
PCSX2 configuration menu

PCSX2 renderer selection and tweaking
When it comes to actually selecting a game, some emulators are more user-friendly than others. Prettier, I guess I should say. PCSX2 only offers up a straight file selection window, while Dolphin and ReDream, a Dreamcast emulator, provide lovely selection menus. Being an HCI person I prefer that, but the PCSX2 barebones method works just as well.
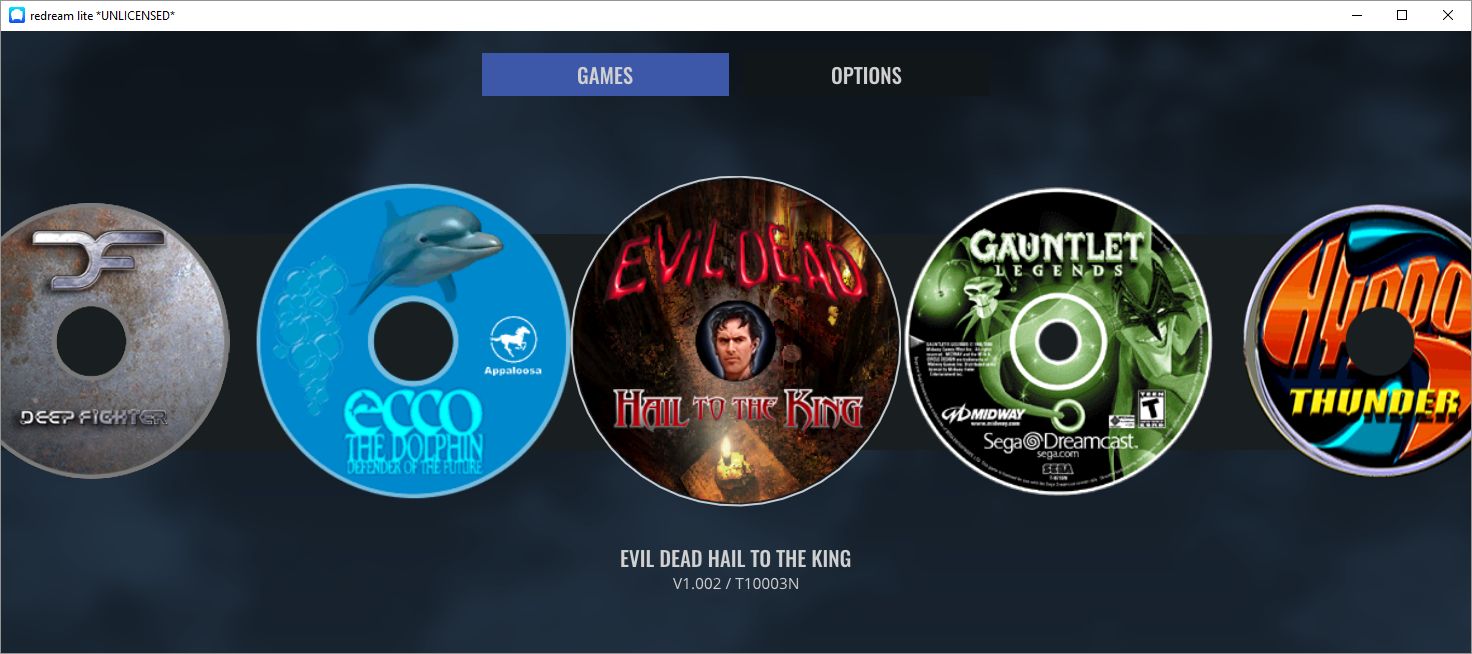
ReDream game browser

Dolphin game browser
So now that we have the details out of the way, what about running them on the TVs in Oculus home? I’m glad to report it works perfectly! There is, however, one big caveat: You can choose to embed the emulator window that’s displaying the game, however the window won’t be listed as a panel if it’s fullscreen, so you’d have to window the emulator on the desktop, then embed the window, then maximize it on the desktop. The better choice is to fullscreen the emulator window then embed the desktop itself. If you do that, it will work perfectly, with no lag (either visual or input), no jitter, no performance hit. For PLEX and even for a couple of emulators, if they’re fullscreen, Oculus Home won’t recognize them anyway so you’ll have to embed the desktop no matter what: It’s just a better all-around option.

Panel selection
It also works for running MAME through the arcade cabinet, as seen below:
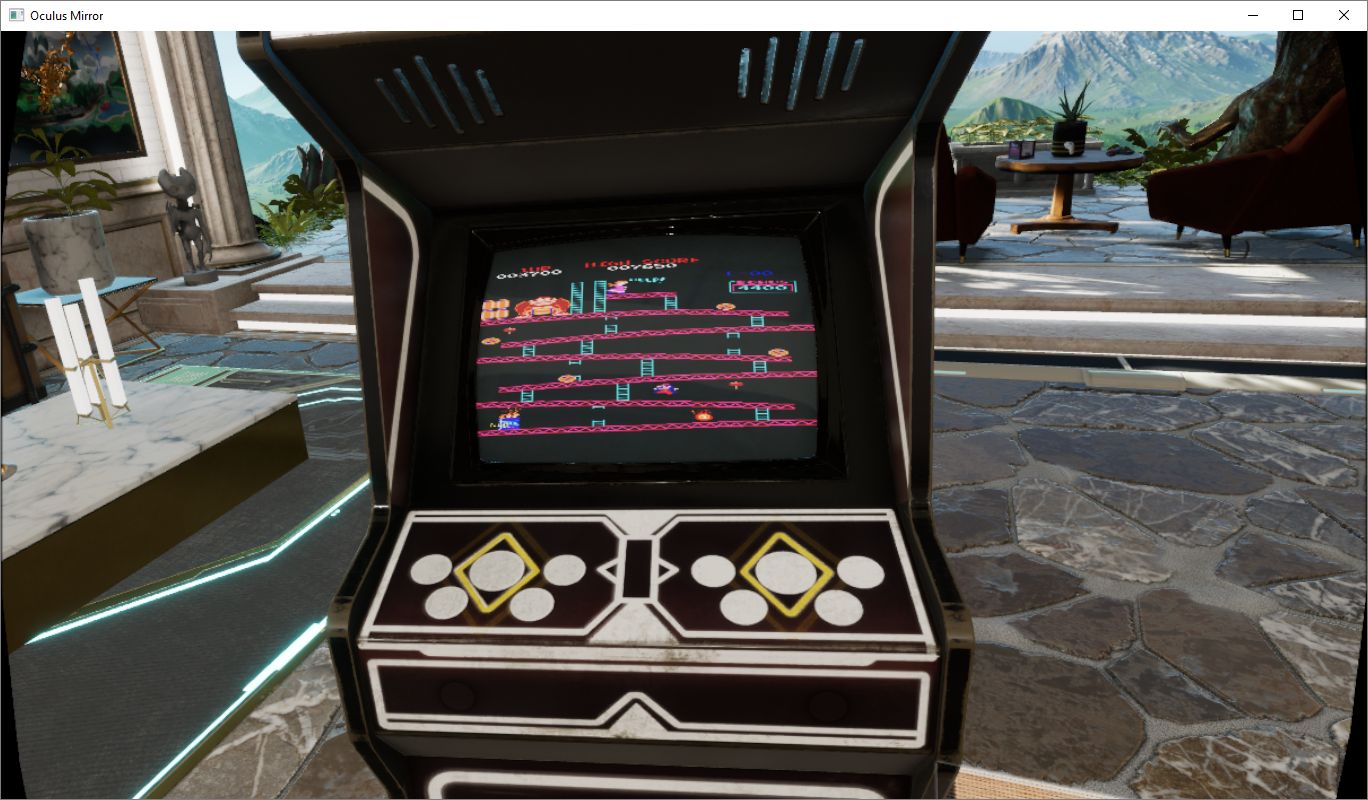
Running MAME in the arcade cabinet
If you’re interested in running PLEX, I have a separate video series on ripping videos and setting up PLEX (part 1 (Ripping), part 2 (PLEX)), and while it’s also not difficult, it’s beyond the scope of this post. Even so, the process of embedding is the same, especially since, as mentioned earlier, PLEX doesn’t show up in the panel selection menu anyhow.
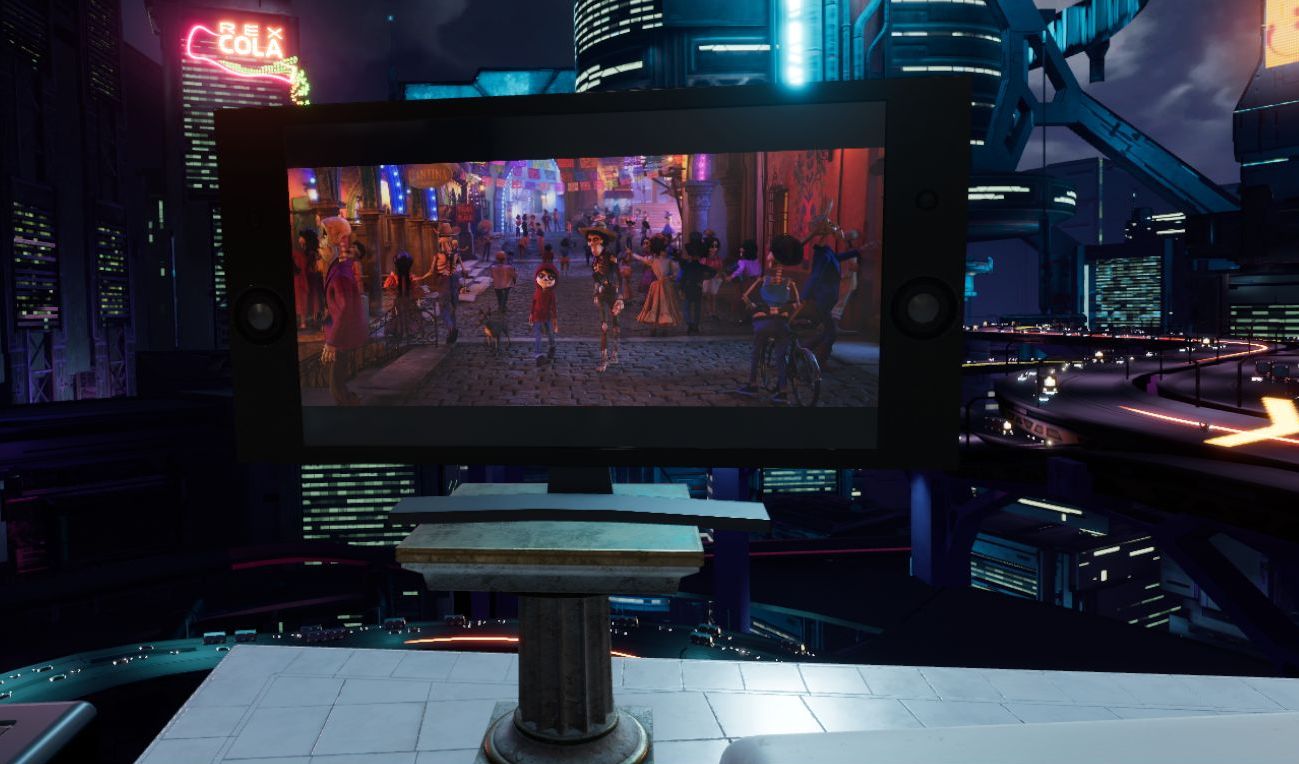
Here’s the video showing four different emulators running on the Virtual TV in Oculus Home, as well as PLEX running a streaming rip of Coco from a network drive, and there is also a wall-mounted TV option along with a computer monitor. It all worked incredibly well, much better than expected.
A new exploit for Intel processors?
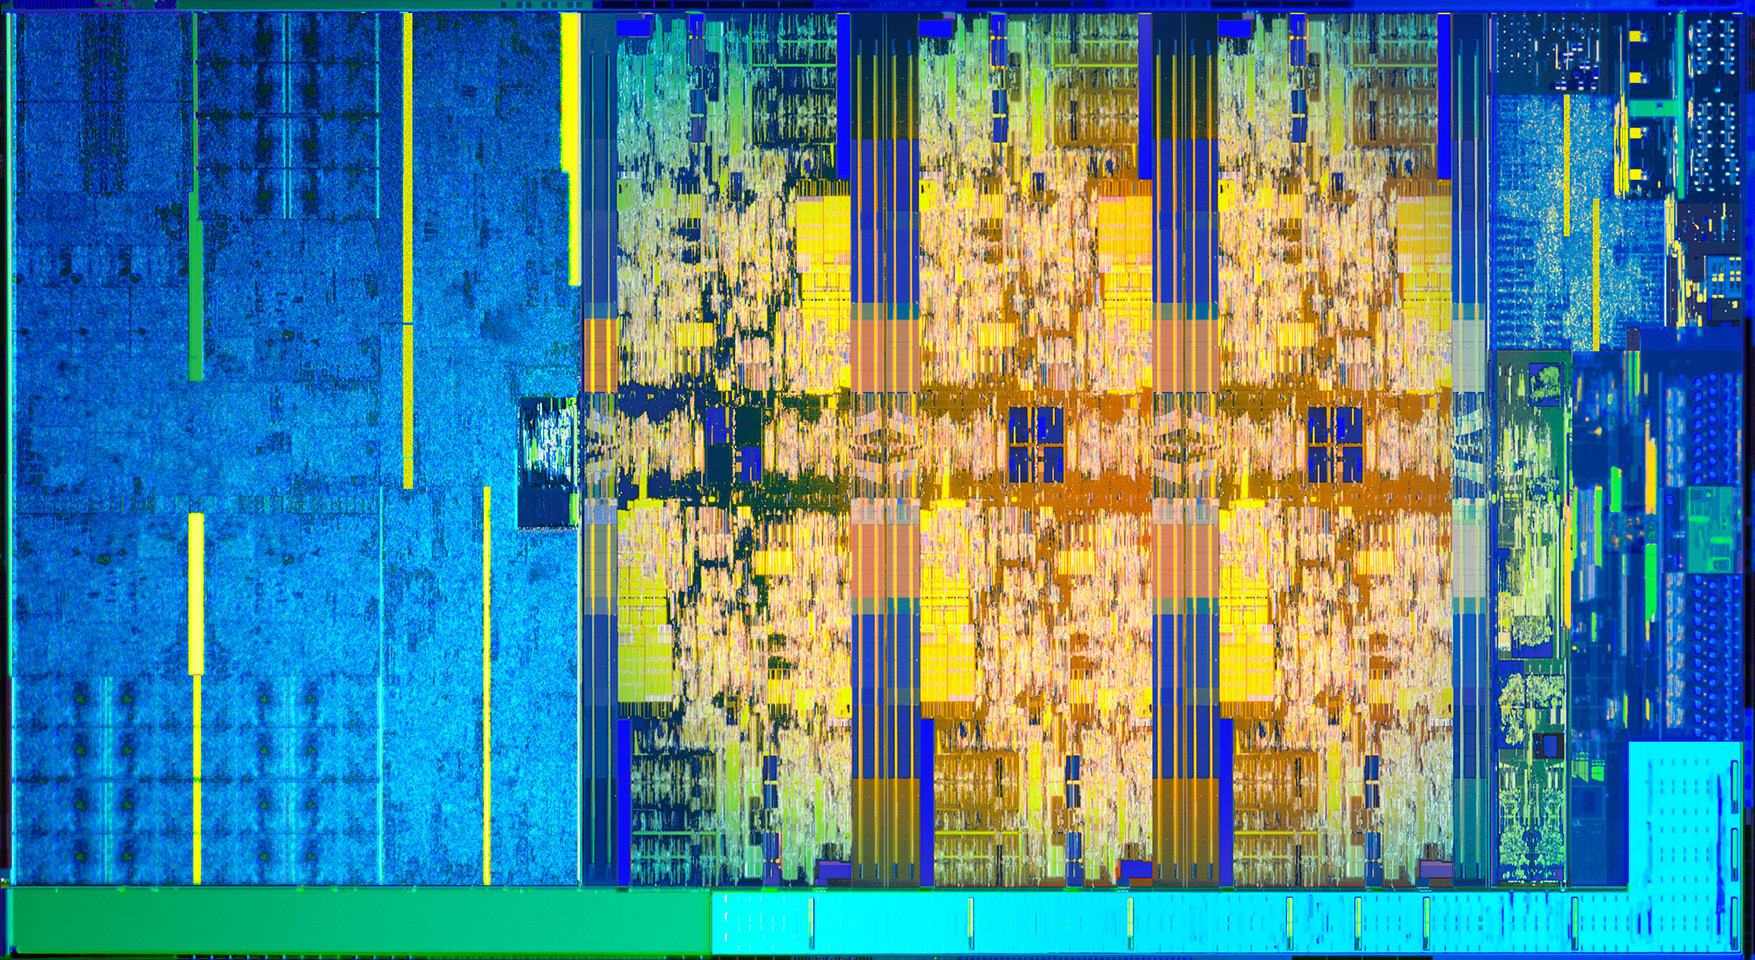
Whether or not this turns out to be a big deal is yet to be seen, but research from collaborators at UC Riverside, Binghampton University, Carnegie-Mellon Qatar, and the College of William and Mary, have discovered a new possible exploit in certain Intel processors that they have dubbed BranchScope – that link will take you straight to the research paper itself. The research is published in the Proceedings of the Twenty-Third International Conference on Architectural Support for Programming Languages and Operating Systems (ASPLOS).
This is a new form of predictive execution exploit, in which the CPU attempts to predict what will happen as the result of a particular instruction, then branch based off of that guess, then guess what will happen as a result of that particular instruction, and so on. It’s the same kind of manner in which a computerized chess game plays chess: Every time you make a move, the game will play out thousands of games as a result of that, trying to guess the moves you will make and the moves it can make in response, and decide on an appropriate next move as a result. It doesn’t make this guess blind, either: In the processor is a component of the Branch Prediction Unit, or BPU, known as a Pattern History Table (PHT) that stores the results of previous operations, and each time a particular branch is taken, the ‘value,’ for lack of a better term, of that branch is increased or decreased. That allows the BPU to be more accurate in its future predictions (Spectre attacked the other part of the BPU, the Branch Target Buffer, which focuses on the result of a branch as opposed to the choice it made).
The exploit, therefore, is to set up selected branches that will modify the PHT and run them so that the PHT will always select one branch over another in a given situation, as well as monitor that the changes to the PHT have actually taken place. These attacks can be used to ensure a particular path is taken when predictive execution happens, and that can be used to divulge information that is otherwise unaccessible, even to the OS, such as key segments, or even provide access to the Software Guard Extensions (SGX), an Intel feature that allows deft software developers to place sensitive or critical data off in protected areas of the CPU cache that should, ideally, be available to none besides the program itself. The whole purpose of the SGX is to prevent bad actors from accessing the data.
Both the Specter vulnerability and BranchScope as well remind me of the more widely-known and difficult to pull off NOP, or No-Operation, Slide (sometimes Sled or Ramp) type of attack, in which an attacker attempts to bypass a series of CPU instructions such that when an operation does happen, it ends up in a specific portion of memory where malicious code has already been installed and will then be run. These often fail, by the way, and in fact the section of memory that holds the malware will often be padded in front and behind so that the target memory location is bigger and the slide hits by luck; it’s a big shot in the dark. The hex value of the NOP is x90, and if you look at the image below which is tracing CPU instruction executions, you can actually see the slide happening as the series of ’90s’ at the top of the lower left and lower right window (source: samsclass).
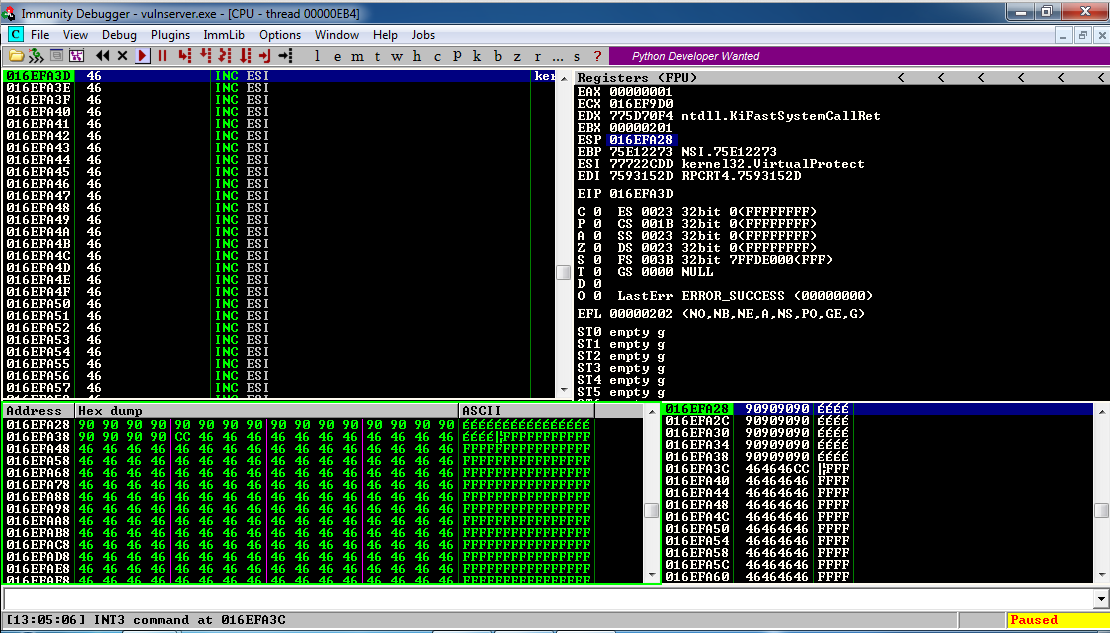
NOP Slide (Lower left). Source: samsclass
This is called a side-channel attack because something is running that shouldn’t be, similar to how loading non-approved, outdated, or unkown-source OSs or apps on a smart phone is considered side-loading.
Predictive execution is complex, the exploits are complex, and as stated earlier, whether or not we see them in the wild is a completely separate issue; the payoff would really have to be worth the effort and I don’t see that being the case unless the exploit was adapted to pair with, say, a trojan horse-style attack, but even then the nature of the returned data would be useless without significant analysis. Knock on wood, but I don’t see this as a common attack vector in the near future.
Why your screen just went black and white: Windows 10 color settings and color-blindness
UPDATE: I’m leaving the original post up, however the latest Windows update changes some of this around. The ‘Windows key-ctrl-c’ shortcut for setting filters is no longer enabled by default, and while you can still use the ‘right-click on desktop and select Personalize’ technique, in settings you now have to choose ‘Ease of Access’ to access these settings, which does make more sense. Additionally, high-contrast settings are where they’ve always been, but black and white / color-blind settings are now under the ‘Color filters’ option.
Here’s the new screen in settings, and the original post follows:
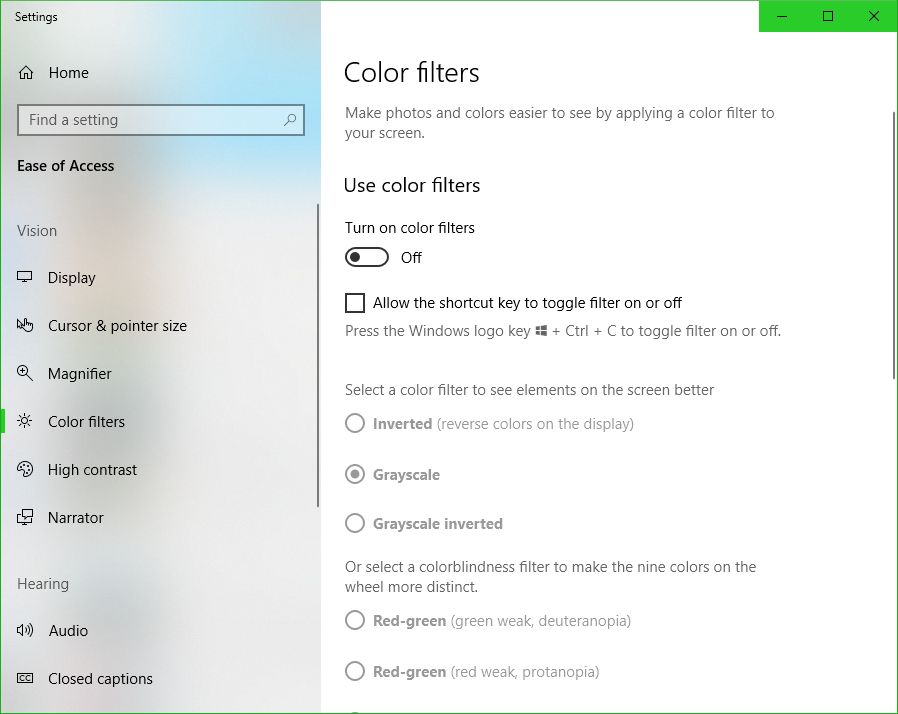
New Windows 10 color and filter settings
If you’re using Windows 10 and looking for a fix as to why your screen has suddenly gone black and white, or if it hasn’t and you’re looking simply to learn something new and interesting and fun (and what can be used as a cruel trick on your friends / acquaintances / enemies, but please don’t do that), try the following: Hold down the Windows key, then Control, then C. If your screen was black and white, problem solved! If it wasn’t, well, now it is. Do the combo again and you’ll be good as new. Spoiler: You can choose other visual settings for that shortcut; black and white is simply the default. More on that in a moment, and here’s the companion video I recorded for this post.
I’d also like to briefly talk about the importance of color. It is a vital tool in communicating information, although it should never be used as the sole communicator: if someone can’t distinguish red, a red sign will serve no purpose if there isn’t text that also communicates what’s up. But there is no such thing as a green stop sign or a red ‘everything’s ok’ light, and there is a reason for that. For you programmers, you know that you tweak the colors of your IDE to enhance readability and comfort. Never underestimate the purpose of color in design. Also, my Ph.D. was in this very subject so I’m especially passionate about it, as you can tell.

I don’t think so
But black and white? You may be wondering why something like this is even a feature. The reason is readability and accessibility, a primary focus of HCI, interaction design, and the larger field of human factors, and remember it’s not the only setting – it’s just the default. The point is to make the screen easier to see for those with visual impairments, particularly color blindness, but these adjustments can also be used by those who simply find stock Windows color settings to be too much. And let’s face it – sometimes they can really be too much.
It reminds me of the old Atari 2600 and it’s B*W / Color switch, which is as far as I can tell the first time a dedicated option was provided to select between one or the other. This wasn’t an accessibility issue, however, it was used because in 1977 black and white TVs were still quite prevalent, and using the black and white setting would adjust the contrast by switching the palettes used, thus making the game easier to see. Without that, in other words if it just switched to a standard black and white with no consideration given to their original colors, on-screen objects that were easily distinguishable in color might be very difficult to distinguish with just shades of gray. So the idea was the same, but the reason was quite different.
The image below shows the B*W / Color switch taken from one of our 2600 consoles in the gameroom here at UCI, while the other two screens show Slot Machine for the 2600, running in the Stella emulator, and how it displays in color and in switched black and white.
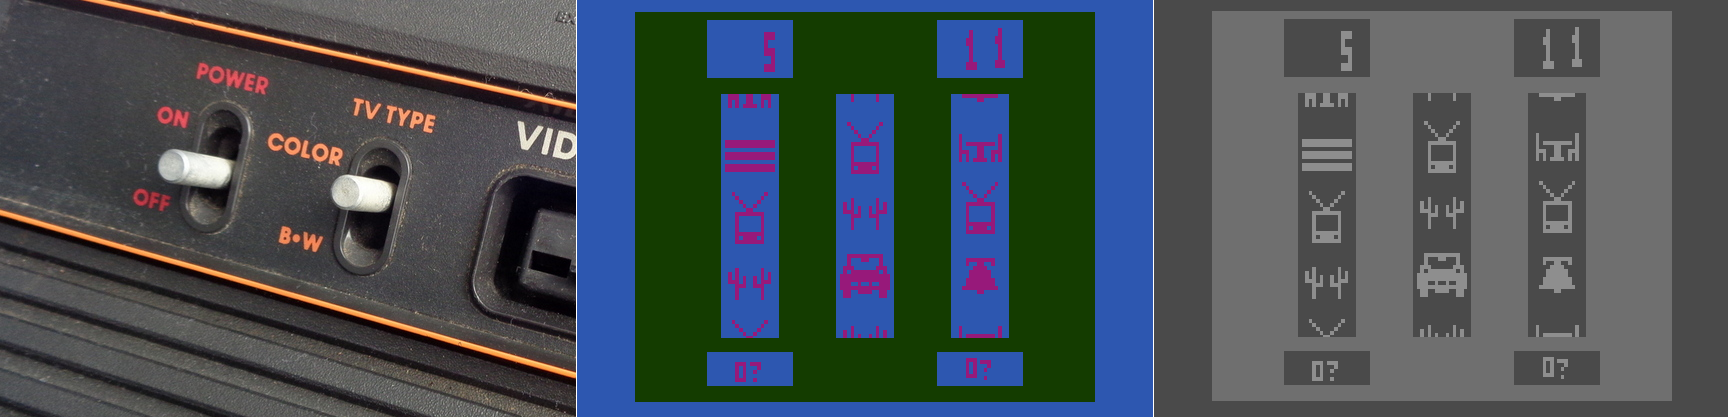
Atari 2600 Slot Machine in color and black and white
Yet that was back in 1977. With todays monitors having HD and 4K capabilities, why on earth would we need a black and white setting? There are several reasons, the most obvious being that black and white photography, which adds an ethereal, ageless quality to a photo, and in my opinion often requires the viewer to focus more on the content and composition of the image, is still very common today. However you can’t simply switch from color to black and white for the same reasons we had a switch on the old Atari; what works well and is easily distinguishable in color may blend into a single shade in black and white. No, unless you are shooting in black and white natively, and if you are you should use the RAW setting to get as much contrast and separation as possible, you have to convert an image from color to black and white, manually adjusting for all those settings that would have been done automatically otherwise. That’s one use for the setting in Windows. Of course, it’s possible that a user might have complete color-blindness, and even though that is extremely rare, it does happen: estimates are, for men, between 1:30,000 and 1:100,000 depending on type.
There is much more to this feature than simply switching between color and shades of gray, however. That capability in Windows is simply foreshadowing for much more important color-based adjustments that can be made. To see what they are, go into settings, select ‘Colors,’ (Alternatively: Right-click on your desktop and select ‘Personalize’), and scroll down until you see ‘High Contrast Settings.’ Click that, and whatever is selected under the heading ‘Choose a Filter’ is what will Windows will switch to when the shortcut Windows key – Ctrl – C is pressed. You can see the choices below.

High contrast settings

Color filters
So what do these do? The first three should be obvious; grayscale converts to shades of gray, or black and white informally, ‘Invert’ inverts the colors on the screen, although what ‘Invert’ actually means cans be complicated. Factors to consider include whether you are using RGB or CMYK color standards, the former being additive and the latter being subtractive, and what you’re trying to invert. Normally, when colors are inverted they are switched to their Complementary Colors, which are those opposite each other on the color wheel and offer the highest contrast to each other, although that high contrast can be a nightmare for text (red and green are complementary on a CMY color wheel, for example), so always consider application and the color scheme you’re using.
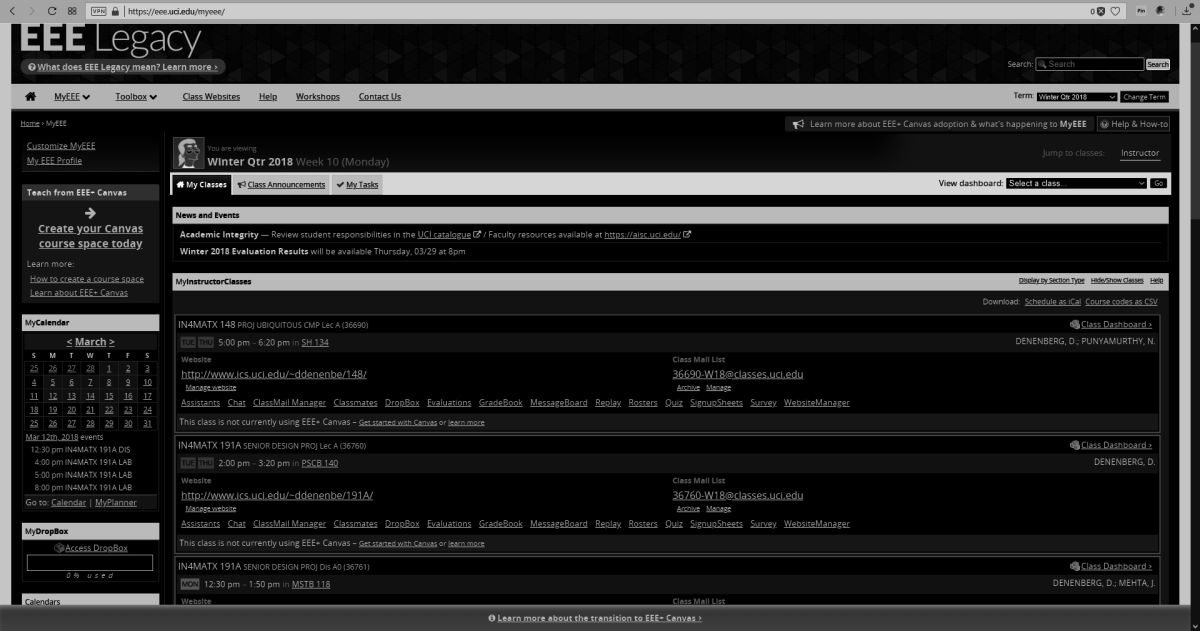
I’ll be using UCI’s EEE page as I see it to show what these selections do, since it has an interesting combination of colors including various shades of blue and yellow which are sort-of-but-not-quite complimentary, my avatar has red hair, the ‘Learn about’ box in the upper right is green, and if you look closely you can see the ‘MON’ in the lower left is a shade of orange.

EEE in its natural state

EEE with Windows color filter set to ‘Grayscale’
EEE with Windows color filter set to ‘Grayscale Inverted’
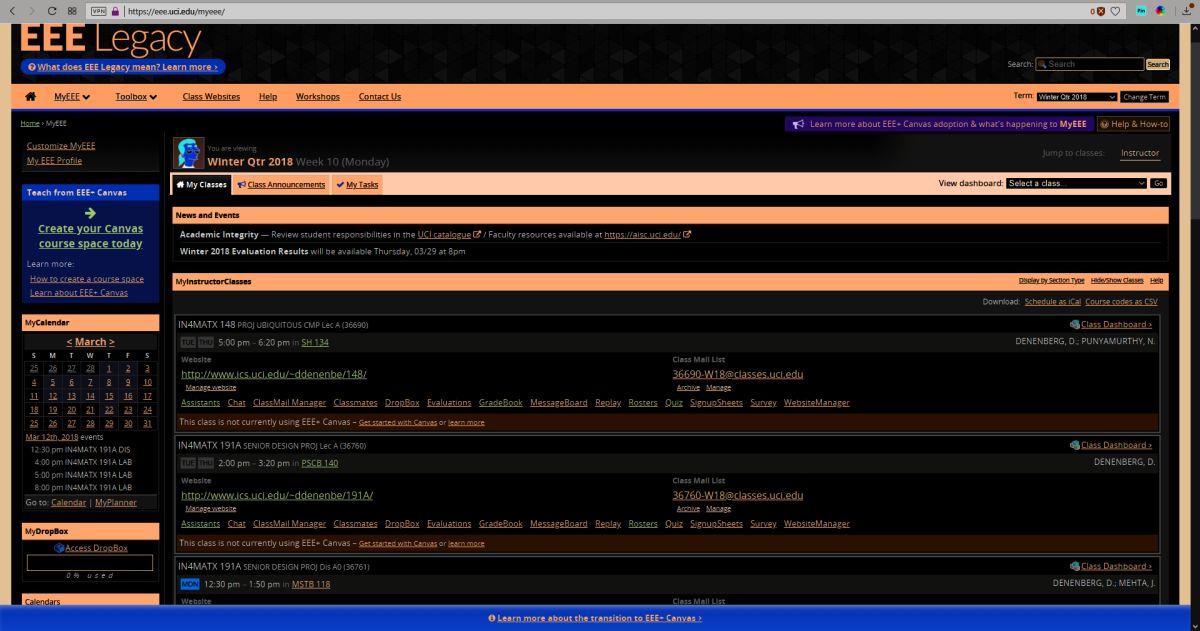
EEE with Windows color filter set to ‘Inverted’
As you can see, these allow a user to change the color scheme to fit their particular needs for viewing web pages or images or whatever, however it is the next three options that deserve our attention, as they are a cornerstone of accessibility and design in the user interface and HCI in general.
If you look back at the earlier image showing the filter options, you’ll notice the last three are ‘Deuteranopia,’ ‘Protanopia,’ and ‘Tritanopia.’ These are types of color blindness – a term that I really don’t like even though it’s accurate – that affect someone’s ability to process colors. We also need to distinguish between some terms here, as they are often, at least from my experience, misused. All of these conditions can manifest in two primary ways: -opia and -omaly. The former, which are the ones indicated in Windows’ color settings, mean you are missing the related cones altogether. In other words, Deuteranopia is a complete lack of red cones (known as L-cones, for long-wavelength), Protanopia is a complete lack of green cones (known as M-cones, for medium wavelength), and Tritanopia is a lack of blue cones (known as S-cones, for short wavelength). The latter is a form of blue-yellow color blindness, although Tritanopes don’t confuse those two colors so it’s not an appropriate name, while the former two are versions of red-green color blindness.
In contrast to the previous circumstances in which the cones are entirely absent, it’s also possible that the cones are present but weak to a particular color stimulus; those cases use the ‘-omaly’ suffix. So Deuteranomaly is a weakness to red, Protanomaly is a weakness to green, and Tritanomaly is a weakness to blue, and very rare; about 1:1,000,000. But the cones are not missing as they are in the previous cases; they are simply weak or mutated. Therefore, one way to address it is to increase the amount of or saturation of the color in which a person is weak, although this in itself is not a complete solution. Additionally, how these manifest in someone’s vision can be wide-ranging, from little impact on color-vision to something very close to the -opia variant.
These types of color deficiencies can cause real problems in distinguishing elements in any visual field, especially a computer screen. Research into accessibility has not only been ongoing for many years, but guidelines for the use of color are in place for all large companies such as Microsoft, Apple, Google, and all the way to the U.S. Government (Usability.gov is overseen by the Department of Health and Human Services, by the way).
So in returning to the color / filter settings in Windows 10, I can’t say with certainty whether Microsoft actually means, for example, Deuteranopia, as indicated, or Deuteranomaly, or is using it as an umbrella term. They aren’t the same, and can only be addressed as such through design to a certain, limited extent, but there aren’t separate settings so…I don’t know.
When switching among these filters on EEE, there was no impact as there is no red or green, however there was a noticeable effect when applying the ‘Tritanopia’ setting, as that refers to an absence of blue cones. As you can see, the yellow sections were switched to green, which makes sense as Tritanopes have generally normal red-green vision.

EEE with Windows color filter set to ‘Tritanope’
For the Protanopia setting, a good example to use instead of EEE is IS301.com itself. because this condition results in a weakness to red light, and IS301 has a strong red background, the setting reduced the saturation of red in all elements on screen for a noticeable change.
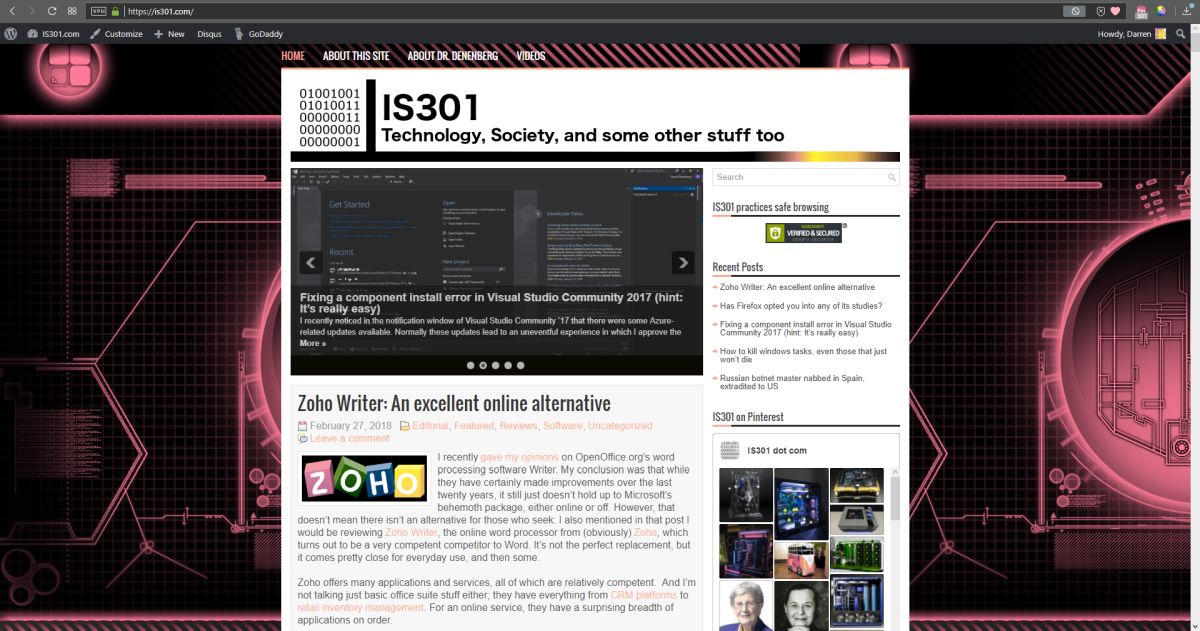
IS301.com with Windows color filter set to ‘Protanope’
When set to ‘Deuteranope,’ the only change was an increase in saturation of the red elements of the screen, but nothing dramatic.
I also want to mention that you can set up your own high-contrast color themes, tweaking the color for every aspect of the display so it fits your needs perfectly; there are a lot of options for configuration.
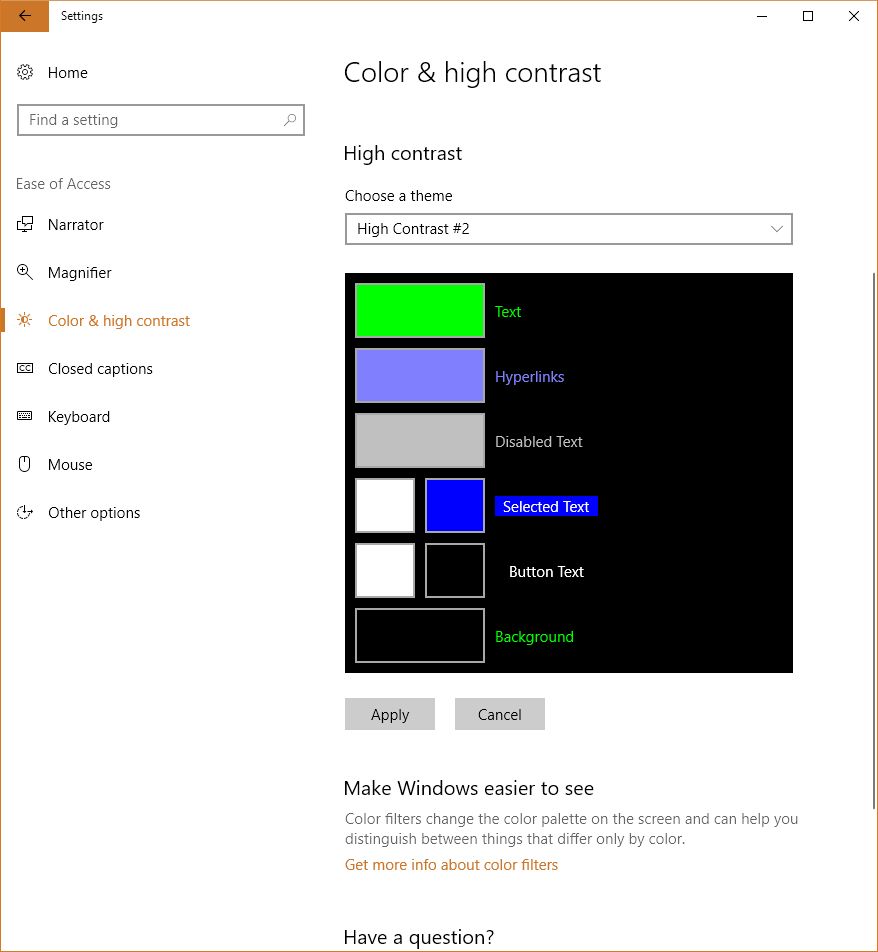
Prebuilt but editable contrast themes
On the other hand, apps and programs and everything else have to be designed with that in mind or else they will be negatively impacted by your adjustments, and that results in another problem: Windows will natively adapt to your specification, but it doesn’t mean any of the programs you run under Windows will. That’s something that needs to be enforced more clearly and strictly in Microsoft’s design guidelines.
So what was s simple fix of a black and white screen turns into a deep dive about accessibility and color blindness – I love it when that kind of thing happens. If you just wanted to fix your screen, then you’re not reading this anyway, but we really need to be aware, especially software and interface designers and developers, that for usability and accessibility these options and many others need to be available so everyone can benefit from the functionality your software brings.
On a related side note for those who may be reading and and are living with color-blindness, I discovered that there are glasses that claim to fix the problem. Apparently they create a bespoke filter on the lens for your particular condition and severity, and can bring you to almost normal. I’m not affiliated with the company, I have no idea how well they work, but for the cost they’d better work pretty well. if your’e interested, the company is called EnChroma. If anyone tries them, let me know how it goes!
Zoho Writer: An excellent online alternative

I recently gave my opinions on OpenOffice.org’s word processing software Writer. My conclusion was that while they have certainly made improvements over the last twenty years, it still just doesn’t hold up to Microsoft’s behemoth package, either online or off. However, that doesn’t mean there isn’t an alternative for those who seek: I also mentioned in that post I would be reviewing Zoho Writer, the online word processor from (obviously) Zoho, which turns out to be a very competent competitor to Word. It’s not the perfect replacement, but it comes pretty close for everyday use, and then some.
Zoho offers many applications and services, all of which are relatively competent. And I’m not talking just basic office suite stuff either; they have everything from CRM platforms to retail inventory management. For an online service, they have a surprising breadth of applications on order.

Zoho Apps
As you can see, there is a lot there. For this review I’ll be focusing on their word processor Writer, which I feel is a highlight of their office productivity suite, but it’s important to note the range of capabilities they have, especially as compared to other online options. I also want to mention that their PowerPoint equivalent, Show, is absolutely fantastic as well, while their version of Excel, Sheet, is also very good. It doesn’t quite live up to the rest of the suite in terms of functionality or design, but that’s not to say it’s not good – it is. But it has significant room for improvement, especially considering its less involved and less usable interface, with sparsely-populated toolbars, buried commands, and no sidebar, especially when considering it’s for such a powerful program as a spreadsheet. Indeed, it’s the one instance in which I can say OpenOffice’s alternative, Calc, is the better option, with more features, a more familiar interface, and better design all around.
That being said, Zoho is the superior option for everything else, and OpenOffice doesn’t provide any enterprise functionality or features beyond the basic office suite anyway. Here we’ll be talking about Writer, a name shared with the OpenOffice equivalent (so don’t mix them up!) and it will hopefully give a good impression of how it all works.
I threw together a nonsense document to mouse around with, and below you can see the spell check, which gives the initial suggestion as well as alternate suggestions, which is nice, although it doesn’t offer meanings / definitions as does Word. You can also see the Format menu in the sidebar to the left with all the functionality you would expect, including Cut / Paste / Format Painter / etc., as well as standard font and paragraph formatting options. Two additional features I think are very useful are the Quick Text option, which allows you to specify a particular piece of text that can be inserted with the click of a button or shortcut key; very good if you frequently use the same phrase or sentence or whatnot in a document. The other nice feature is evidenced by the very faint two boxes you can see in the left margin; the plus and text boxes. See those? You might have to look closely. The box with the plus is an insert menu, and the text box opens a formatting menu. They follow your insertion point automatically, and they turned out to be quite a convenience.
A variety of page layout templates are also readily available, with more available for download and very easy to implement.
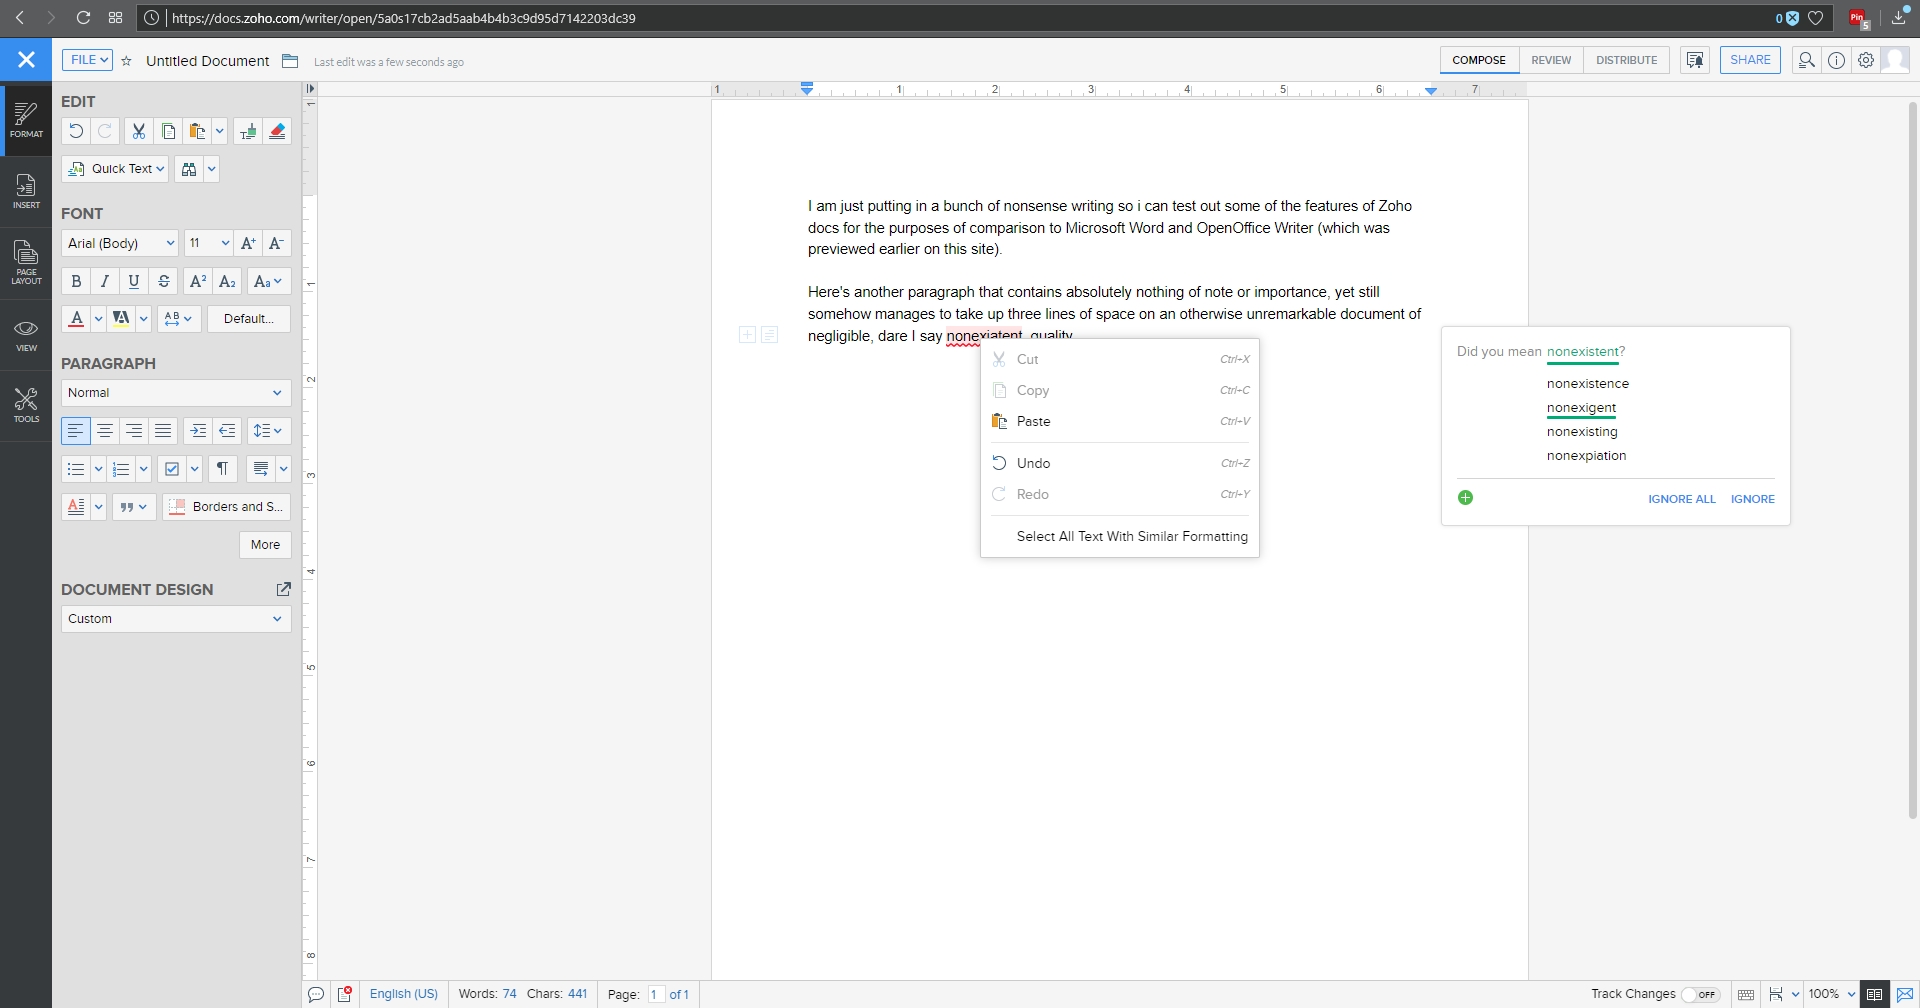
Zoho Writer format menu and spell check
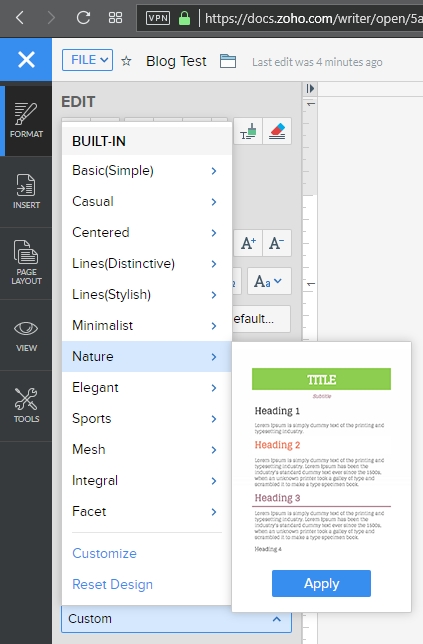
Page Layout Templates
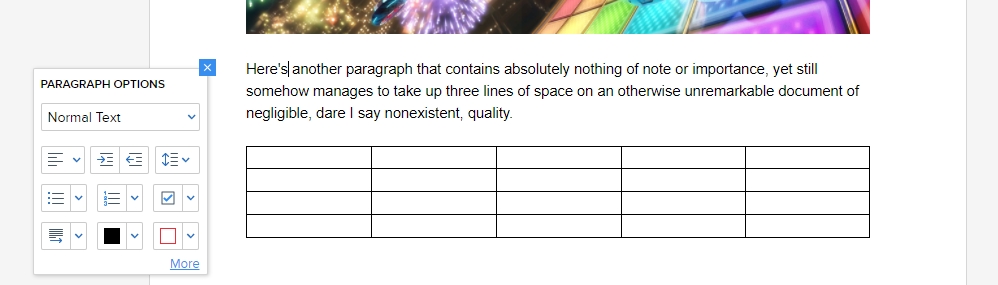
Paragraph Options
Although this document is hardly complex, inserting an image and table is something that can trip up even stalwart word processors, and that was true here as well. Inserting the image was easy and worked fine, however arranging it for word wrap was more problematic. Smaller images resulted in much more layout success.
Inserting a table was also quite easy, and I especially like the live preview it provided as I hovered the mouse over the design options, all of which were neatly contained in the Design tab of the table options window. This is very similar to how Word will open custom contextual tabs that provide additional functionality depending on the specific element you’re working with.
Manipulating the table was much easier than manipulating the picture, which wanted to jump around the page, and even manipulating individual cells was very smooth; everything from changing their dimensions to their color to their alignment and everything in between worked perfectly the first time.

Image and table (with table options) in Zoho writer
Now is when I need to mention the biggest advantage of (Zoho) Writer over (OpenOffice) Writer: .docx compatibility. OO Writer doesn’t have it, and that’s a huge knock, a terminal knock, actually, against it. With Zoho Writer, when saving a document, you have multiple options: You can save to a cloud service, and Zoho has collaborated with many as you can see (although I couldn’t help but notice the logo for OneDrive is oddly blurry, while the others are very clear), or you can download the file as a Microsoft Word .docx, or even as an .odt file, which is the open standard used by OpenOffice itself.

Writer’s Other Drives options
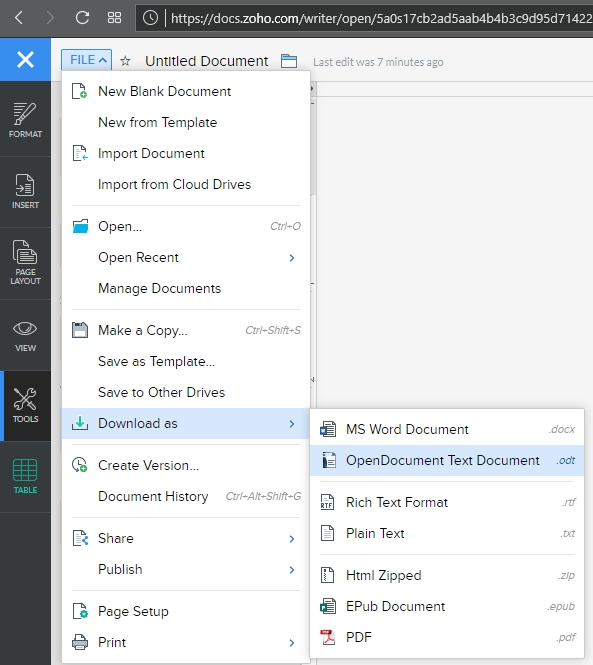
Zoho Writer Save dialog and File menu
As one would hope, there are also multiple ways to get some statistics about your document. They run along the bottom as one would expect, but I am also a big fan of the Document Properties as accessed by clicking on the ‘i’ with a circle around it at the upper right of the window. Not only does this provide a wealth of information about the document itself, but coming from an HCI perspective, having the page count, word count and character count in individually shaded, easy to see and immediately locate, is genius. In terms of information presentation and information availability it puts those interrelated metrics right next to each other yet separated visually and thereby forces them in a cognitive whole.
Not to get too far off topic, but the reason I’m so enamored with this design choice is that humans, in order to make sense of, and order out of, information and stimuli presented to them, engage in several practices that help them in organizing what they see. One of them is known as Proximity, in which spatially similar images are considered as part of a larger group, even if they’re not related, so when they are related, as these three metrics are, our ability to process them, their meaning and their relation to each other is increased even more. Another is Similarity, in which when considering multiple individual field objects, those that are similar in some dimension, whether it be shape, color, orientation, or whatever else, are considered to be part of the same group, again even if they aren’t. Those are two reasons presenting that specific document information is so brilliant – it addresses the way we as humans process information.
Consider the Windows logo below. This is an example of both proximity and similarity. We consider the logo as a single shape because the four smaller squares that comprise it are both similar and proximal.

Example of Similarity and Proximity
This is the Writer document properties pane, that uses these concepts to such great effect.
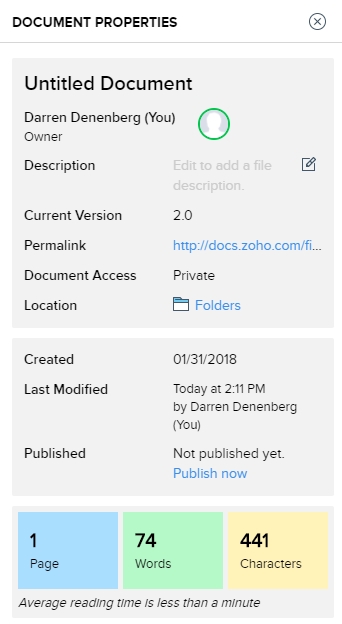
Document Properties
It even estimates the average reading time. There is nothing I don’t like about this information window, it’s one of the best interface designs I’ve ever seen, and I’ve seen a lot.
Before I just put up the rest of the menu dialogs for your perusal to give you an idea of how they’re implemented, I also want to address a nice usability touch they have incorporated in the form of a support icon. See that little blue envelope there way on the right hand side?
![]()
That’s the Writer support icon, and it opens up a window that allows you to offer feedback or ask questions directly. For a free service, that’s pretty remarkable. It really gives the idea – true or not – that they are at least receptive to feedback or requests for help. I was very surprised by that, and pleasantly so.
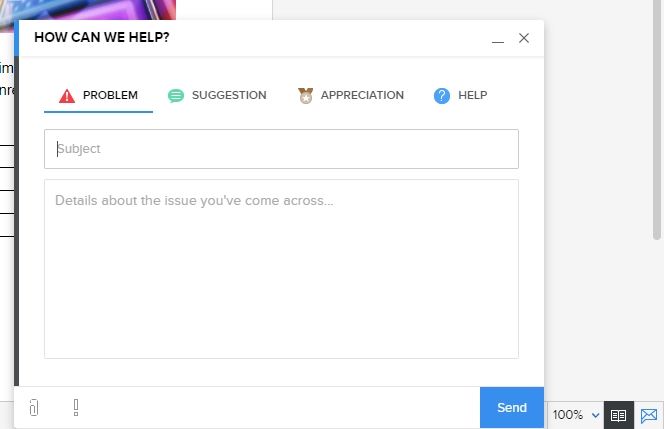
Writer support
As you can probably tell, I think Writer is a great program. It’s not often I get to gush over software, but this company is so unknown, comparatively, yet they have such a well-designed and functional, free service, I’m surprised we don’t hear about it much more often. According to their webpage, they are a private company but one with five thousand employees! They hold user conferences and expos – that is not small time, yet their name recognition, even with millions of users, is small. If I may be so bold, even sacrilegious to some, I’ll even go so far as to say it destroys the offerings from Google. The only service that can compete is Microsoft’s Office 365, and even then it’s just a little better, plus Zoho integrates with all of them anyhow. Zoho has really created something great, and I encourage anyone interested in alternatives to standard office suites to give it a try.
Here are some functional dialogs if you’re interested in seeing all the options available before taking the plunge.
[Best_Wordpress_Gallery id=”8″ gal_title=”Zoho Dialogs”]